The Embroidery Setup I Recommend for Beginners
One of the questions I get most often is what embroidery machine and supplies I recommend for someone just getting started.
I am by no means working out of a large commercial embroidery shop. Most of the custom embroidery you see from me is produced on a relatively compact home embroidery setup in my Georgetown studio, and that is actually one of the things I enjoy most about it. While I am upgrading to a larger multi-needle machine soon, there is not much that my small yet mighty single-needle machine can’t do.
If you are interested in getting into machine embroidery yourself, you do not need an enormous machine or an overwhelming collection of supplies to start.
This is the setup I use, what I recommend for beginners, and what I have learned from using it.
P.S. I saved the best for last, so try to make it to the end.
This post contains affiliate links. If you purchase something through one of these links, I may earn a small commission at no additional cost to you.
The Embroidery Machine
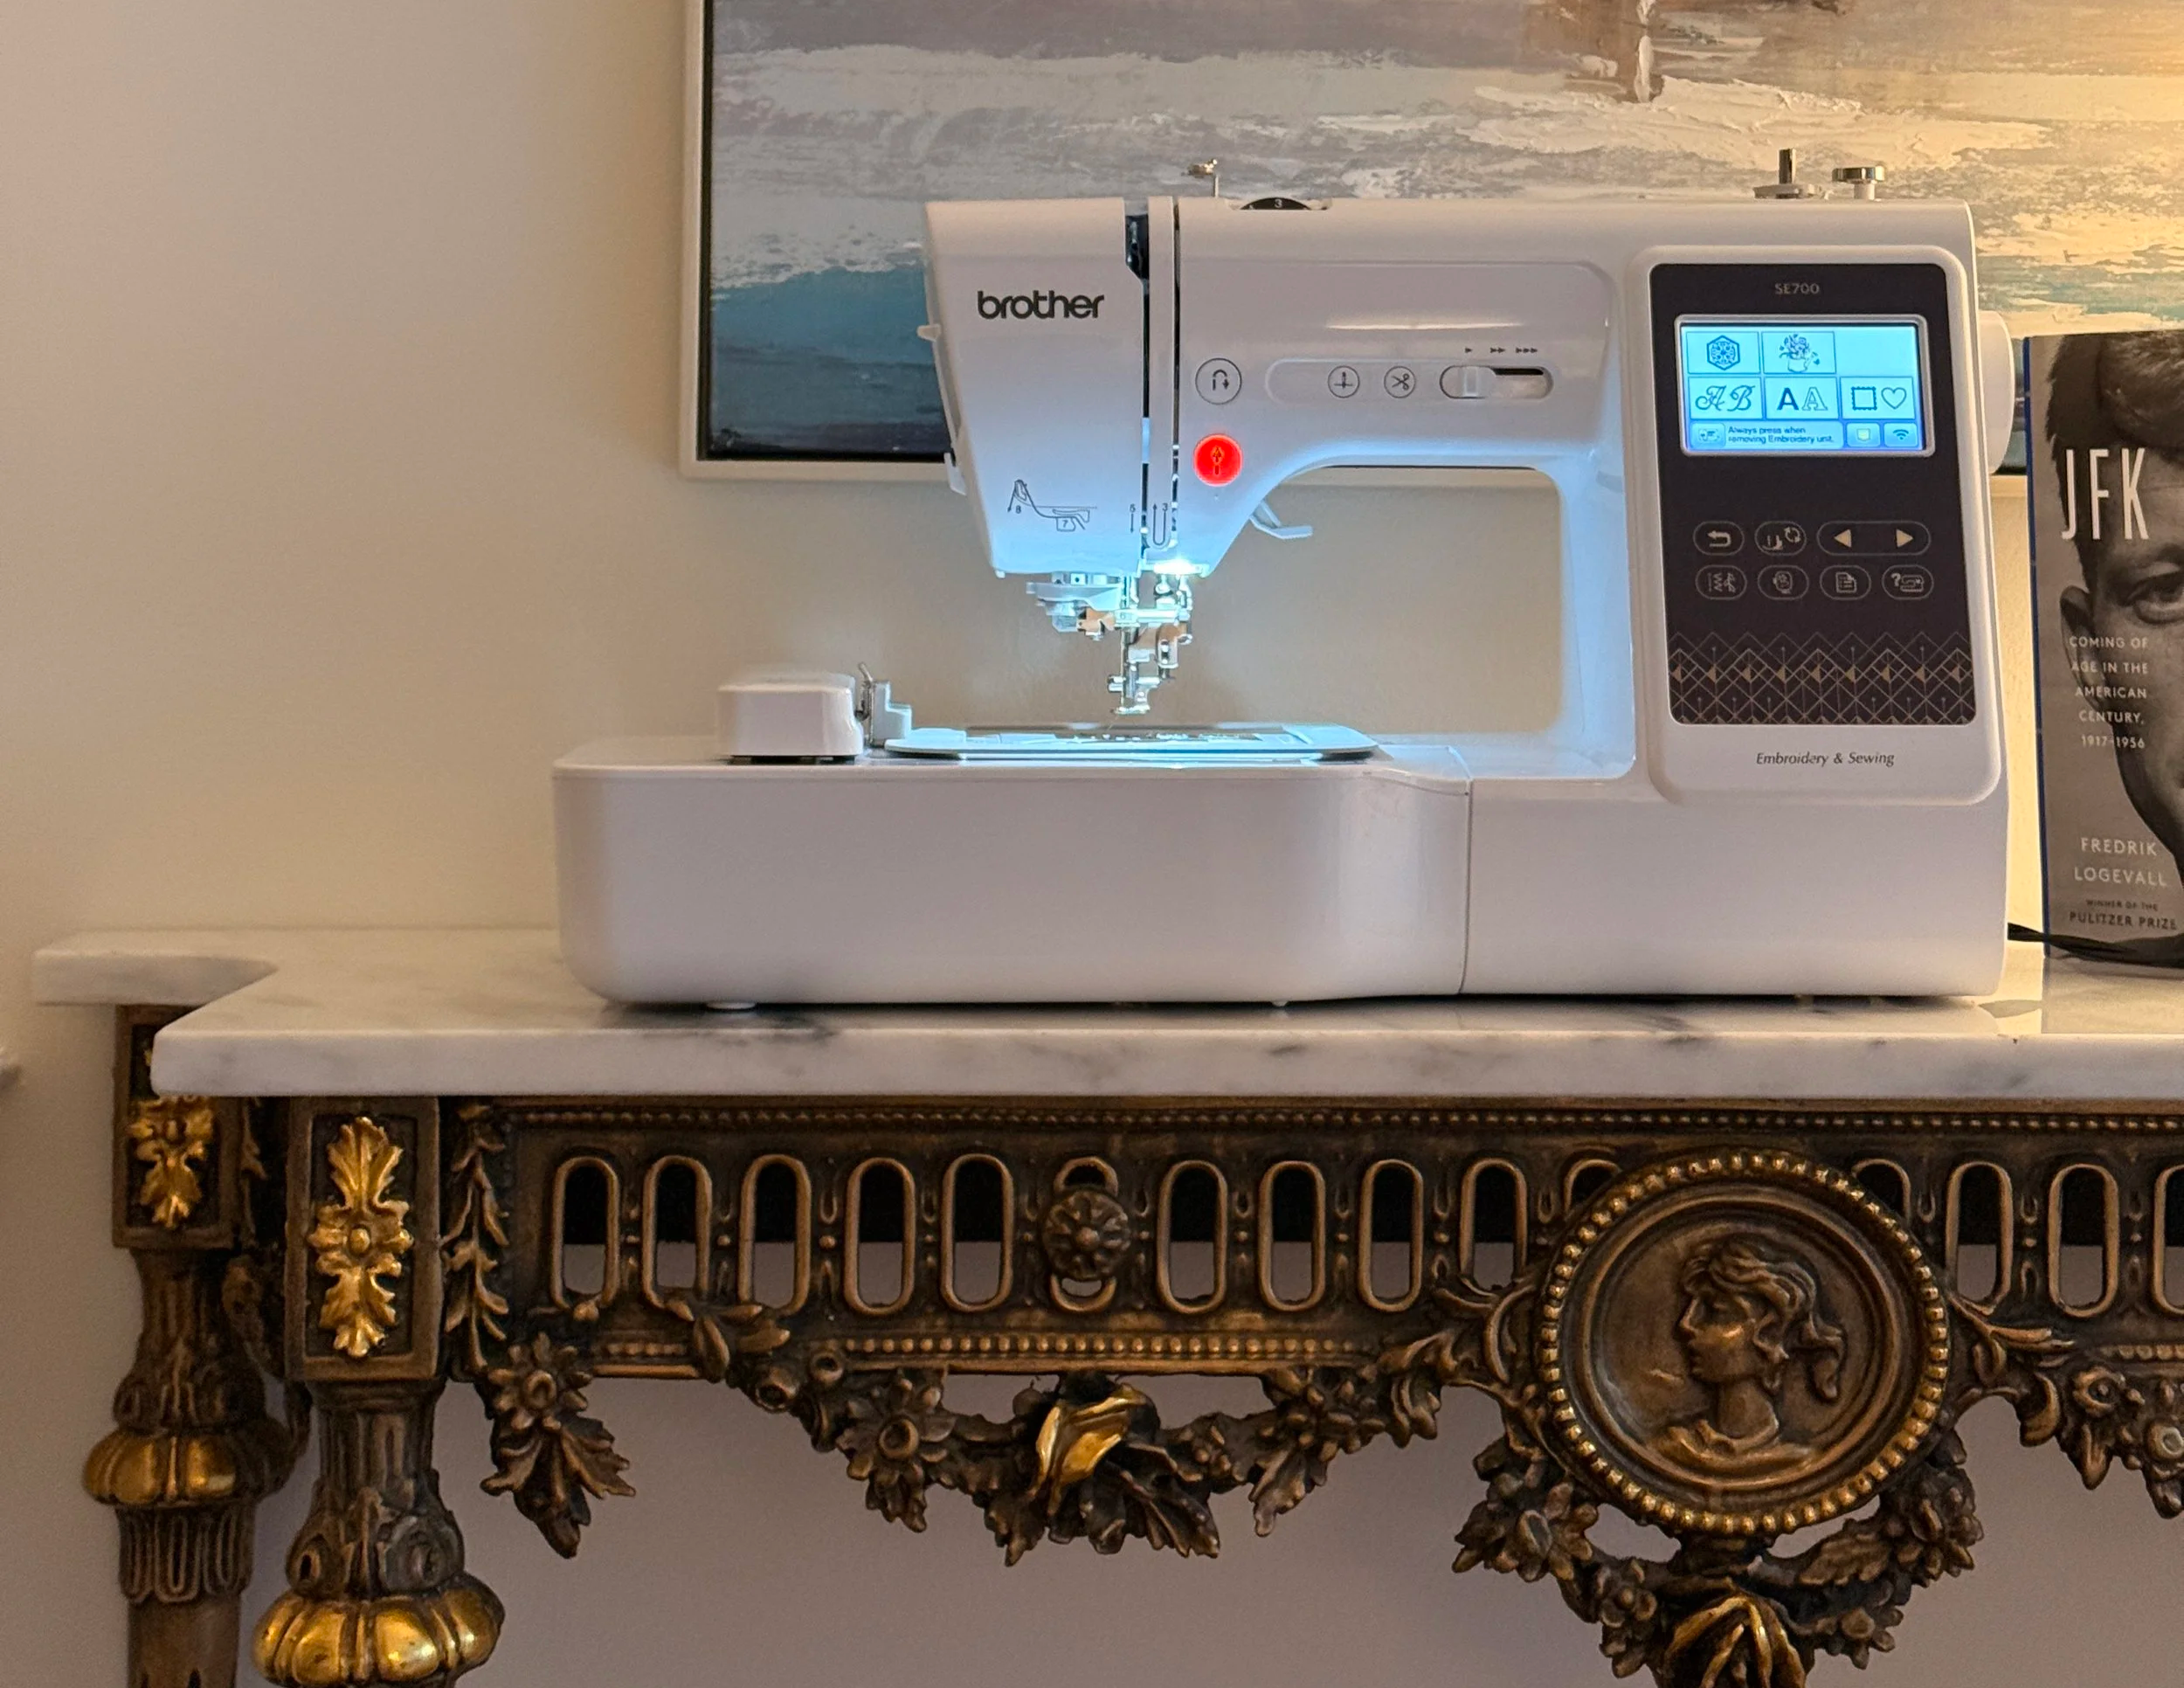
My primary machine is the Brother SE700 Sewing and Embroidery Machine.
It is a combination sewing and embroidery machine, although I primarily use mine for embroidery.
The maximum embroidery area is approximately 4 × 4 inches, which sounds small compared with commercial machines, but you can do a surprising amount within that space.
I use it for things like:
Monograms and initials
Names and lettering
Small logos
Jacket embroidery
Shirt and cuff embroidery
Napkins and linens
Towels
Tote bags
Small decorative motifs
Custom one-off designs
For someone learning embroidery, I actually think the 4 × 4 format is useful. It encourages you to understand placement, density, stabilization and digitizing before jumping into much larger designs.
It is also considerably easier to fit into a home or small studio than a commercial embroidery machine.
Would I recommend it to a beginner?
Absolutely.
You can start using existing embroidery files almost immediately while gradually learning the more complicated parts of embroidery.
The machine does not do everything, and eventually you may want something with a larger embroidery field or multiple needles, but I have been able to produce a surprising amount of professional work with mine.
I am now at the point where I need to upgrade to a larger machine for bigger corporate orders, but that is something you can grow into later if embroidery eventually becomes a business rather than just a hobby.
Brother Artspira
I use Brother Artspira, Brother's companion app for compatible machines. The membership is also worth the money.
I highly recommend using it when you are first starting out. One of the best ways to practice is simply to stitch out their existing designs and fonts on spare fabric.
It is useful for transferring designs and experimenting with the machine without having to make every project complicated.
For a beginner, it is a great way to start exploring embroidery before getting deeply involved with desktop software like Embrilliance.
The day you actually need to draw your own artwork into an embroidery file may be quite a while from now. Until then, Artspira gives you plenty to practice with.
Embroidery Software: Embrilliance
The machine itself is only part of my setup.
For working with embroidery files and creating my own designs, I use Embrilliance on my computer.
I personally use Embrilliance Level 2, which gives me the amount of control I need for the kind of work I do.
View Embrilliance Software Level 2 Here
This is where embroidery becomes much more interesting.
I use embroidery software to do things like:
Resize designs
Adjust placement
Edit lettering
Combine design elements
Preview stitch-outs
Change thread colors
Prepare files for my Brother machine
Create and digitize my own designs
If you are completely new to embroidery, you do not need to learn digitizing on your first day.
Start with professionally digitized embroidery files (I get mine off Etsy) and learn how the machine behaves first.
Digitizing is its own skill.
Once you understand how stitches interact with different fabrics, learning to create your own embroidery files makes considerably more sense.
Embroidery Thread
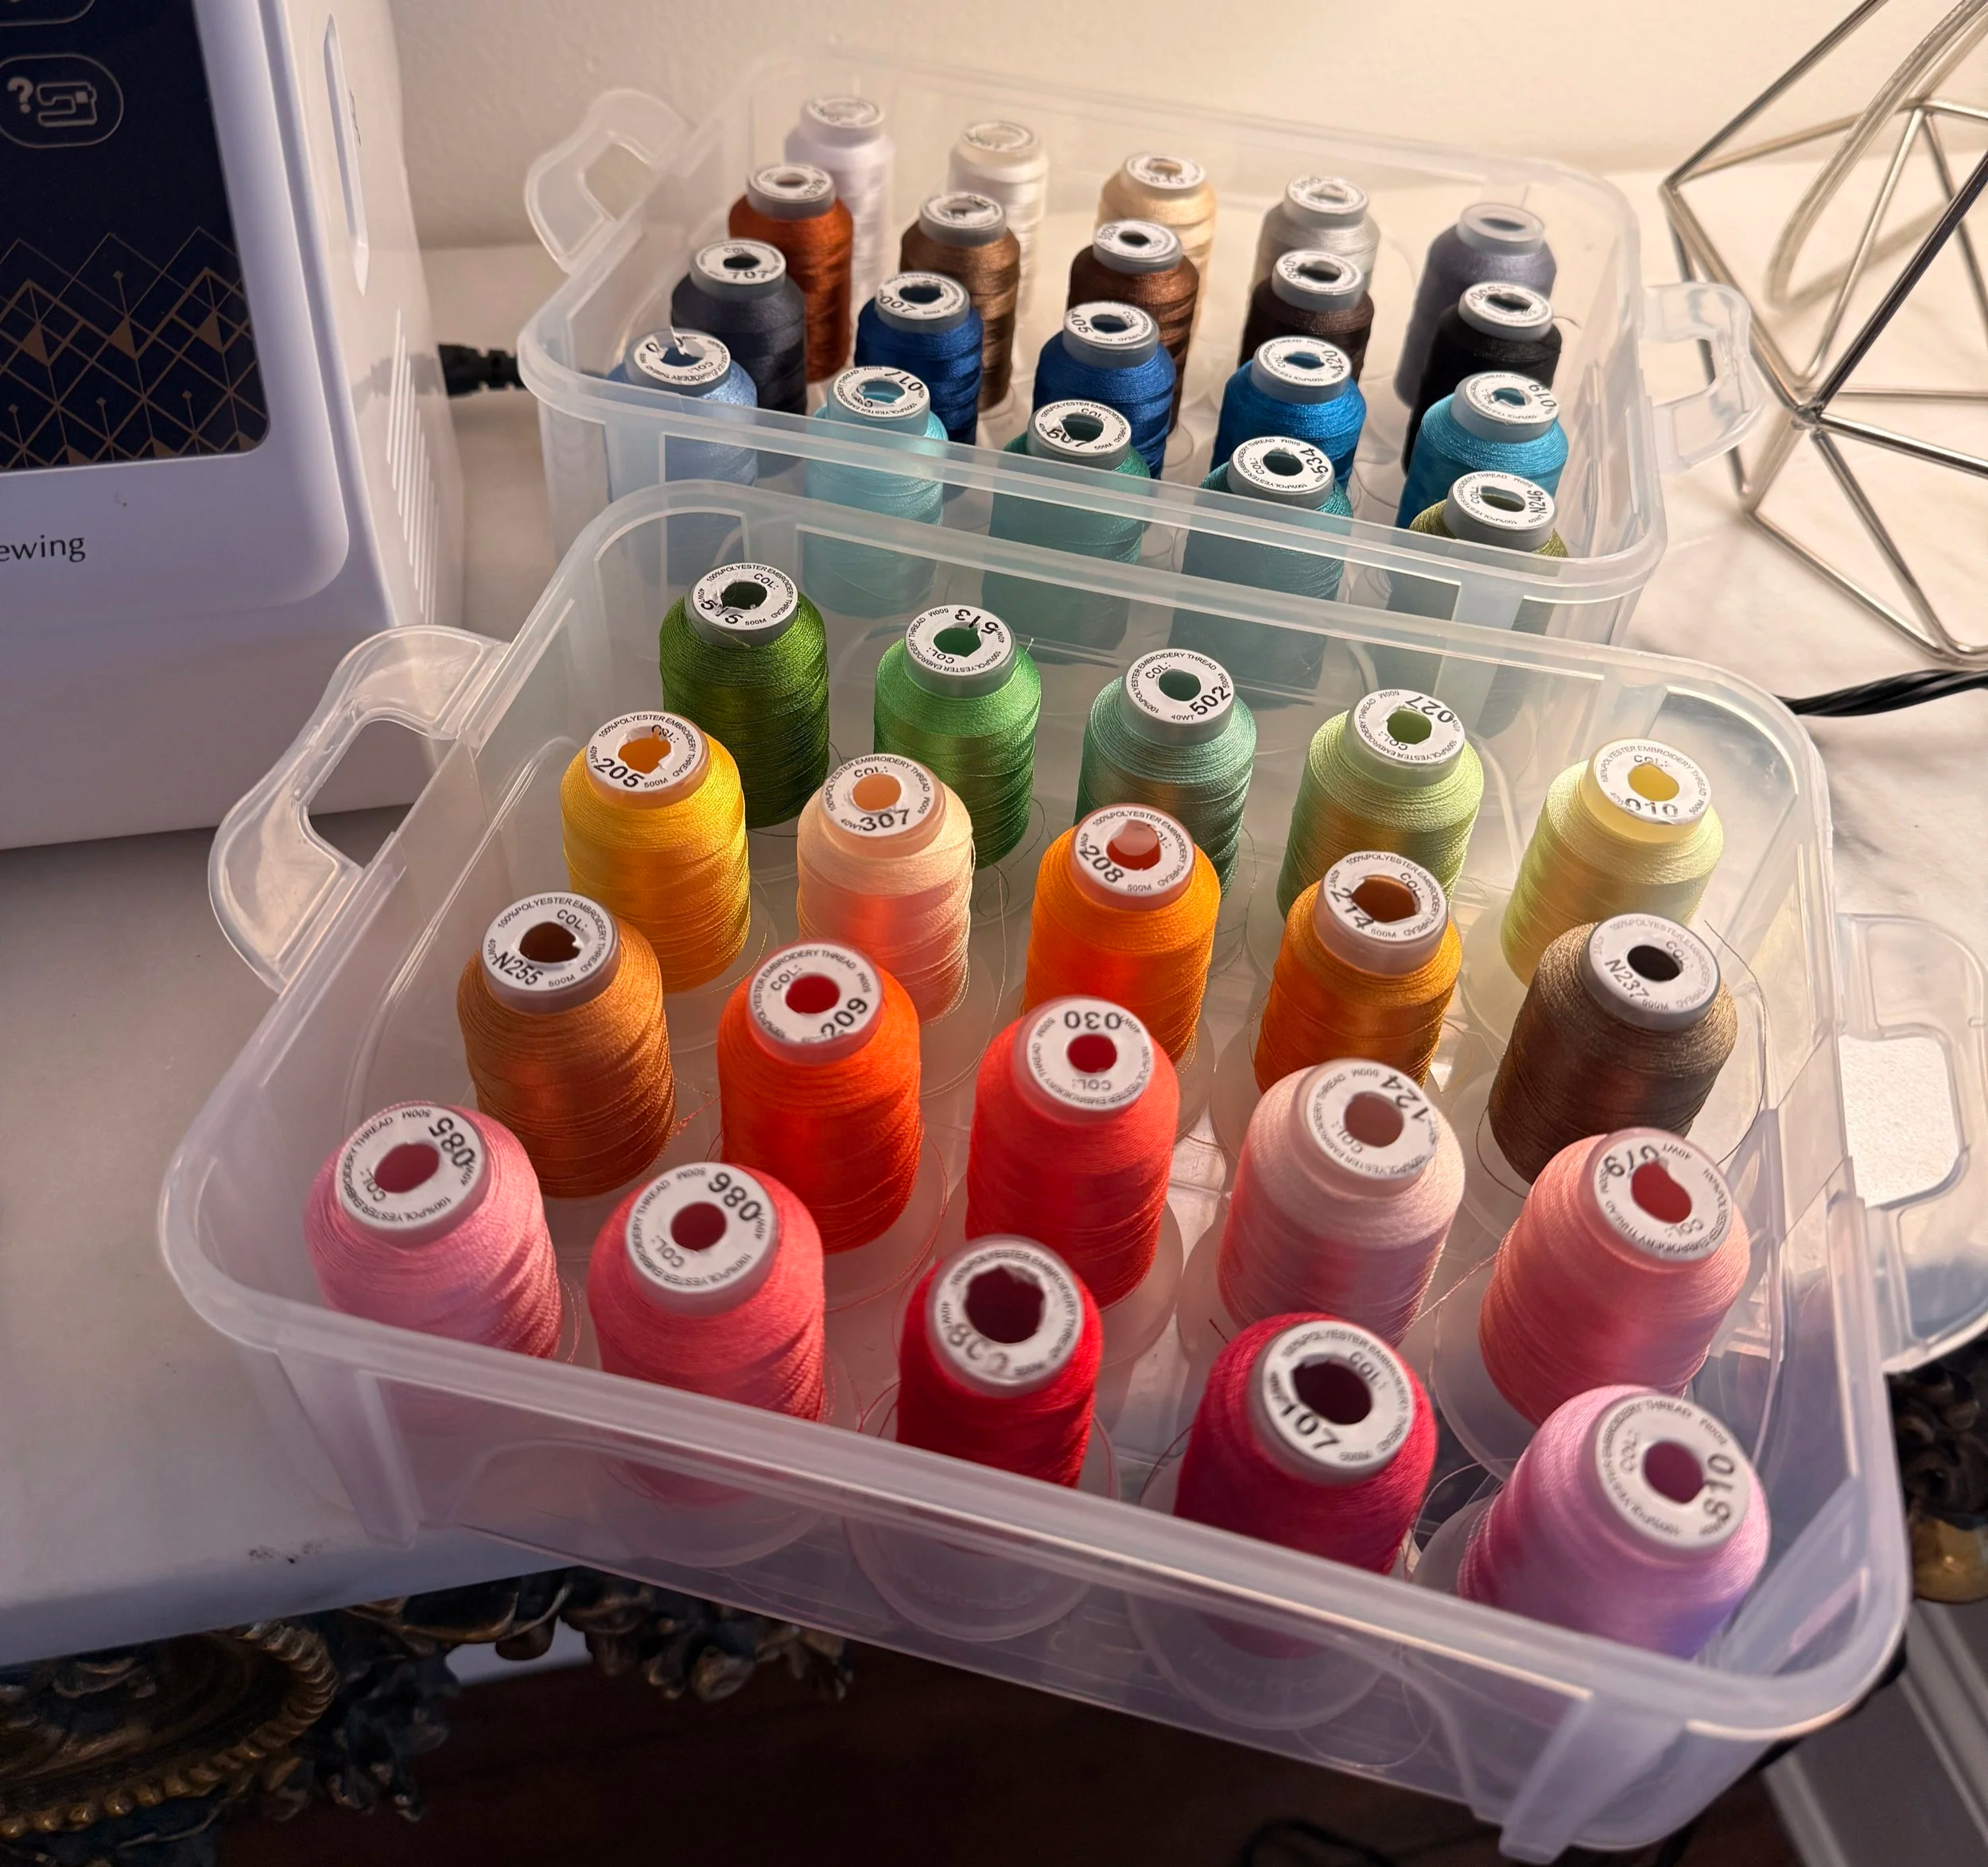
One of the easiest mistakes to make when starting embroidery is buying enormous packs of cheap thread simply because they include every imaginable color.
You do not necessarily need every color under the sun, but I do think buying a good-quality assortment is the easiest way to start because you will quickly discover how often you need a slightly different shade.
For embroidery, I generally use 40-weight embroidery thread.
View the New Brothread 80 Pack with Storage Box Here
For a beginner, an assortment like this gives you enough range to experiment without having to buy individual colors every time you start a new project.
The colors I reach for most often include:
Black
White
Navy
Dark brown
Medium brown
Dark green
Red
Blue
Gold
Beige or khaki
Then you can replace or add individual colors as your projects require them.
I now maintain a much larger curated thread collection because color selection has become part of my embroidery work.
If you do not mind spending a little more for a broad range of colors, this is the larger pack I keep in stock for my own projects. There are certainly colors you may not use very often, but I like having them available when I need a very specific shade.
View the New Brothread 150 Pack Here
Why embroidery thread instead of ordinary sewing thread?
Machine embroidery thread is designed to run through the machine at high speed while giving embroidery the smooth finish you normally associate with professionally embroidered garments.
For most of my work, 40-weight thread is my standard.
Embroidery Bobbin Thread
Do not forget bobbin thread.
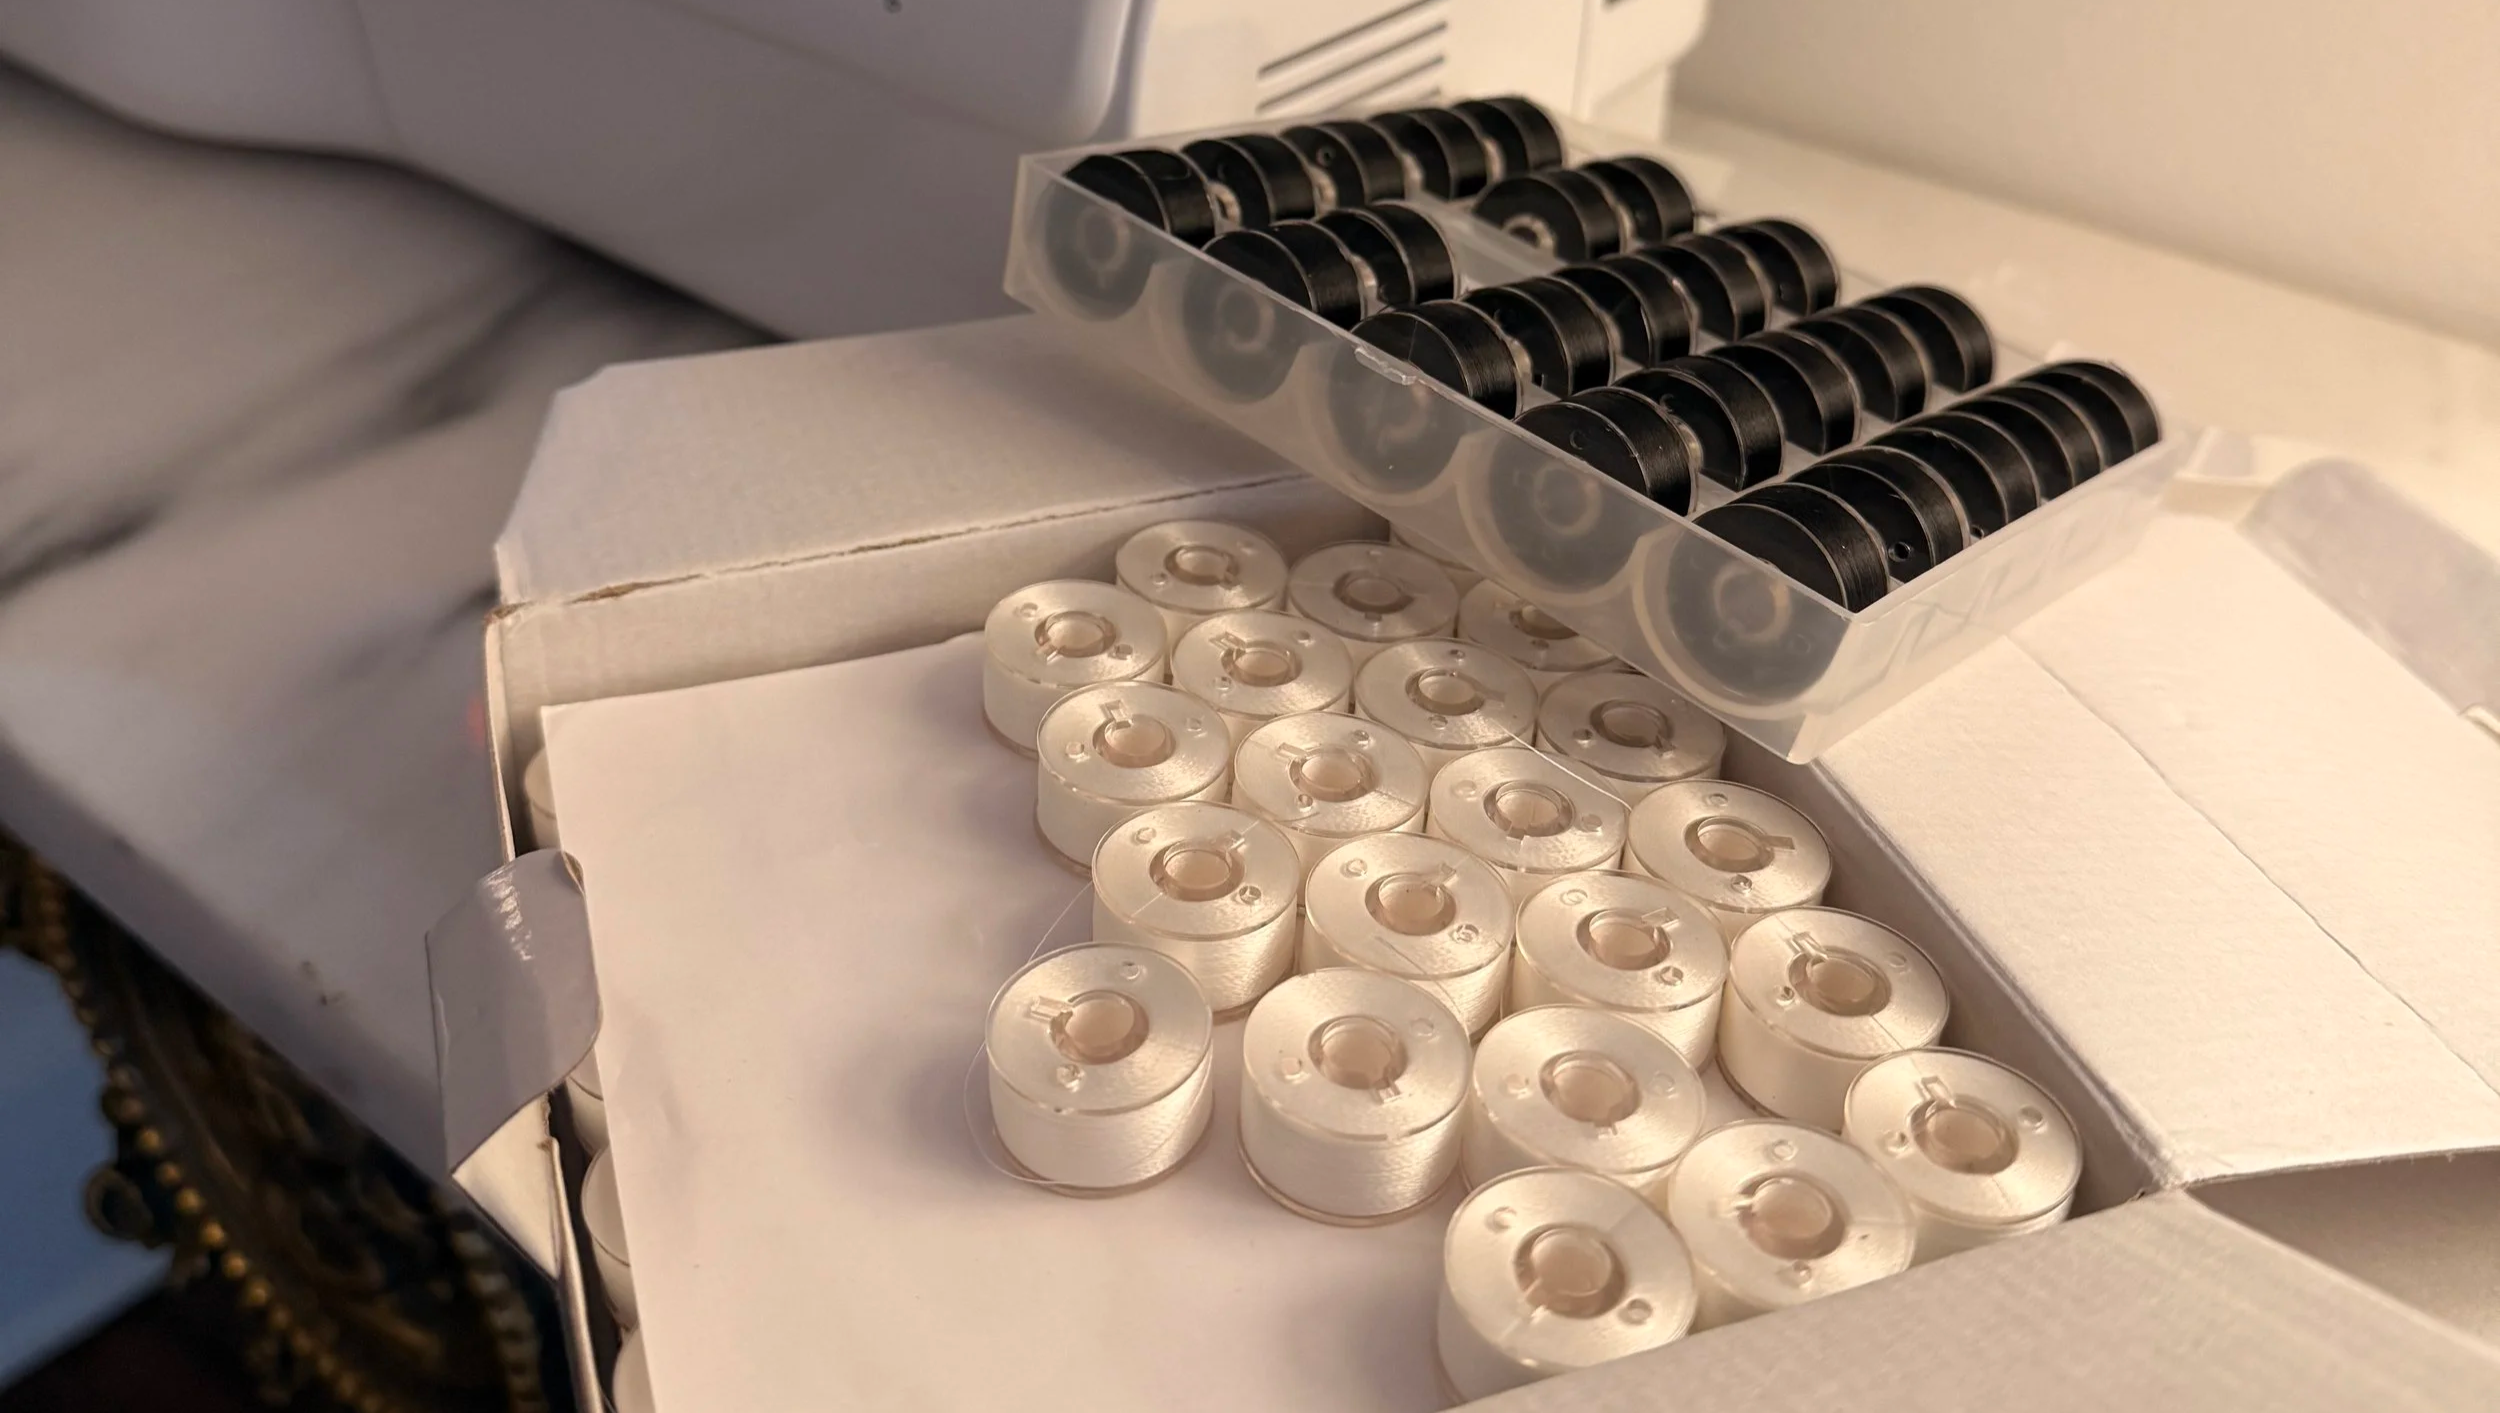
For my setup, I use 60-weight bobbin thread with 40-weight embroidery thread, and that combination has worked very well for me.
View the White Bobbin Thread Here
Your machine uses embroidery thread on top and bobbin thread underneath.
Pre-wound embroidery bobbins can also be convenient because you can simply replace one and continue stitching instead of constantly winding new bobbins yourself.
I always keep extras nearby.
If I am embroidering on dark fabrics and I do not want my customer to end up with a noticeable white patch on the reverse side of the embroidery, I use black bobbin thread instead.
View the Black Bobbin Thread Here
Embroidery Needles
Needles are inexpensive, and they are consumable.
View the Embroidery Needles Here
Do not try to make one needle last forever.
A fresh needle can solve a surprising number of mysterious embroidery problems.
Bent, dull or damaged needles can contribute to:
Thread breaks
Poor stitch quality
Fabric damage
Skipped stitches
Strange noises from the machine
I keep spare embroidery needles on hand and replace them whenever something starts behaving strangely or after particularly demanding projects.
Stabilizer: Probably More Important Than You Think
If there is one supply beginners underestimate, it is stabilizer.
The stabilizer supports the fabric while thousands of stitches are being placed into a relatively small area.
Without appropriate stabilization, you can end up with puckering, shifting, distorted lettering or designs that simply do not look clean.
There are several types worth keeping in your studio.
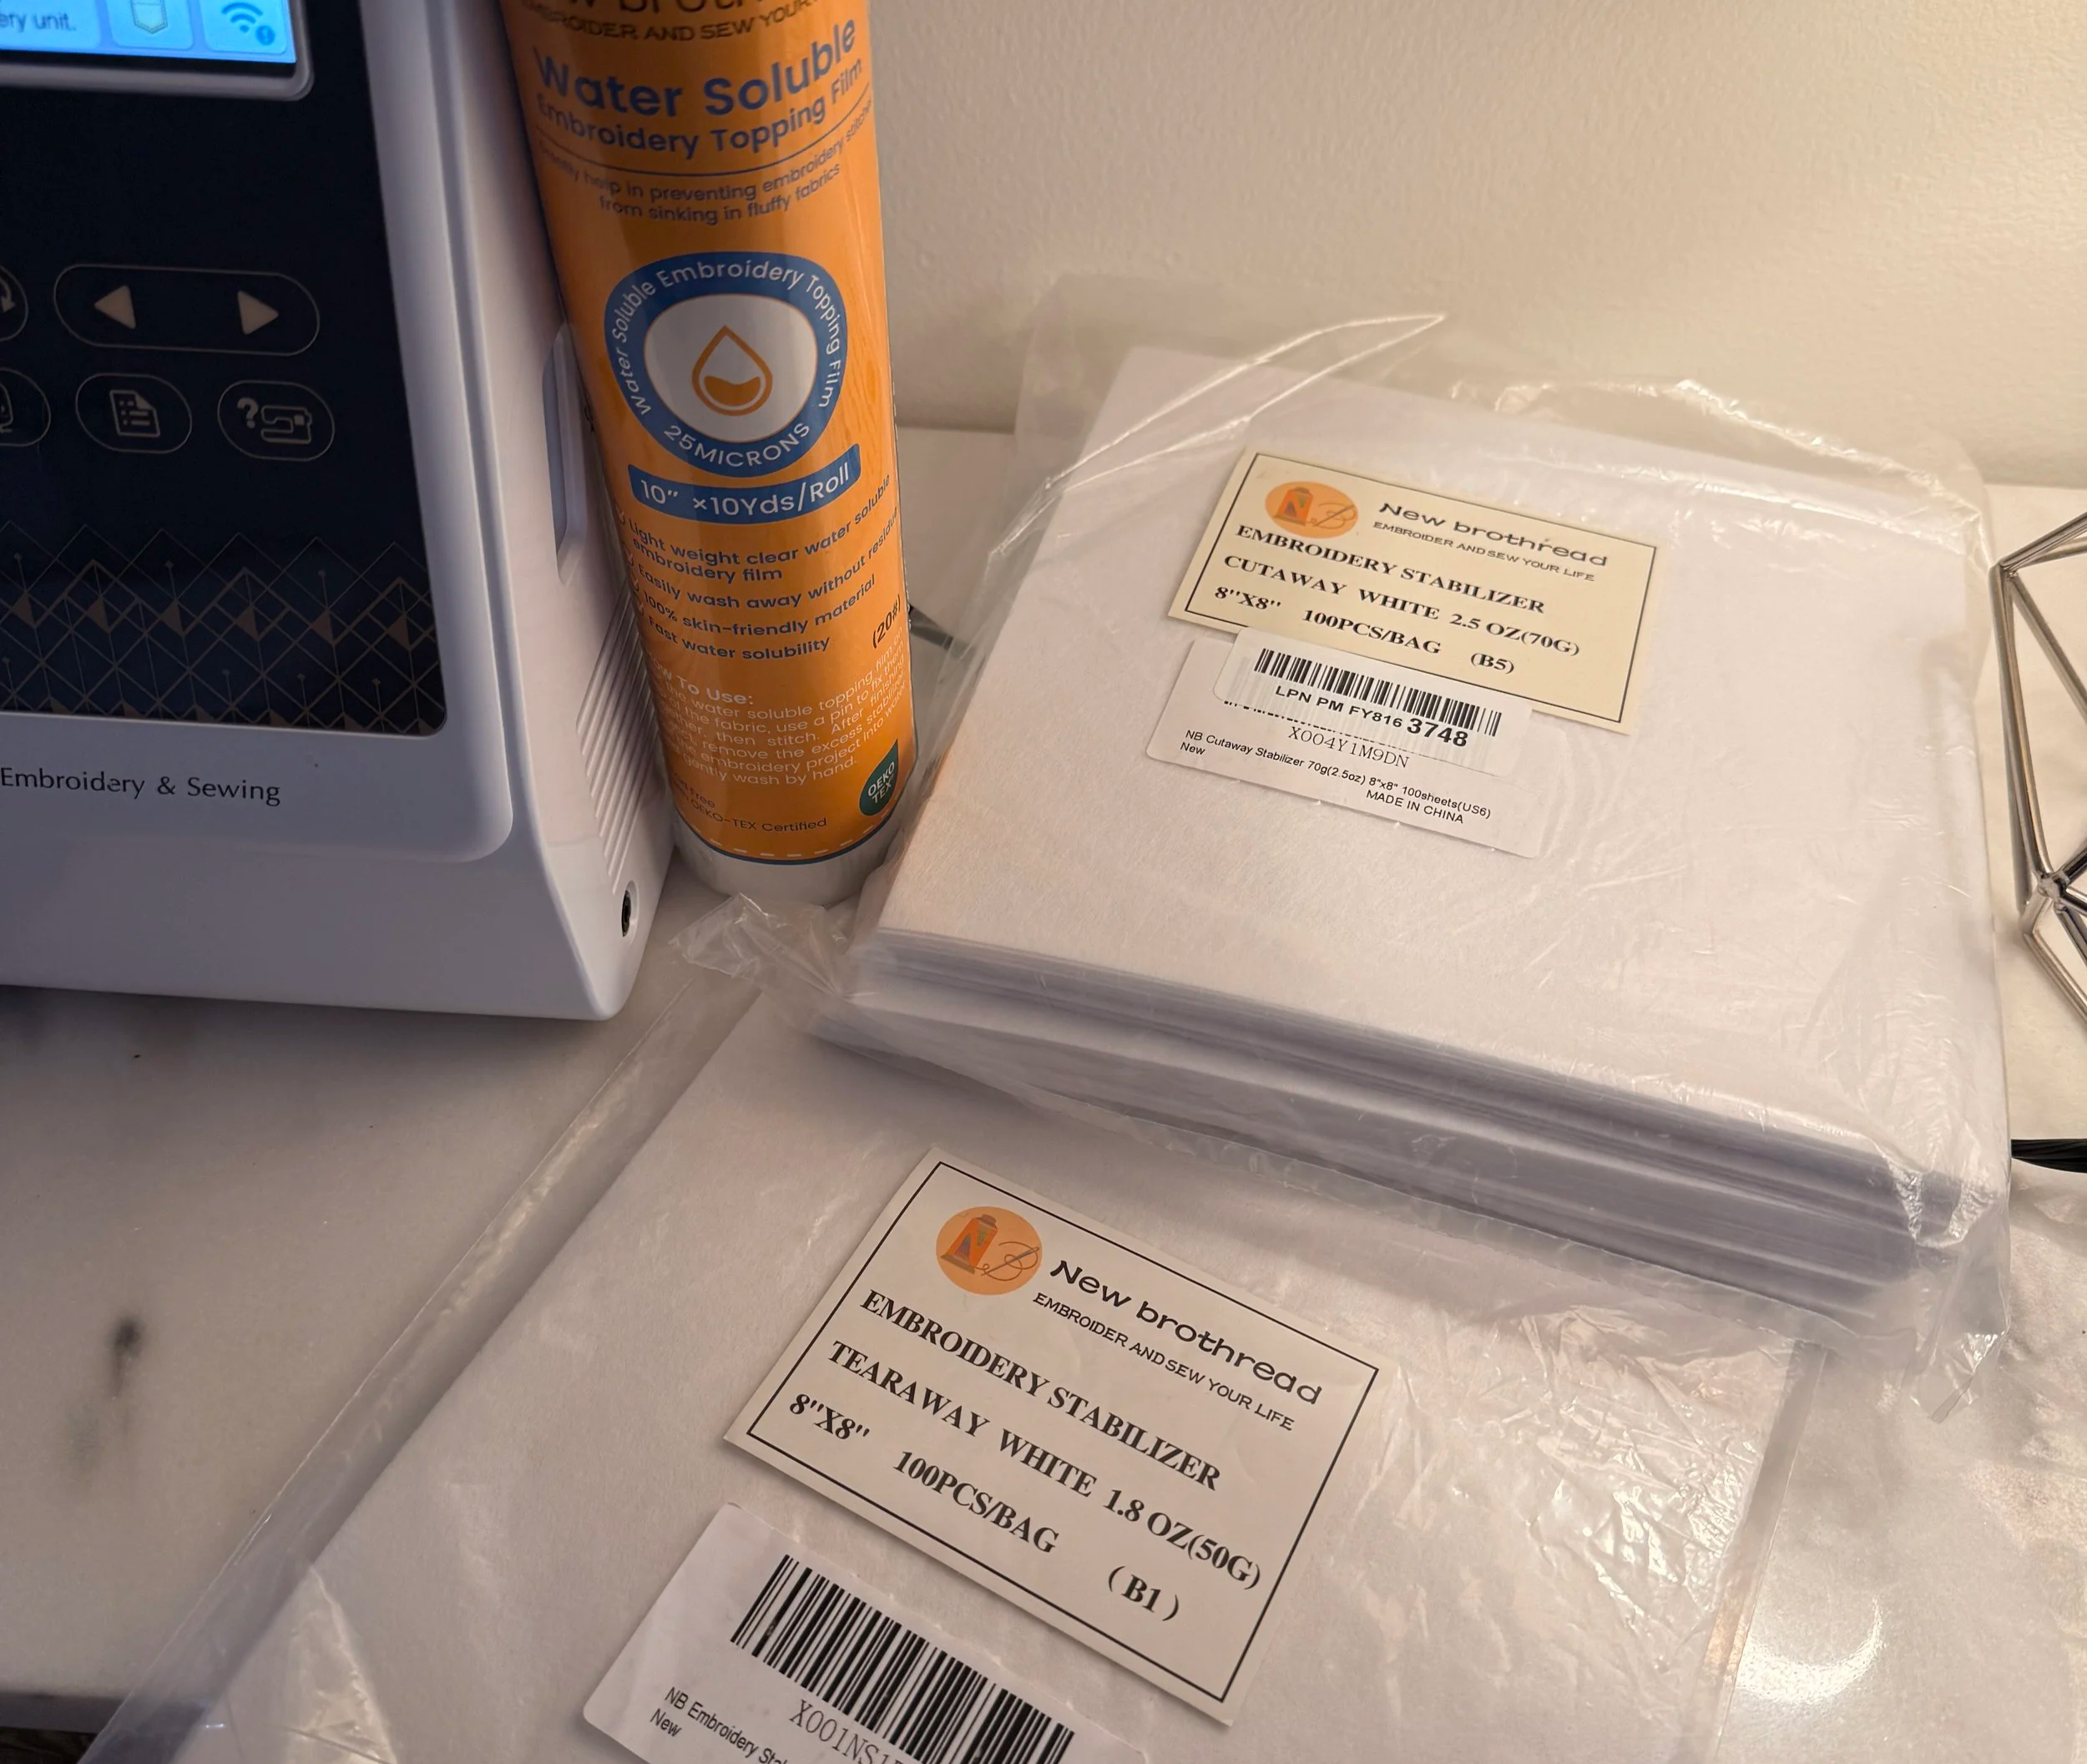
Cut-Away Stabilizer
View Cut-Away Stabilizer on Amazon
This is one of the most useful stabilizers to own.
I generally reach for cut-away when the fabric needs permanent support, especially on garments and fabrics that can move or stretch.
After embroidery, you trim away the excess stabilizer around the design while leaving support behind the stitches.
Tear-Away Stabilizer
View Tear-Away Stabilizer on Amazon
Tear-away is useful for stable fabrics where you do not necessarily want stabilizer permanently remaining behind the embroidery.
Once the embroidery is finished, the excess can be carefully torn away.
Water-Soluble Topper
If you want to embroider towels, robes or other fabrics with a raised surface, buy water-soluble topper.
You place it on top of the fabric before embroidering.
It prevents stitches from disappearing into the loops or pile of the material and can make an enormous difference in how crisp the finished embroidery looks.
Afterward, the excess is removed and the remaining material dissolves with water.
Embroidery Scissors
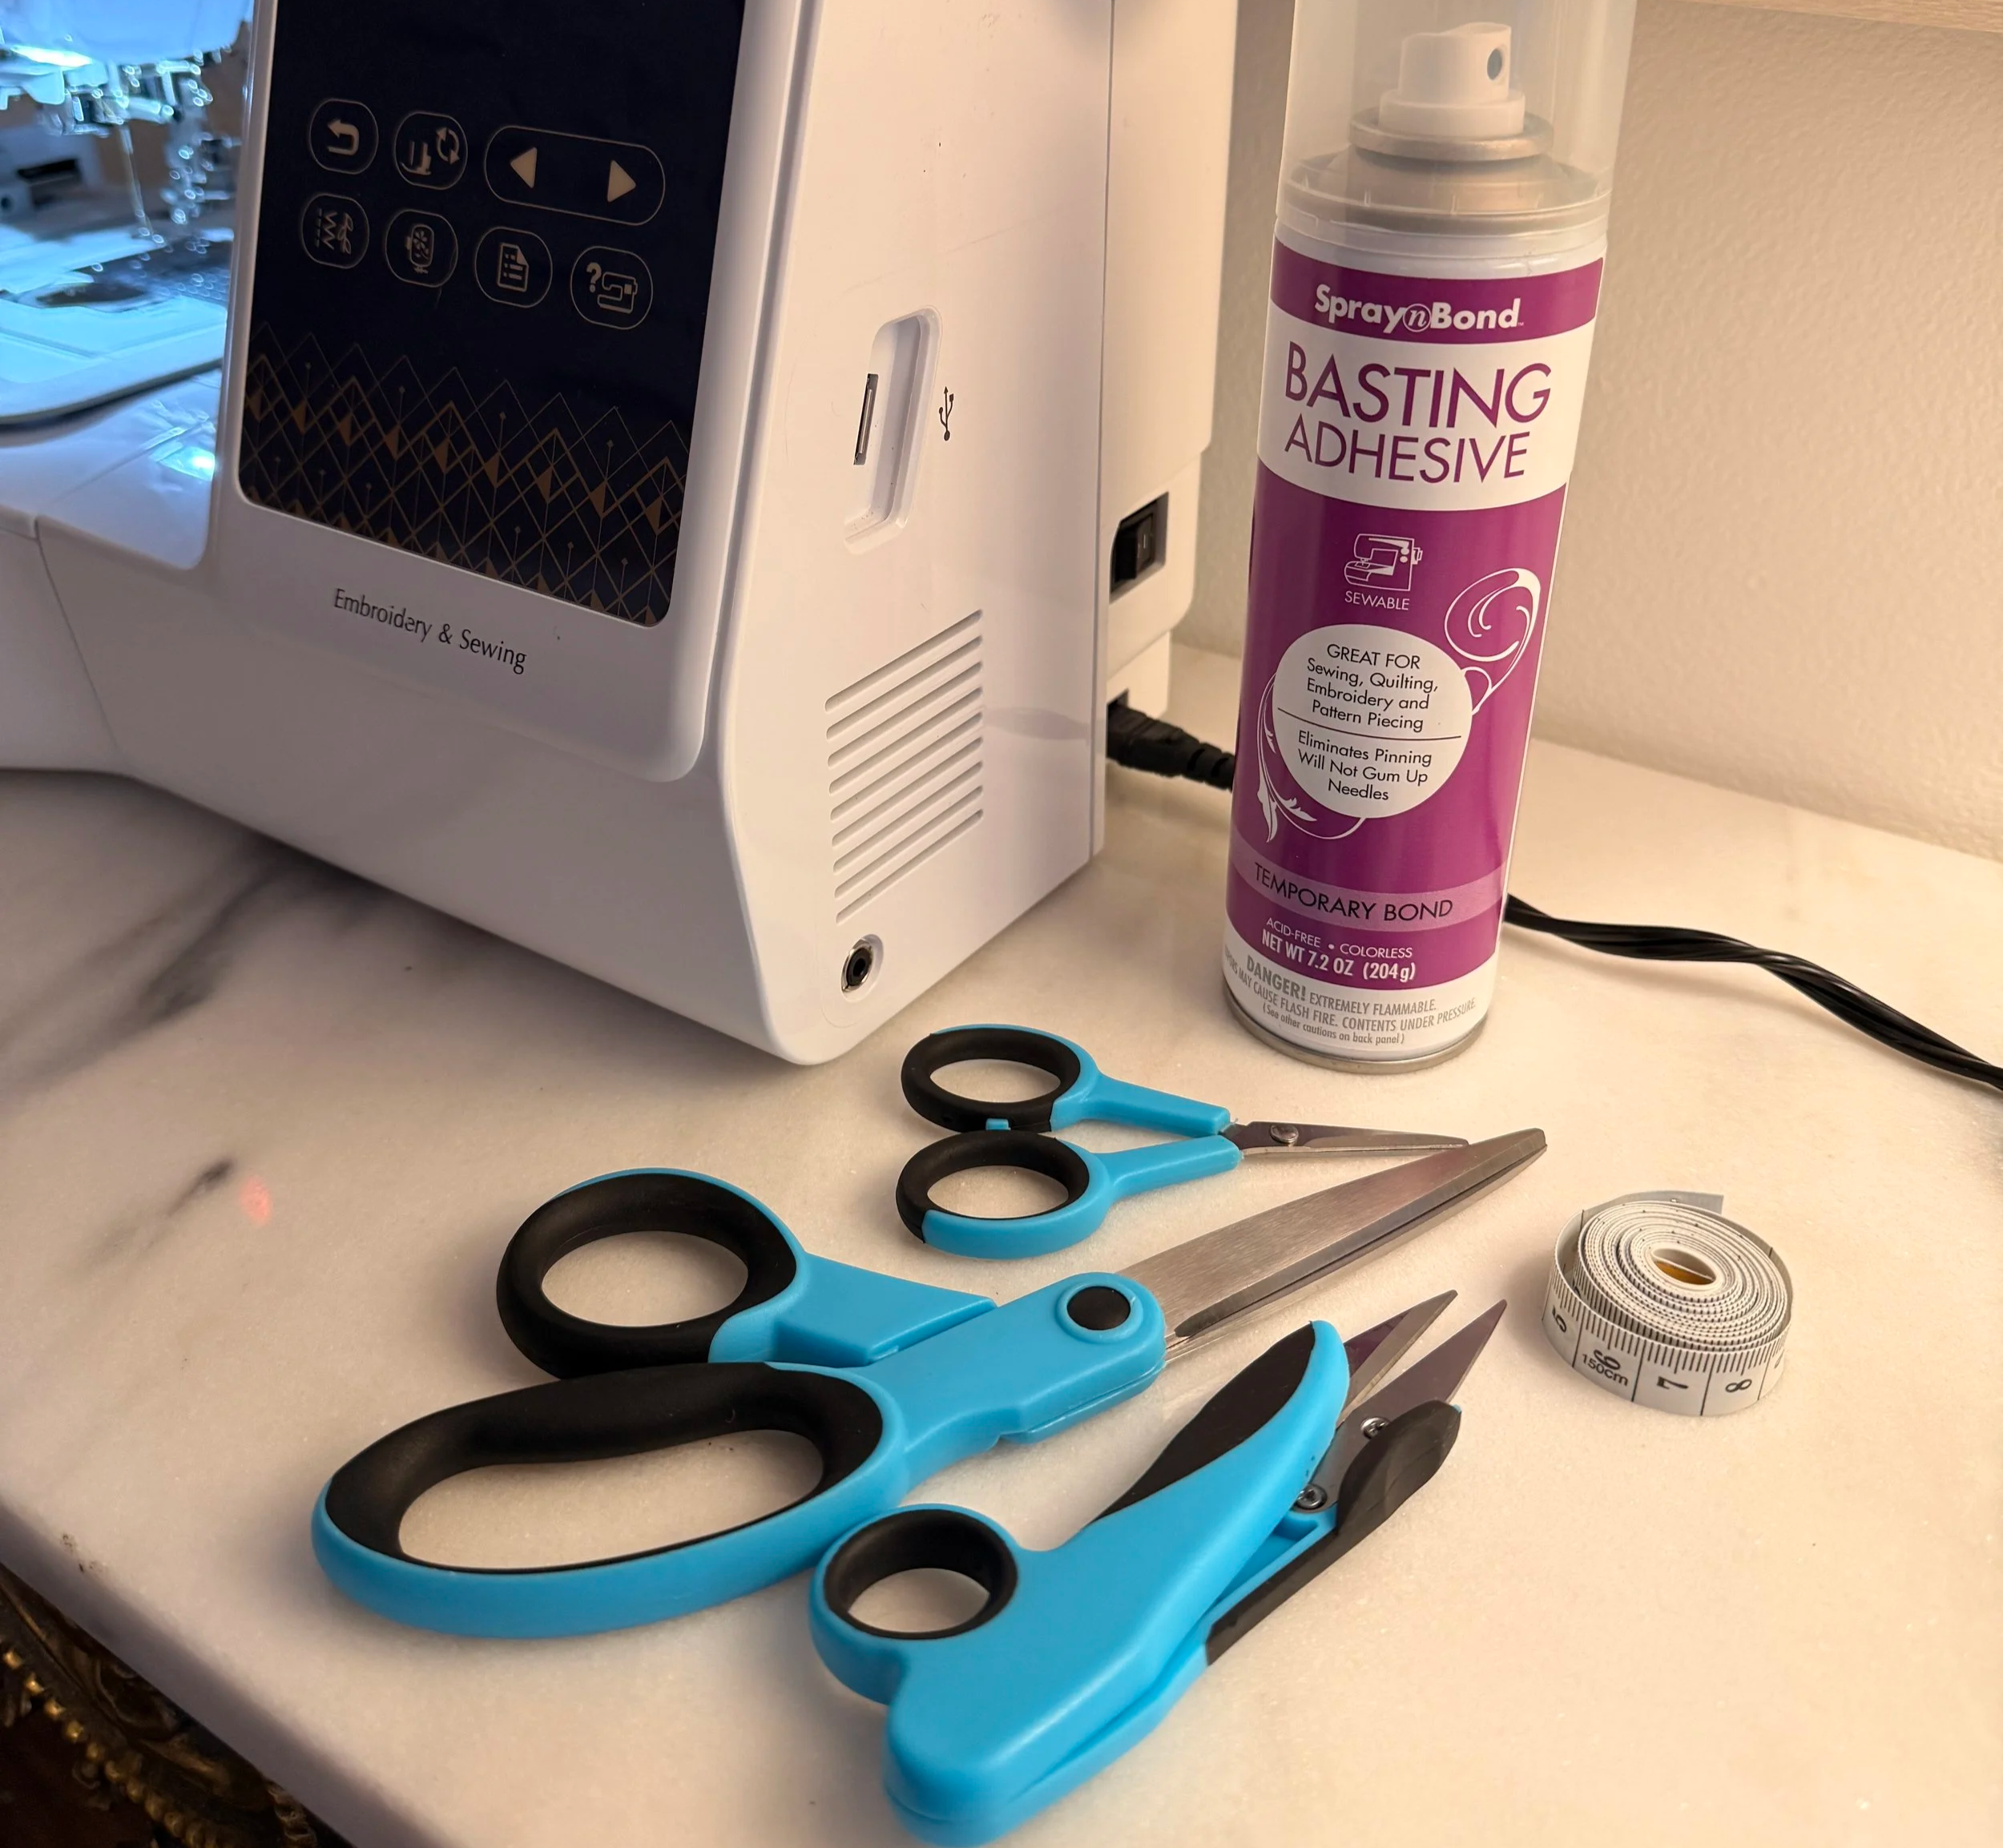
A good pair of small embroidery scissors is worth having beside the machine.
You will constantly be trimming:
Jump stitches
Thread tails
Stabilizer
Small loose fibers
Small, sharp scissors give you considerably more control around finished embroidery than full-size household scissors.
Temporary Fabric Adhesive
Temporary embroidery adhesive can be extremely useful when something cannot easily be hooped in the traditional way.
Rather than forcing an awkward item into the hoop, you can sometimes hoop the stabilizer and secure the item above it.
This technique is commonly referred to as floating the item.
Use adhesive sparingly. You want temporary support, not a garment covered in glue.
Measuring Tools
Embroidery placement is often what separates something that looks homemade from something that looks intentional.
I keep basic measuring tools nearby, including:
Flexible measuring tape
Small ruler
Fabric marking tools
View Tailoring Measuring Tape Here
Before embroidering, I measure and mark the center point of the design.
Never assume that something looks centered just because it looks centered while sitting on your desk.
An Iron or Steamer
Prepare the item before embroidering it.
Wrinkles make accurate placement harder, particularly on linens, shirts and other lightweight fabrics.
An iron or garment steamer is also useful for preparing finished pieces for presentation or photography.
Just be careful around certain synthetic fabrics and specialty materials.
USB Drive
Depending on how you transfer your embroidery files, having a small dedicated USB drive for embroidery is convenient.
I like keeping embroidery files separate from everything else on my computer.
Organizing them by category also becomes increasingly important as your design library grows.
The Upgrade I Recommend Most: Magnetic Hoops
One of the first things I changed after getting my machine was the hoop.
The standard clip-style hoop was one of the most frustrating parts of learning embroidery for me, so I switched to magnetic hoops during my second week with the machine.
I have never looked back.
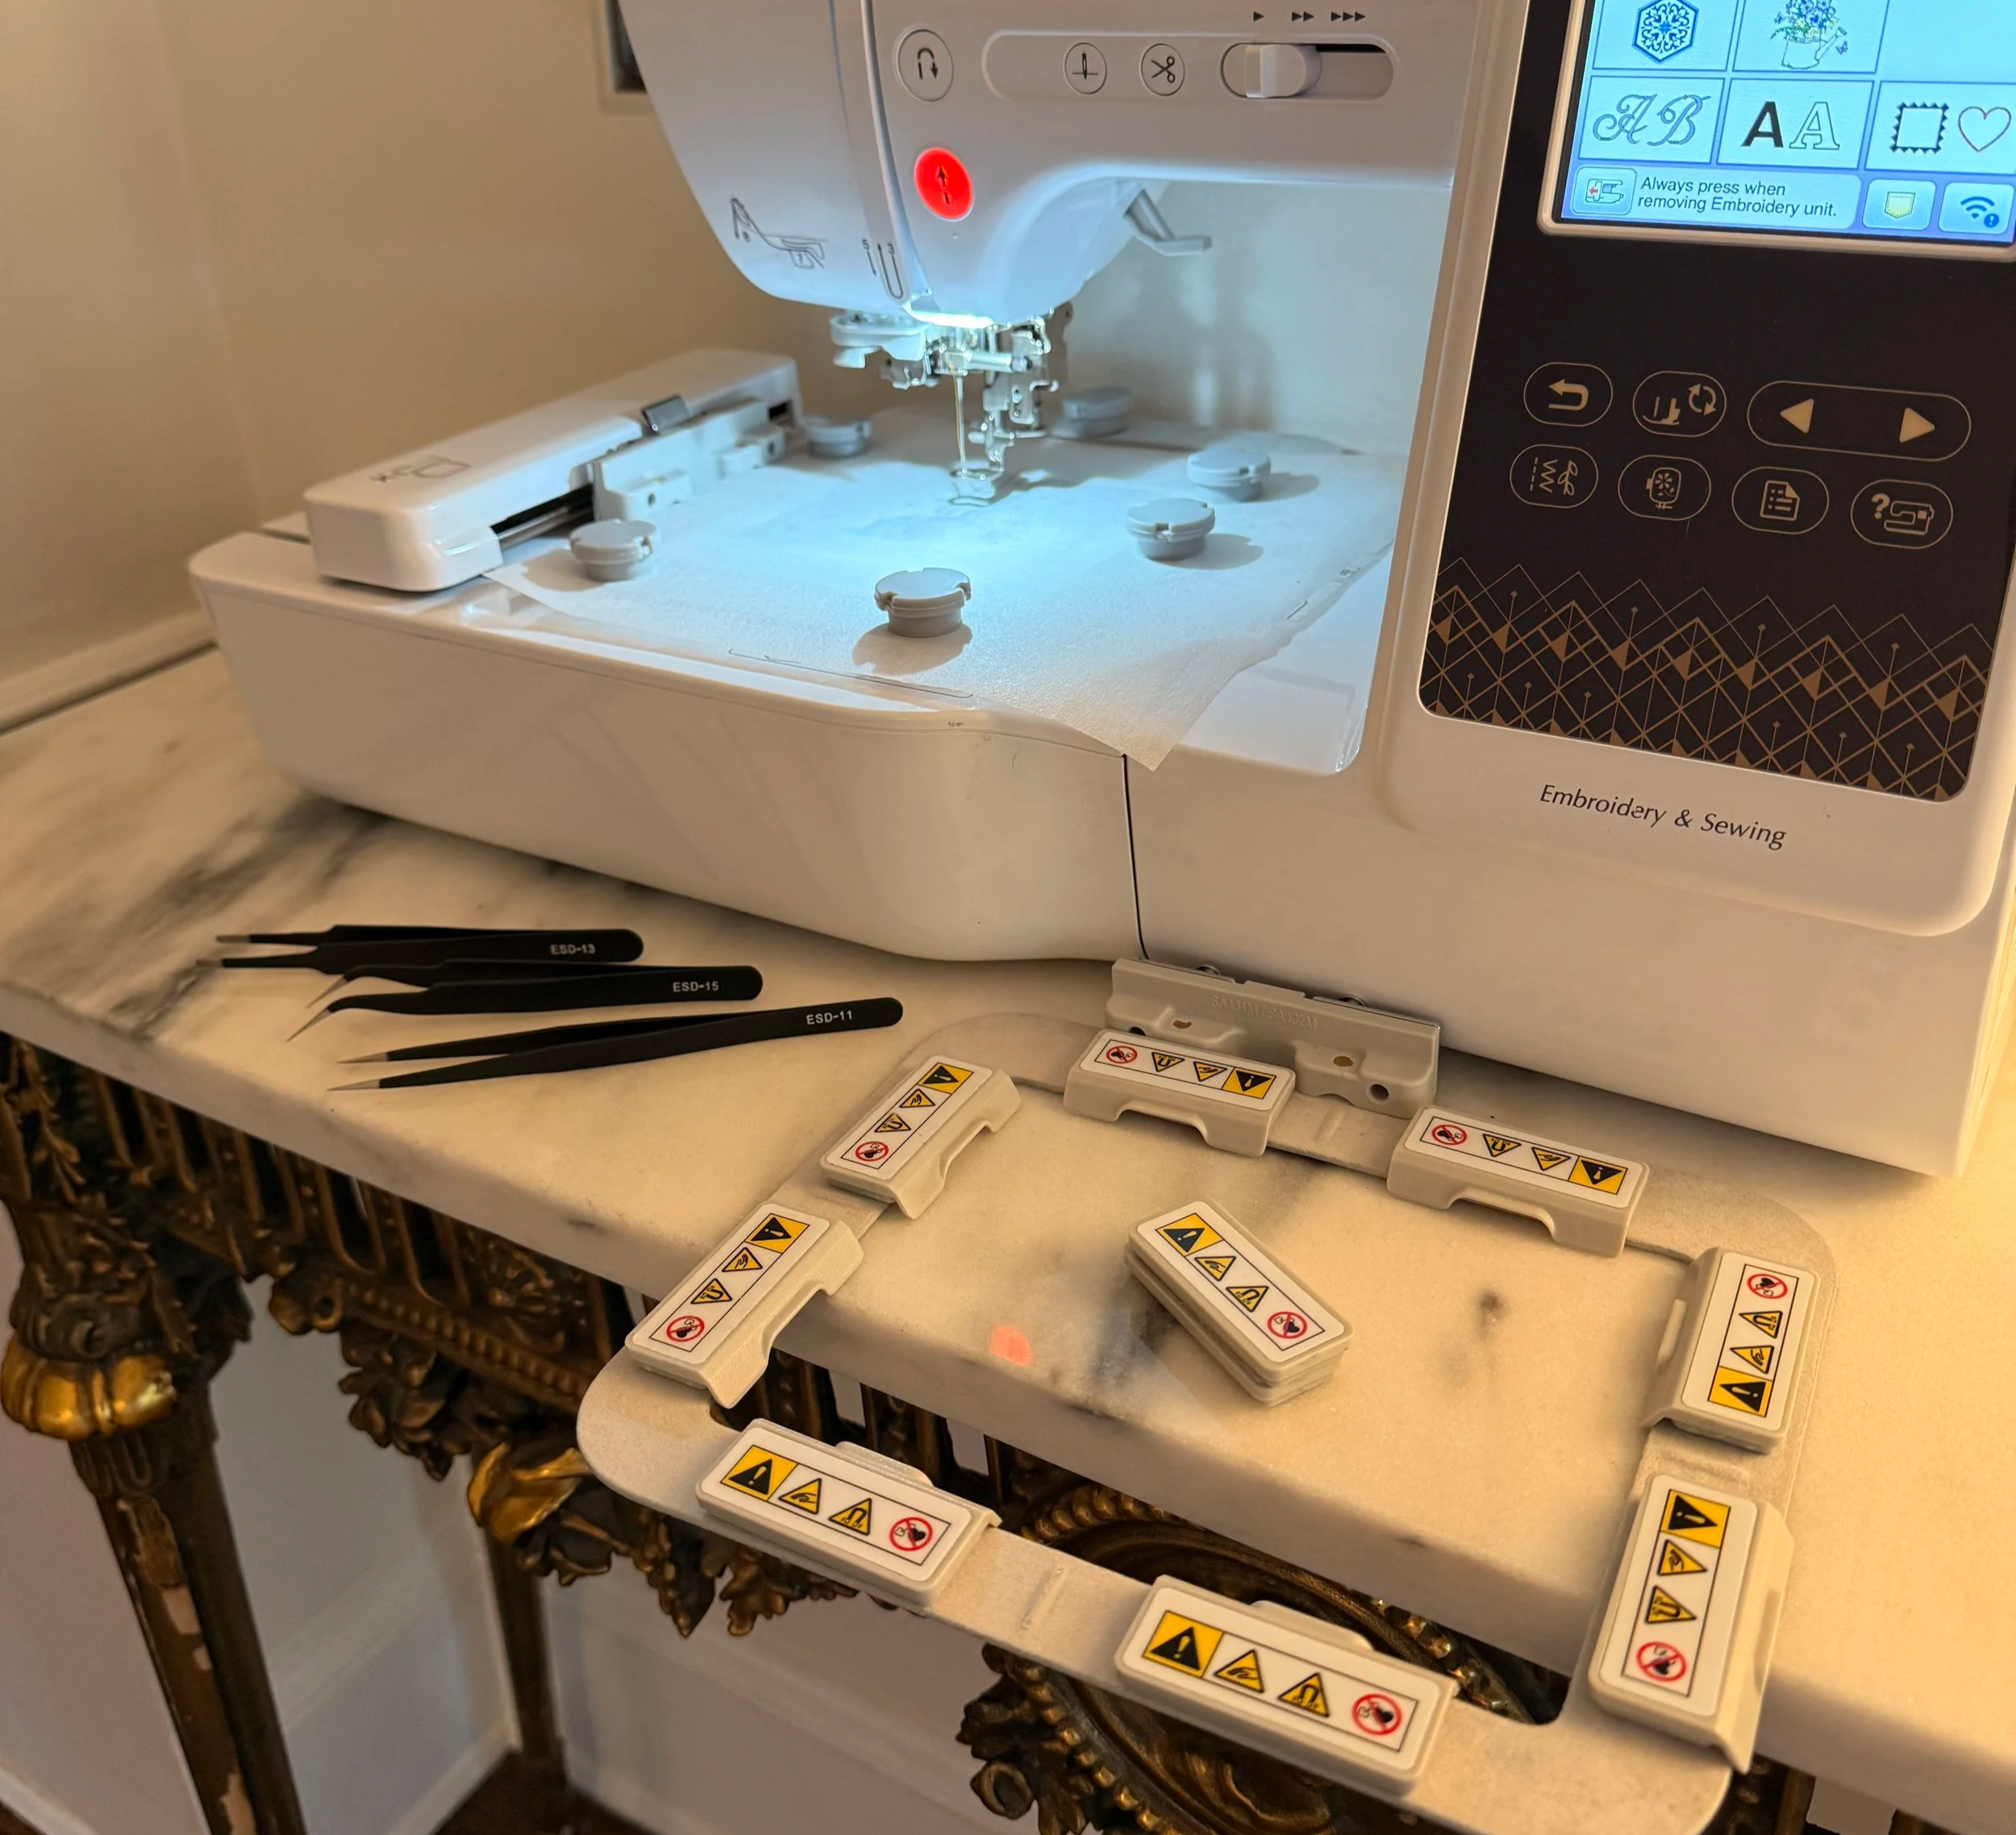
With a magnetic hoop, you can lay your stabilizer and fabric onto the hoop and use the magnets to hold everything flat.
Depending on the material and project, you may still need a little extra support from temporary adhesive or pins, but I find magnetic hoops dramatically more convenient for the majority of what I embroider.
I actually keep two of them.
That means I can prepare the next item on one hoop while the machine is running the previous item on the other.
This first hoop has particularly strong magnets. If I am working with thicker material and need additional grip, the magnets can even be stacked.
View the Strong Magnetic Hoop Here
My second magnetic hoop for the SE700 uses flatter magnets that are not quite as strong, but I particularly like it for delicate materials because everything can be held very flat.
View My Other Magnetic Hoop Here
If there is one accessory from this entire list that made using my machine more enjoyable, it is probably the magnetic hoop.
Precision Tweezers
The last small tool I always keep beside my machine is a pair of precision tweezers.
View the Precision Tweezers Here
After running the thread through the embroidery needle, I use the tweezers to guide the thread down through the opening in the presser foot and pull it completely through.
Doing this has helped me avoid having loose thread get caught when the machine begins stitching.
The tweezers are also extremely handy for gripping tiny threads when cleaning up a finished piece.
It is a very small tool, but I use it constantly.
Things You Do NOT Need Immediately
It is very easy to watch embroidery videos online and feel as though you need an entire commercial studio before making your first monogram.
You don't.
I would not immediately spend money on every available:
Hoop size
Thread color
Specialty stabilizer
Digitizing program
Embroidery gadget
Blank garment
Accessory
Start small.
Learn what your machine can do and buy additional supplies as your projects require them.
Start With Simple Projects
Your first embroidery project does not need to be an elaborate multicolor design.
I would start with something simple like:
A single initial on a napkin
A three-letter monogram
A name on a towel
A small design on a tote bag
A simple motif on stable cotton fabric
Every material behaves differently.
A towel does not embroider like linen. Linen does not behave like a waxed jacket. A stretchy shirt introduces completely different challenges.
Learning how the same machine behaves across different materials is part of learning embroidery.
Test Stitch Everything
This is one habit I recommend developing immediately.
Test your embroidery before putting it on the final item whenever possible.
I regularly stitch designs onto spare fabric before embroidering a customer's garment.
A test lets you check:
Size
Thread color
Stitch density
Lettering
Registration
Stabilization
Overall appearance
Ten minutes spent testing can prevent ruining something considerably more expensive.
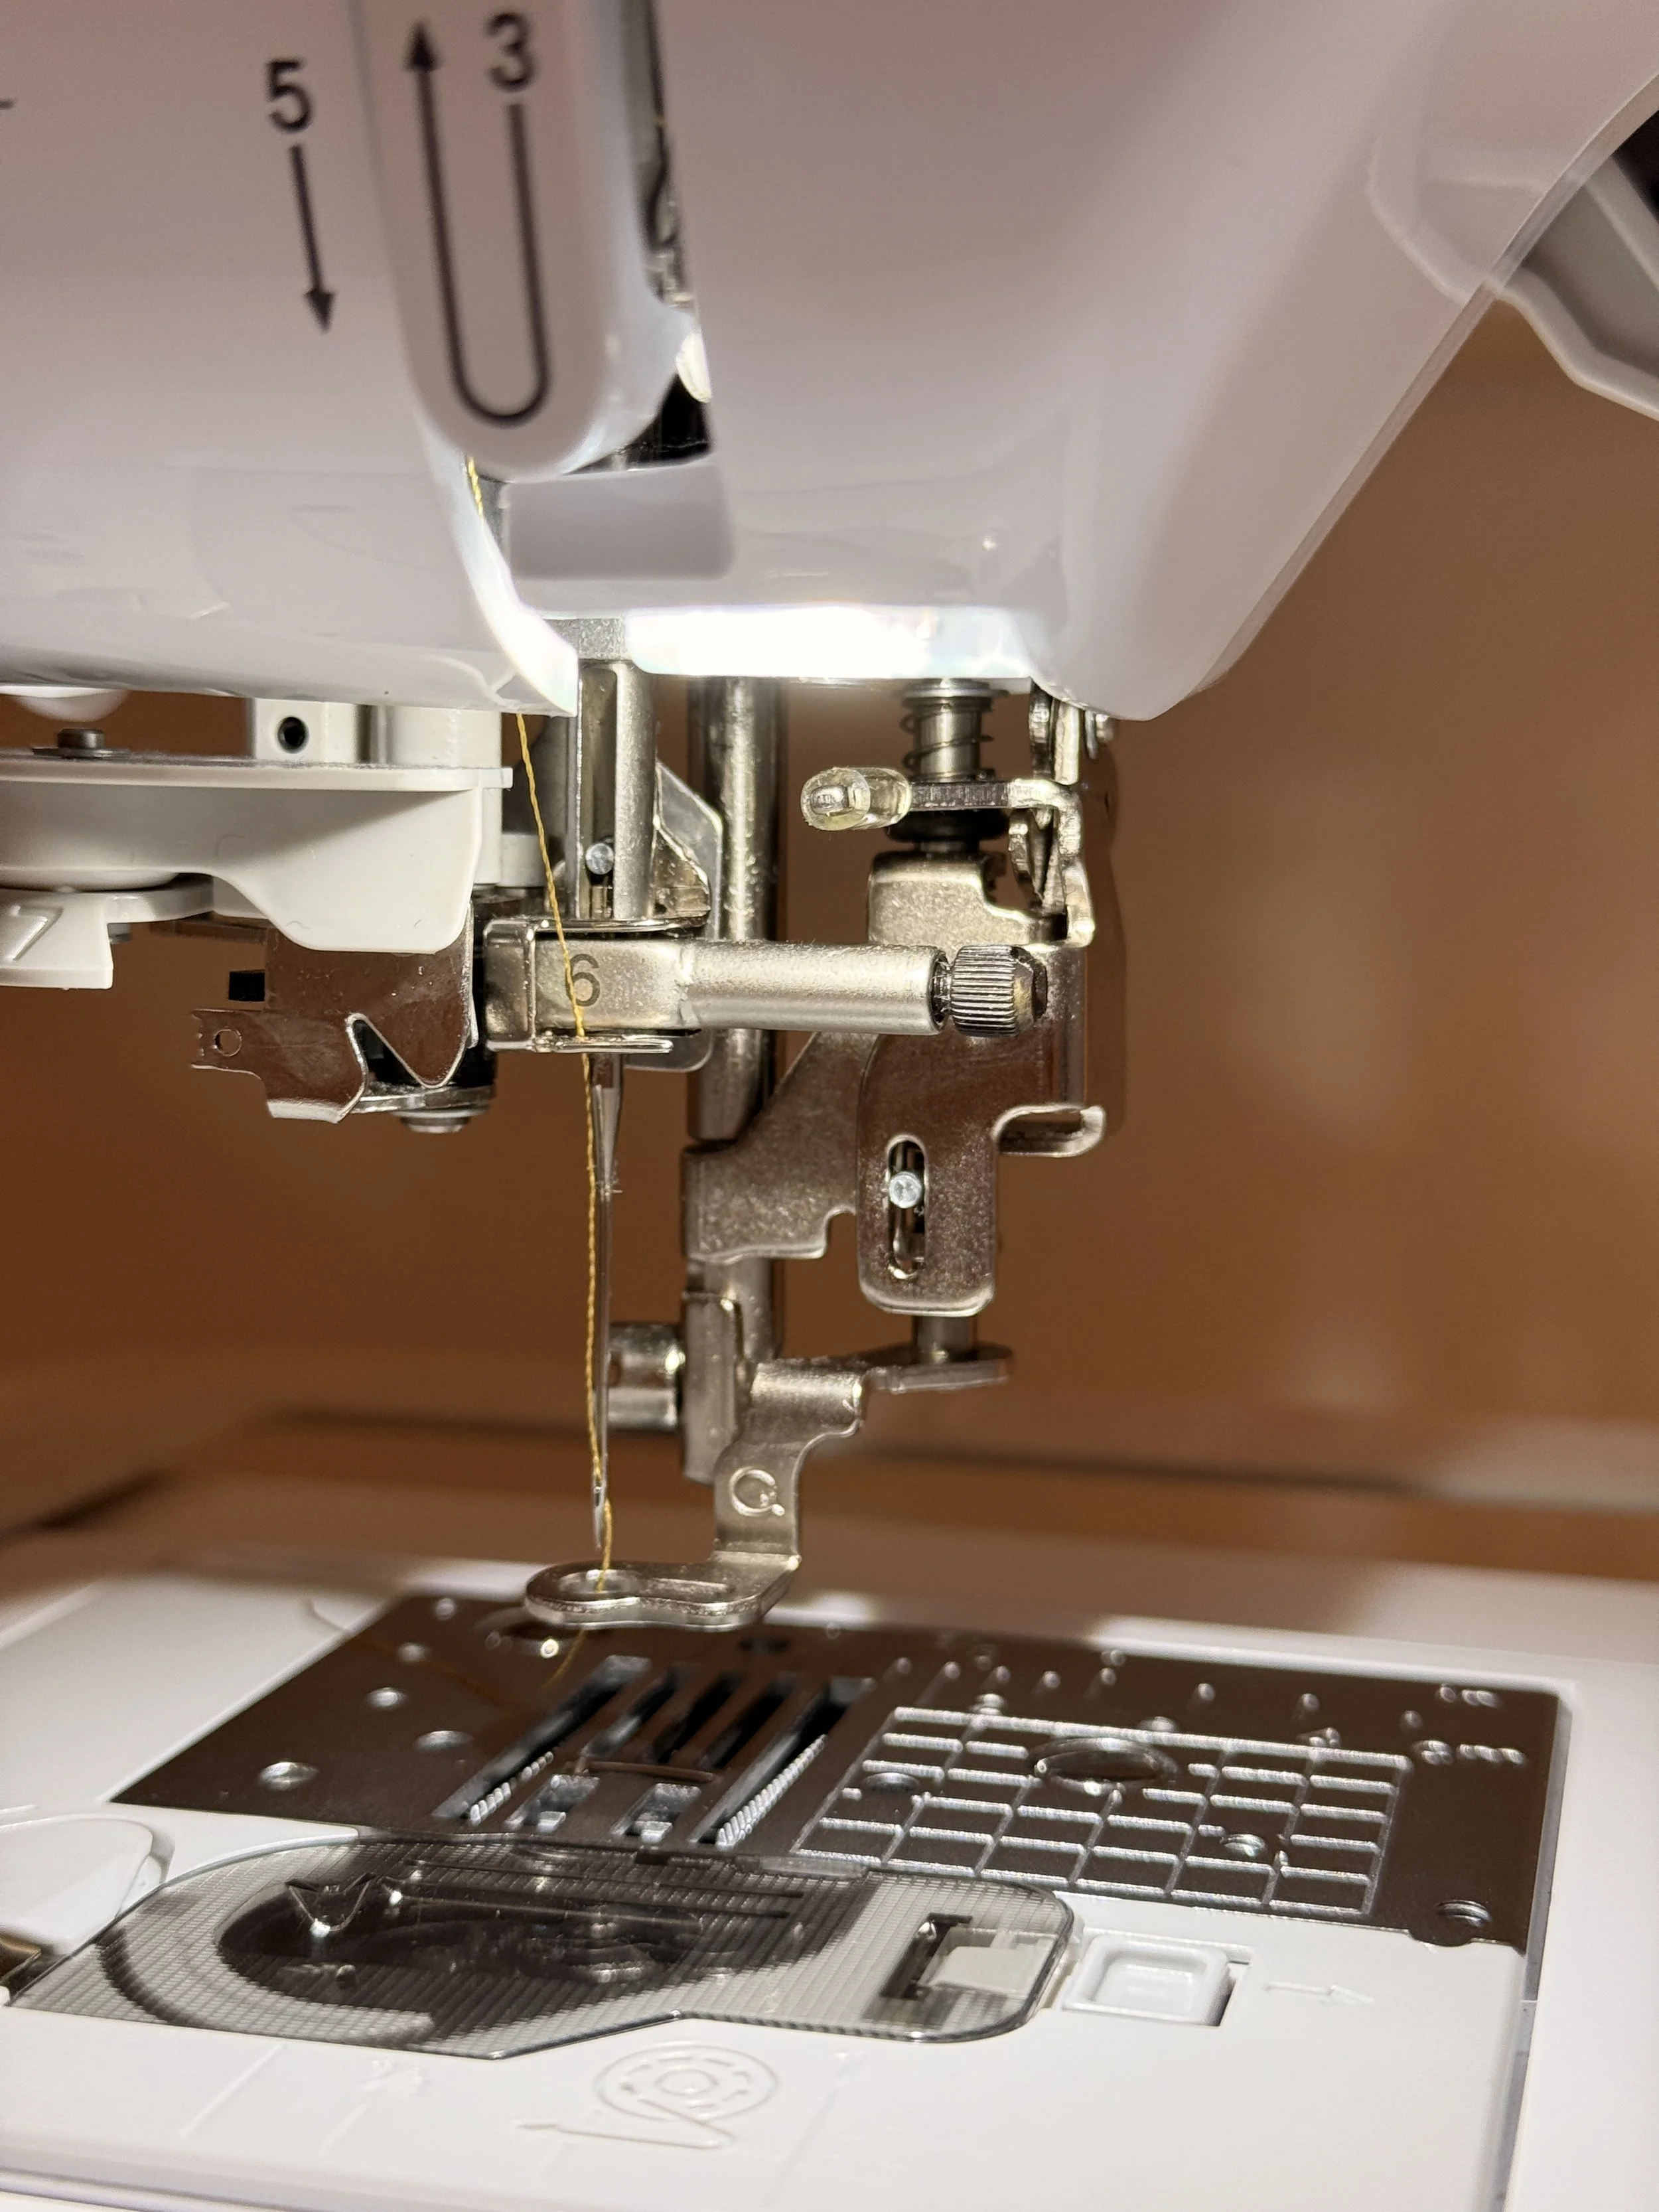
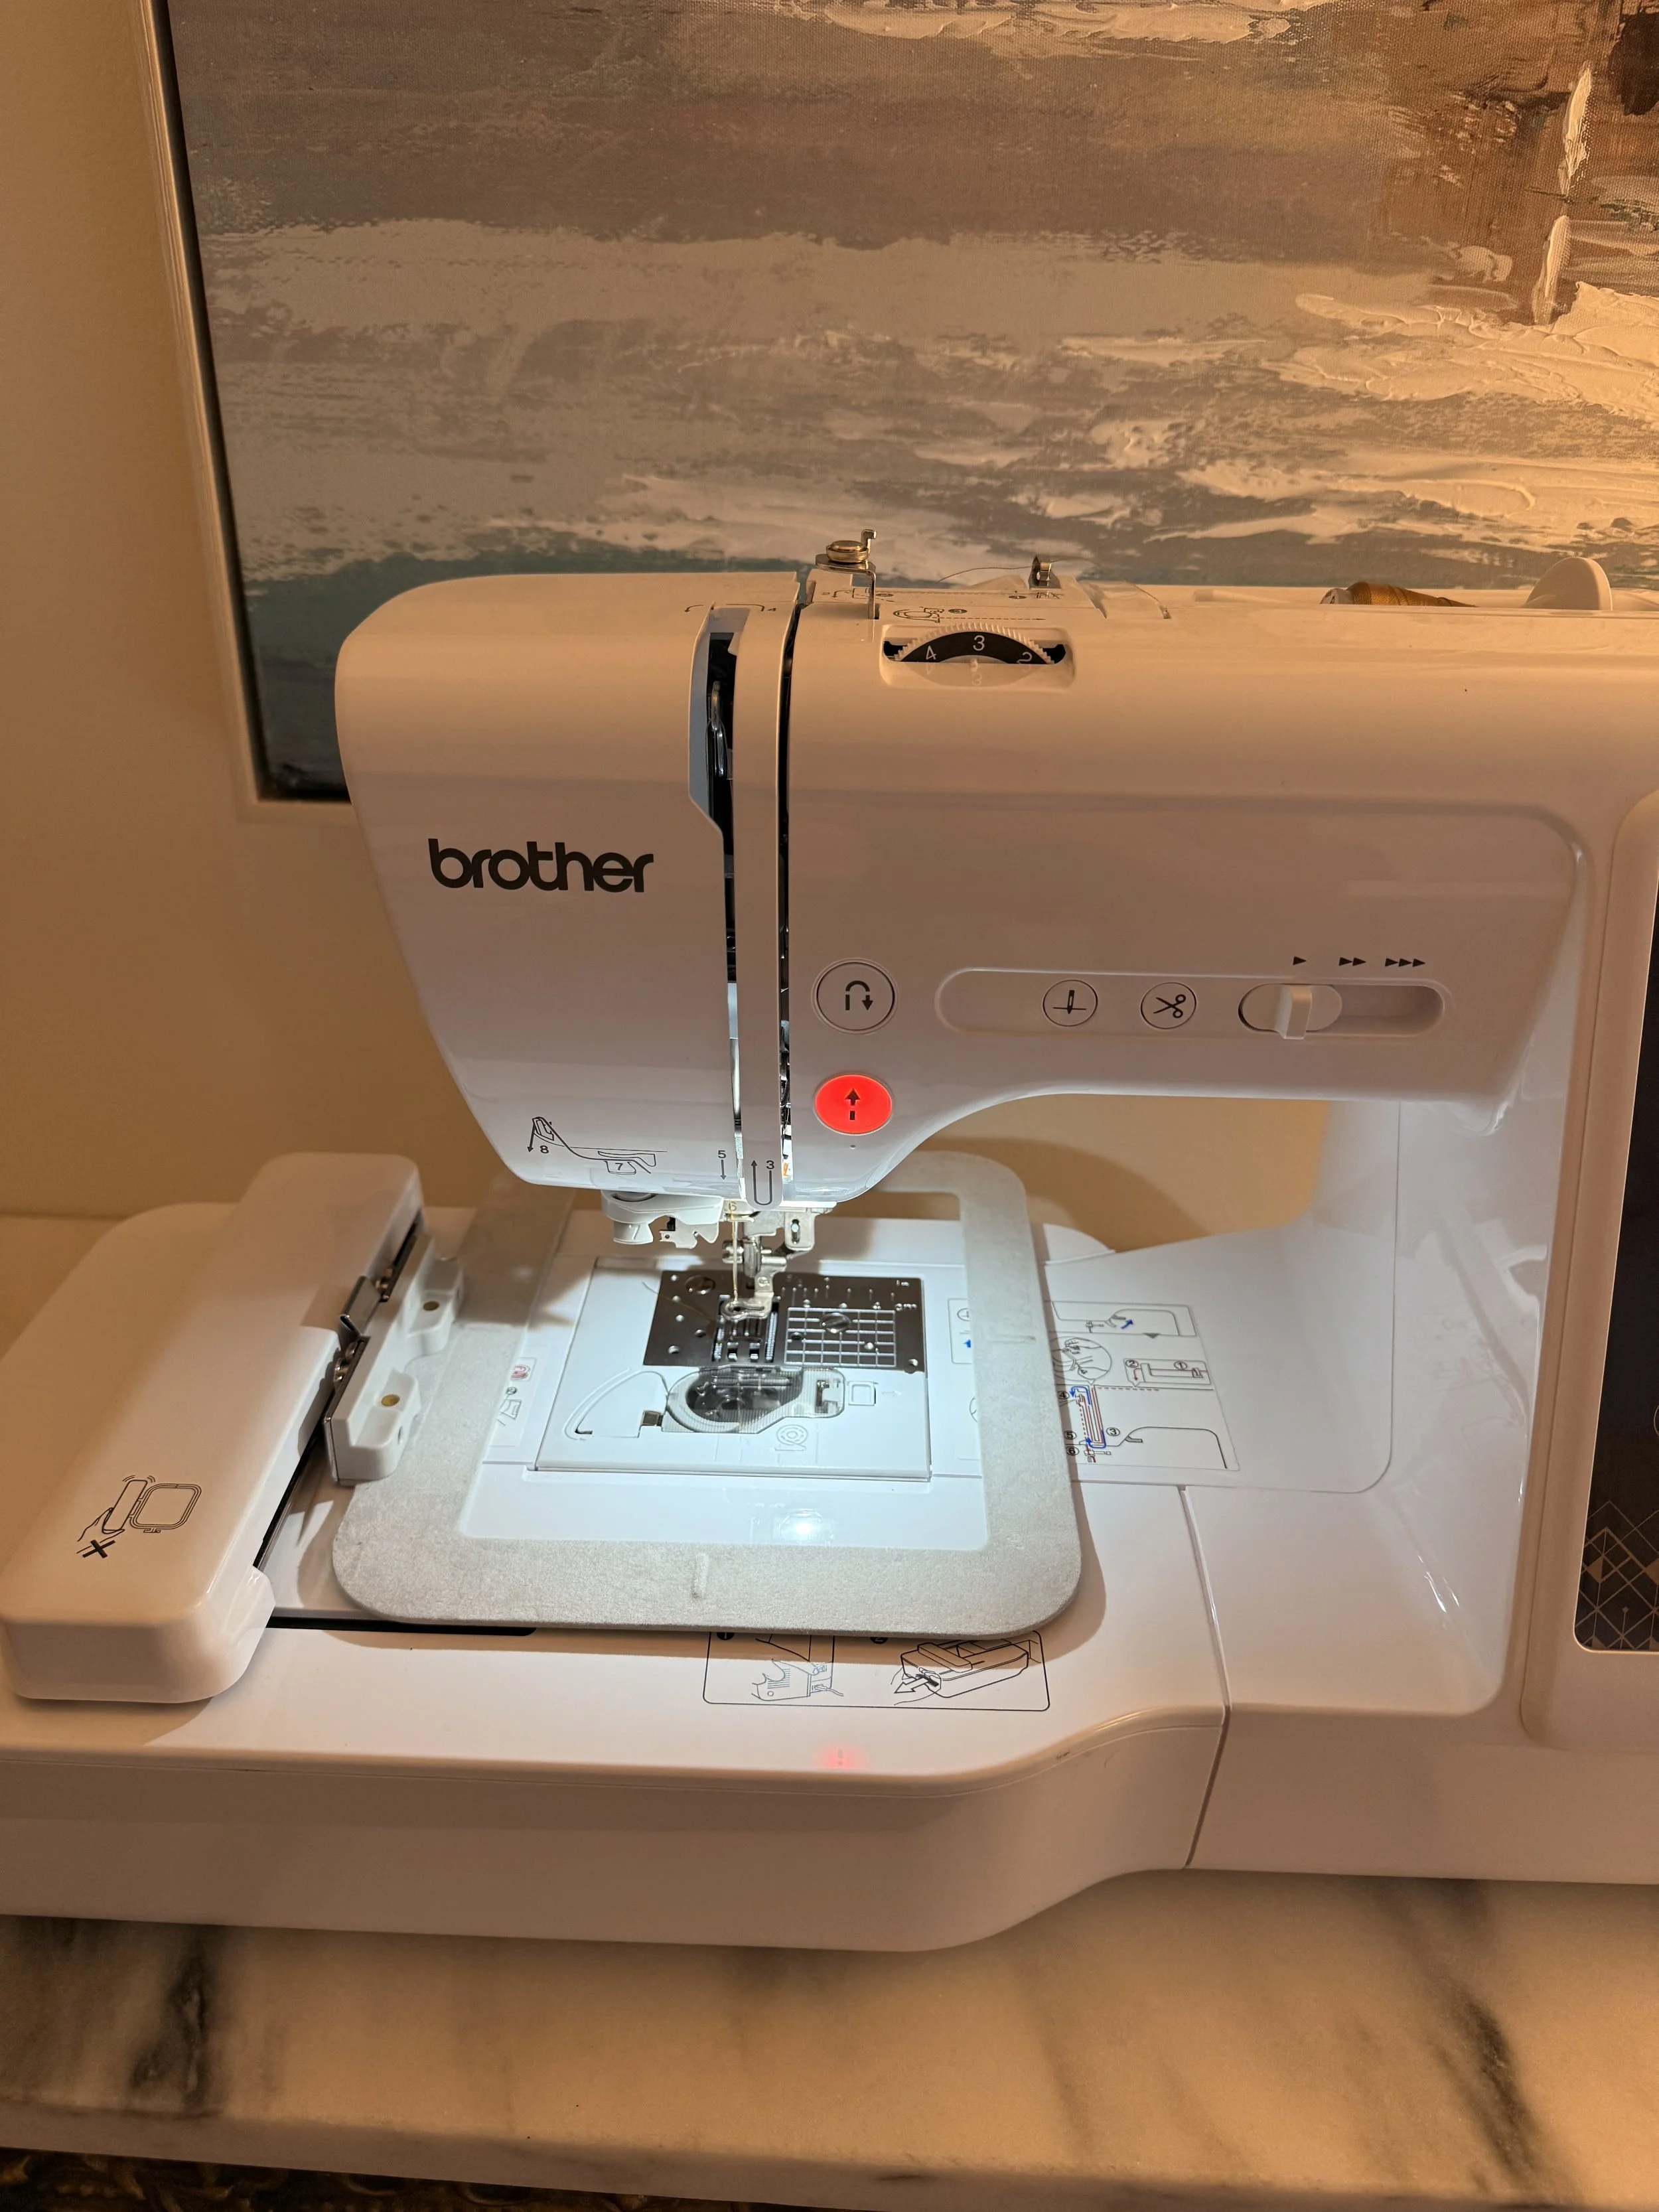
PRO TIP: Are you using the right foot attachment?
Make sure you are using the embroidery attachment for your machine, not the sewing one. The embroidery one has the large round hole for the needle and more space for you to place things underneath. Make sure you check your machine’s manual. I also like to operate at a tension of 3 and the lowest speed setting, as shown below.
Do You Need to Learn Digitizing?
Eventually, I think it is worth learning.
Digitizing is the process of telling the embroidery machine how a design should actually be stitched.
An image file is not automatically an embroidery file.
A digitized design contains information about stitch direction, stitch type, density, sequence, underlay and many other factors.
When I create custom designs, I often start with artwork and build the embroidery file from there.
But beginners should not feel pressured to master this immediately.
There are thousands of properly digitized embroidery designs available online, and professional digitizers can also create files for you.
Learn embroidery first.
Then learn how to tell the machine what to embroider.
The Biggest Lesson I Have Learned
The machine is only one part of good embroidery.
The finished result is a combination of:
Design + digitizing + thread + needle + stabilizer + fabric + placement + machine settings.
When something goes wrong, resist the temptation to immediately blame the machine.
Usually there is a reason.
Learning how all of those variables interact is what eventually gives you confidence to embroider unusual materials and more valuable garments.
My setup started relatively simply and has gradually grown alongside the projects I take on.
You do not need to buy everything at once.
Start with a good machine, good thread, proper stabilizer and a few simple projects.
Then experiment.
That is the fun part.
Shop My Exact Embroidery Setup
If you came here simply to find out what I use, here it all is in one place.
I will keep this list updated as I continue testing products and changing my own setup.
Alternatively, you can shop the complete embroidery setup (except the hoops, those are below) on my Amazon Storefront: View Whole Storefront Here
Brother SE700 — View Here
Embrilliance Level 2 — View Here
Magnetic Hoop — Strong Magnet Version — View Here
Magnetic Hoop — Flat Magnet Version — View Here
Embroidery Thread — 80 Pack — View Here
Embroidery Thread — 150 Pack — View Here
White Bobbin Thread — View Here
Black Bobbin Thread — View Here
Embroidery Needles — View Here
Cut-Away Stabilizer — View Here
Tear-Away Stabilizer — View Here
Water-Soluble Topper — View Here
Embroidery Scissors — View Here
Temporary Fabric Adhesive — View Here
Tailoring Measuring Tape — View Here
Garment Steamer — View Here
USB Drive — View Here
Precision Tweezers — View Here
For examples of my own embroidery work and custom embroidery services in Georgetown, Washington, D.C., visit Ricardojposada.com