My Georgetown E-Bike Build: Upgrades, Accessories & Custom Details
I wanted an e-bike that was practical enough for everyday use but still felt personal. Since buying it, I’ve gradually changed the storage, security, comfort, lighting, and appearance to make it work better for how I actually ride around Georgetown and DC.
I mainly use the bike for getting to work, running errands, picking up groceries, and occasionally delivering finished embroidery pieces to customers. What started as a fairly ordinary Amazon e-bike has gradually become a much more useful—and much more distinctive—everyday bike.
This page documents the parts I used, what worked, what required a little improvisation, and the accessories I would actually buy again. The full list is linked at the bottom for your convenience as well.
Affiliate Disclosure: Some links on this page are affiliate links. If you make a purchase through one of these links, I may earn a commission at no additional cost to you. As an Amazon Associate I earn from qualifying purchases.
The Bike
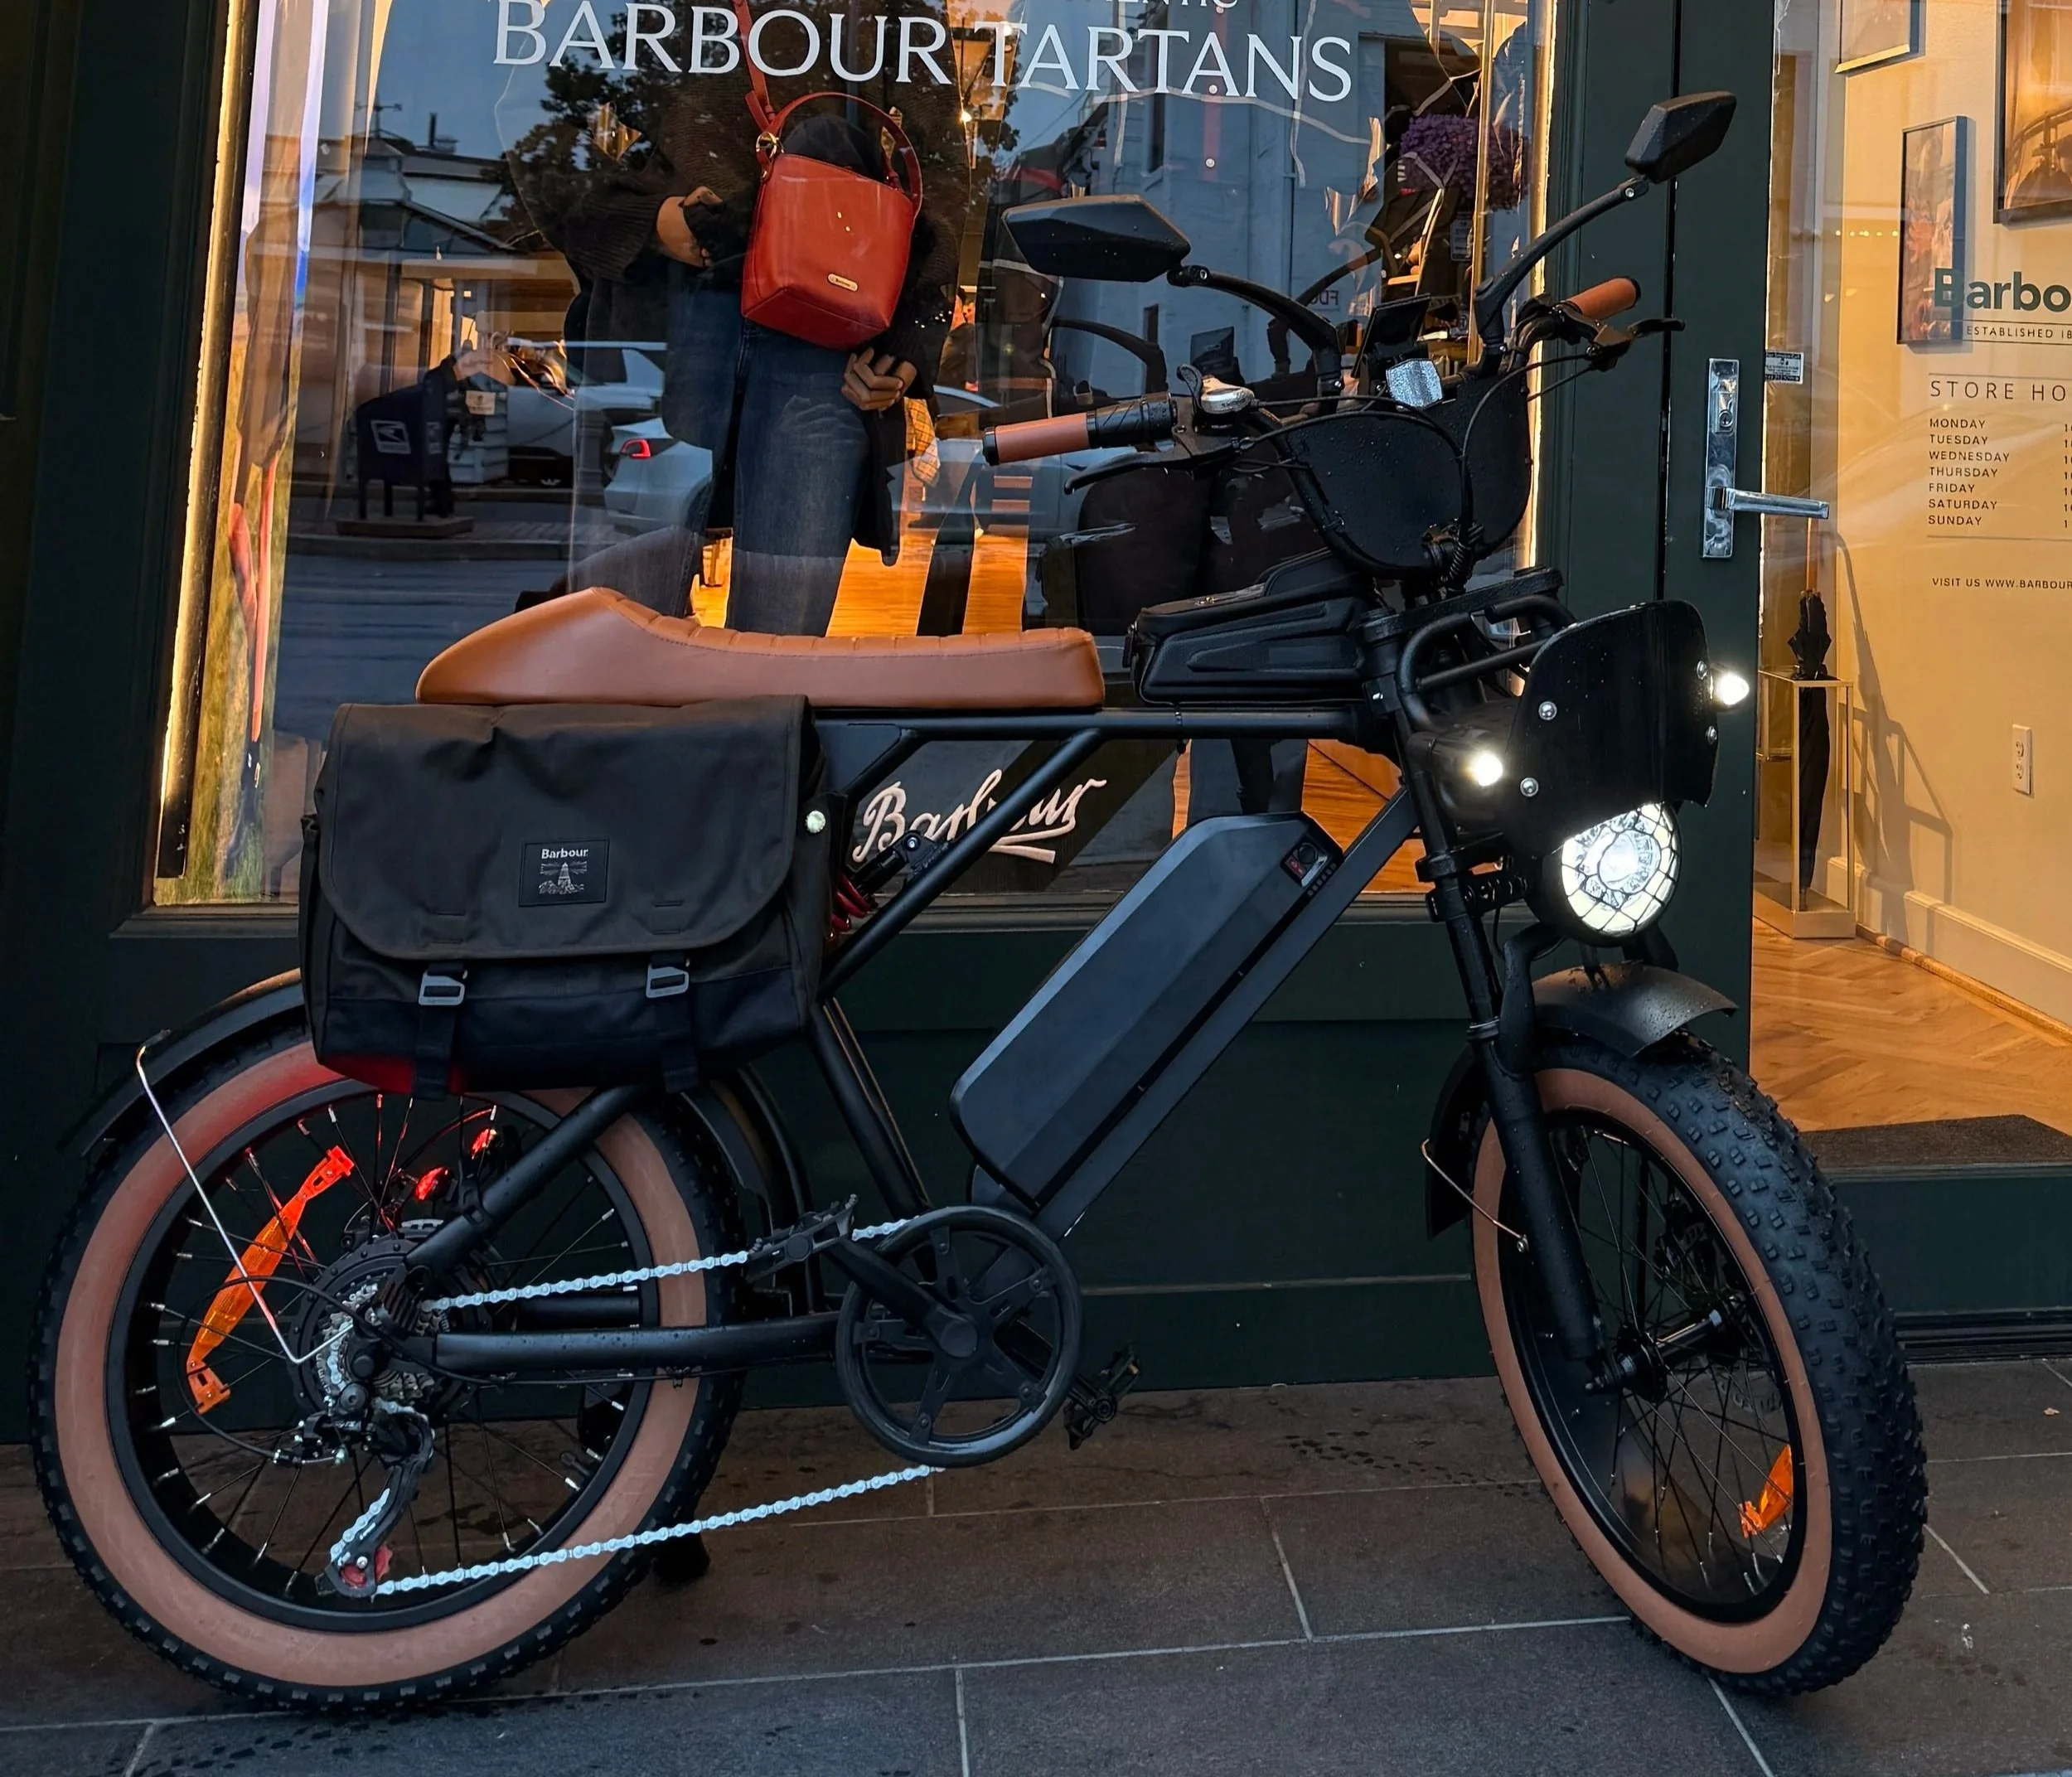
The starting point for the build is an INVANTI 20-inch fat-tire e-bike.
I chose this model largely because of its proportions, seat style, brown tire accents, and the fact that it looked relatively easy to modify. It also had decent reviews and respectable specifications for the price, so it felt like a good starting point rather than something I would be afraid to customize.
Out of the box, I was pleasantly surprised by how straightforward it was to assemble. The paint finish looked better in person than I expected, and the brown tires paired nicely with the saddle, giving it a slightly more classic appearance than many e-bikes in this style.
The first thing that had to change was the branding.
The racing-inspired stickers and graphics made the bike feel much busier than I wanted, so I removed everything that could be peeled away. Anything printed directly onto the bike that could not be removed was covered with matte-black vinyl. That gave me a much cleaner base to build from.
The Bike: View the INVANTI e-bike on Amazon →
Matte Black Vinyl: View the LZLRUN matte-black vinyl on Amazon →
Storage & Carrying
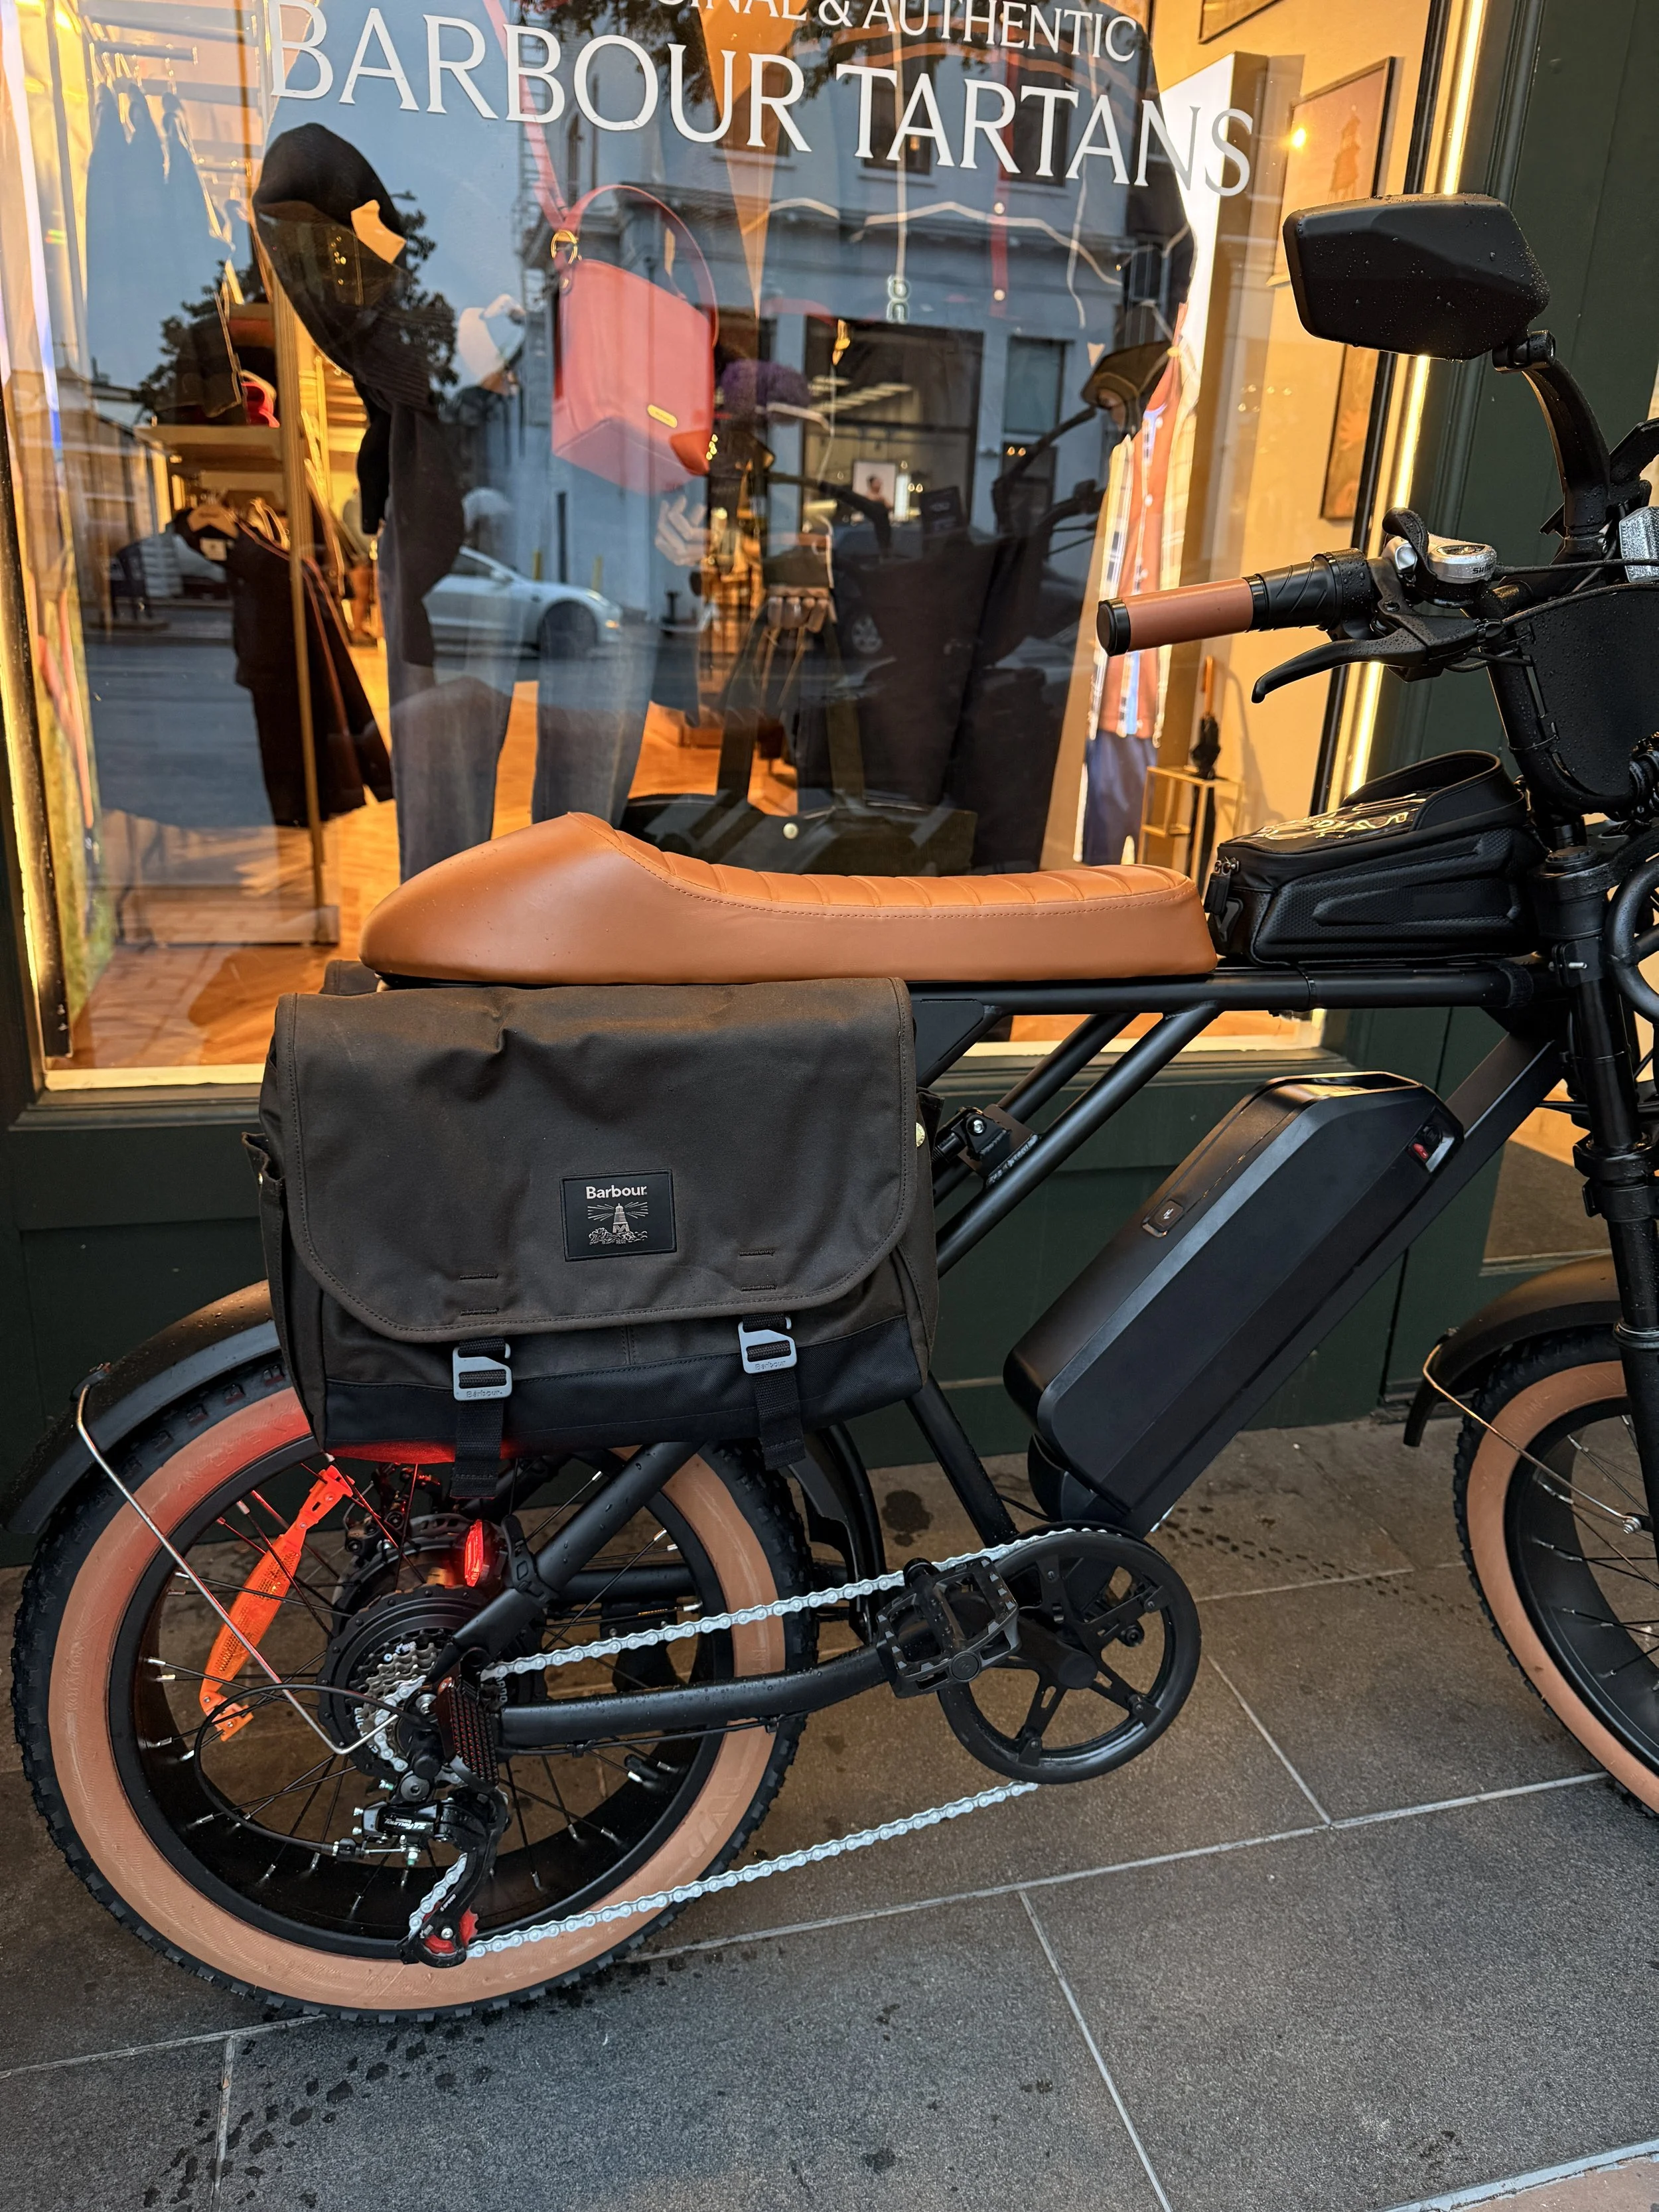
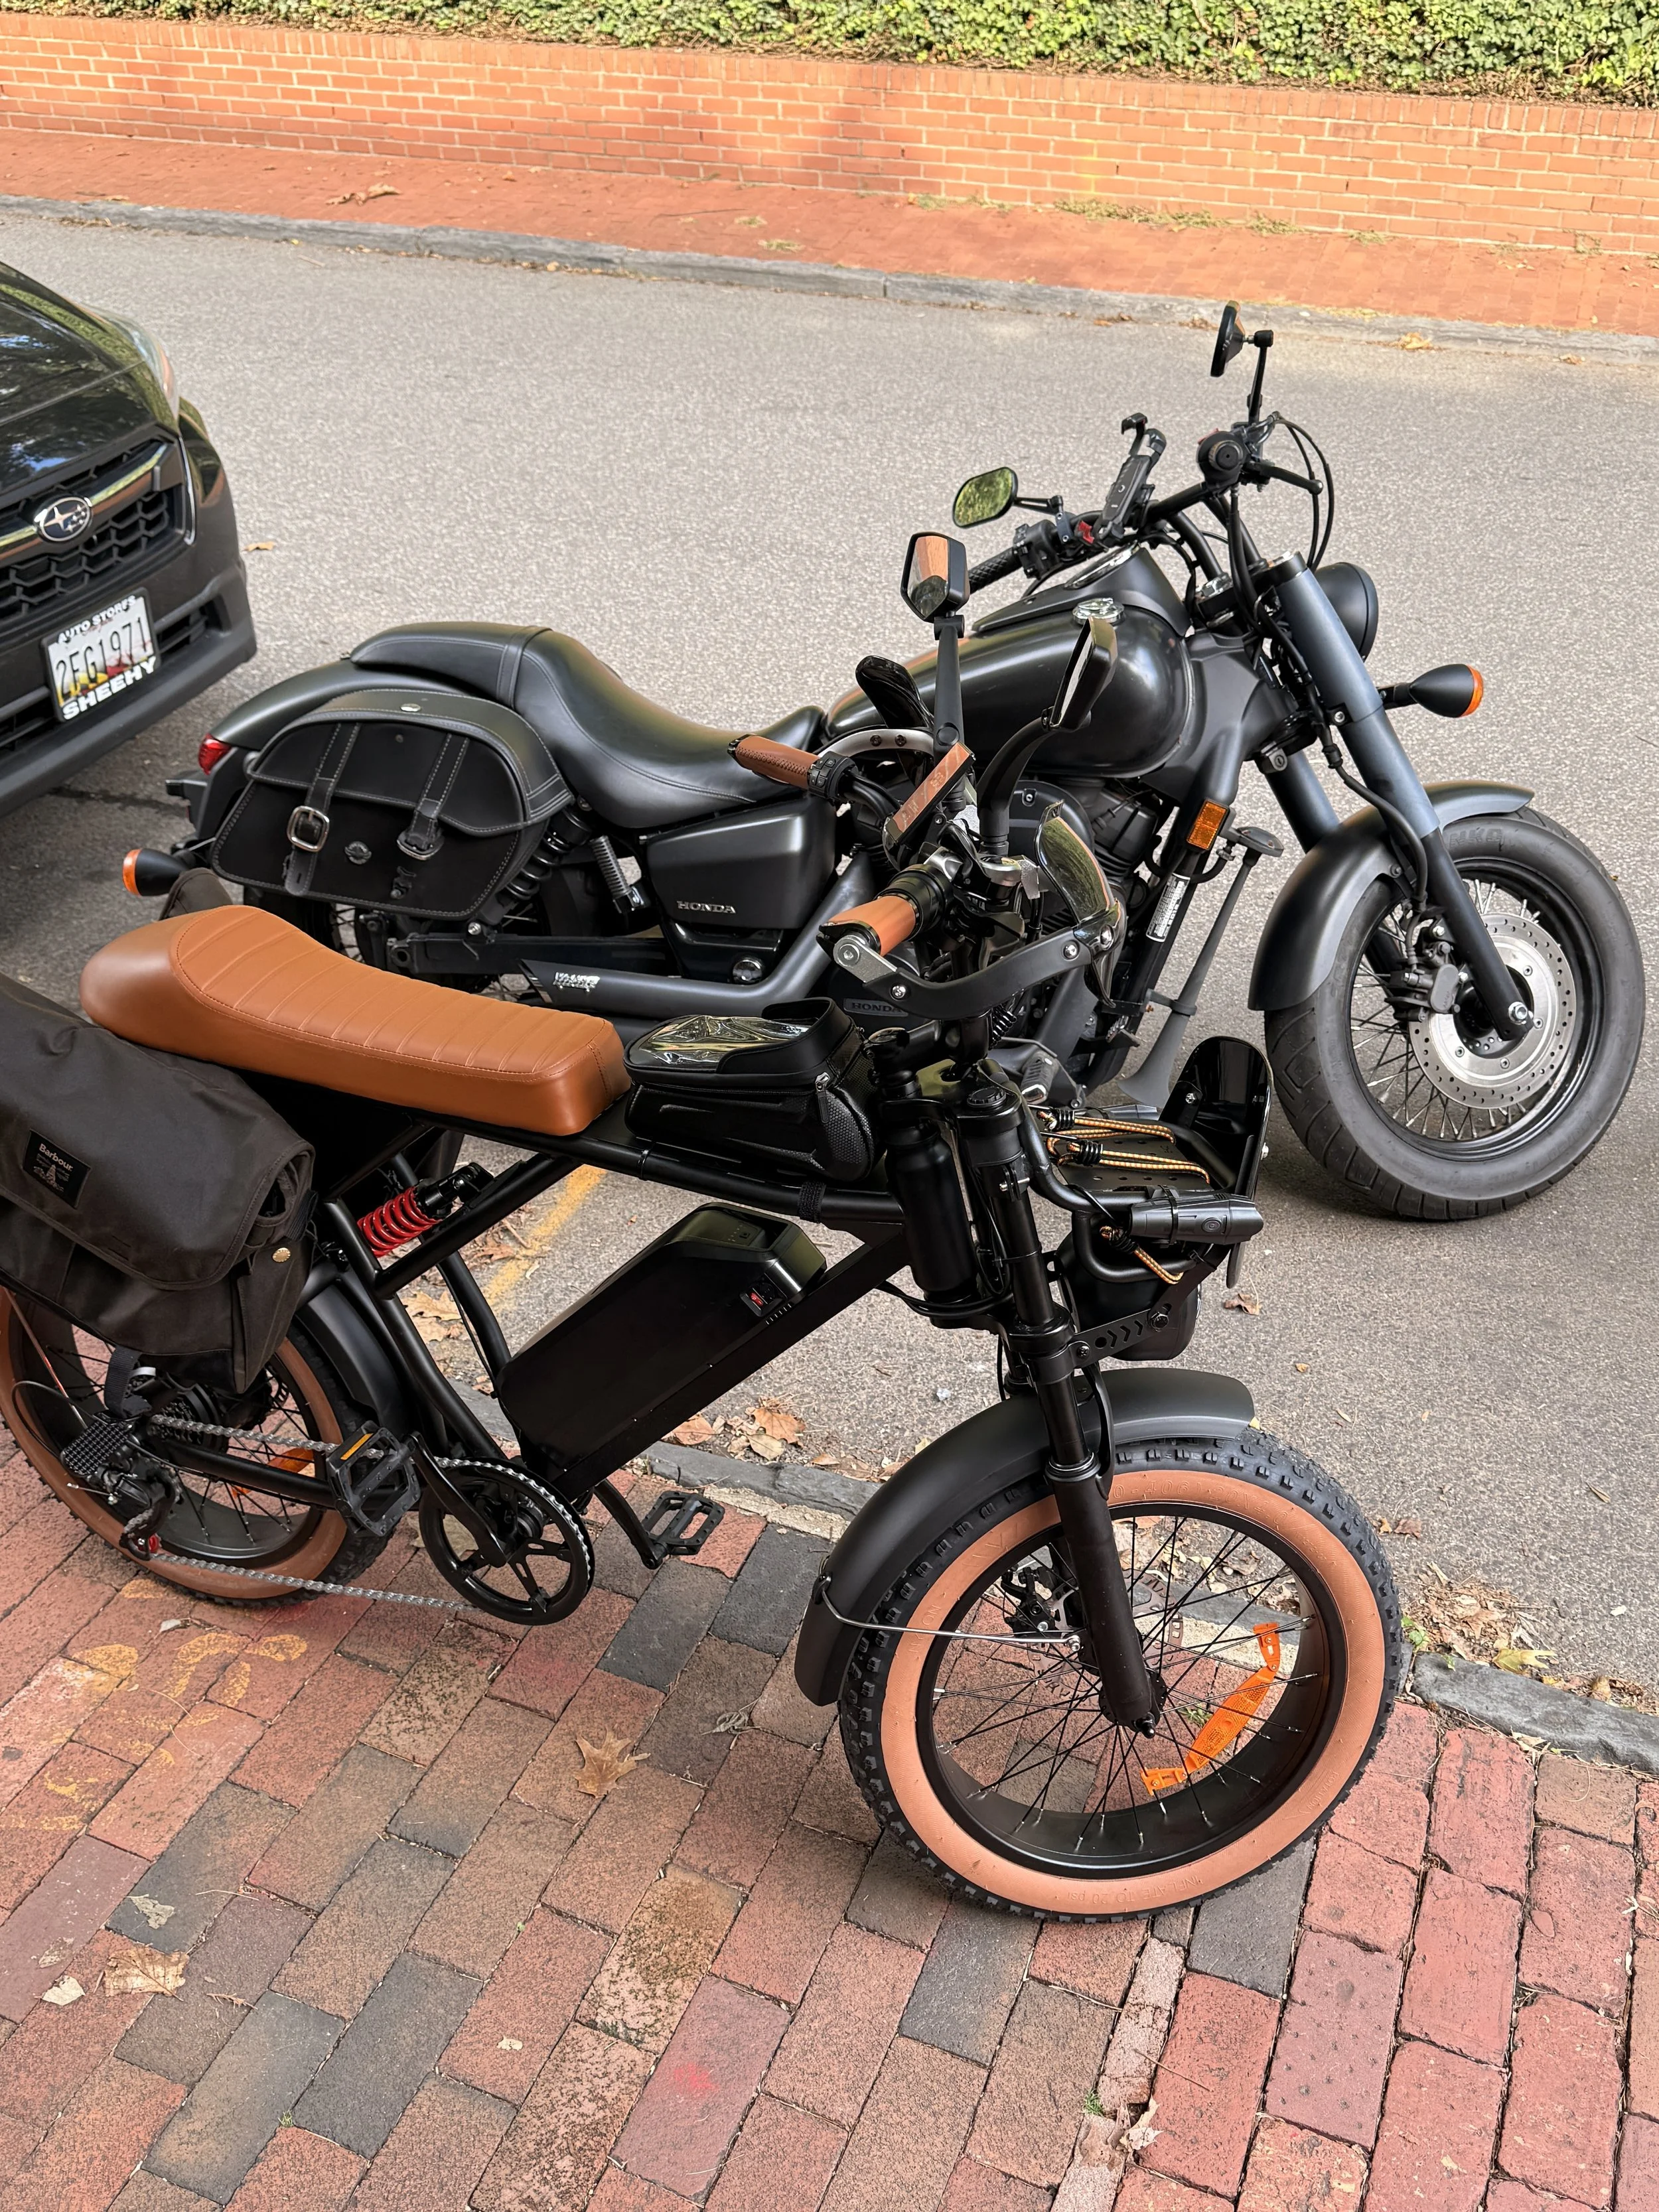
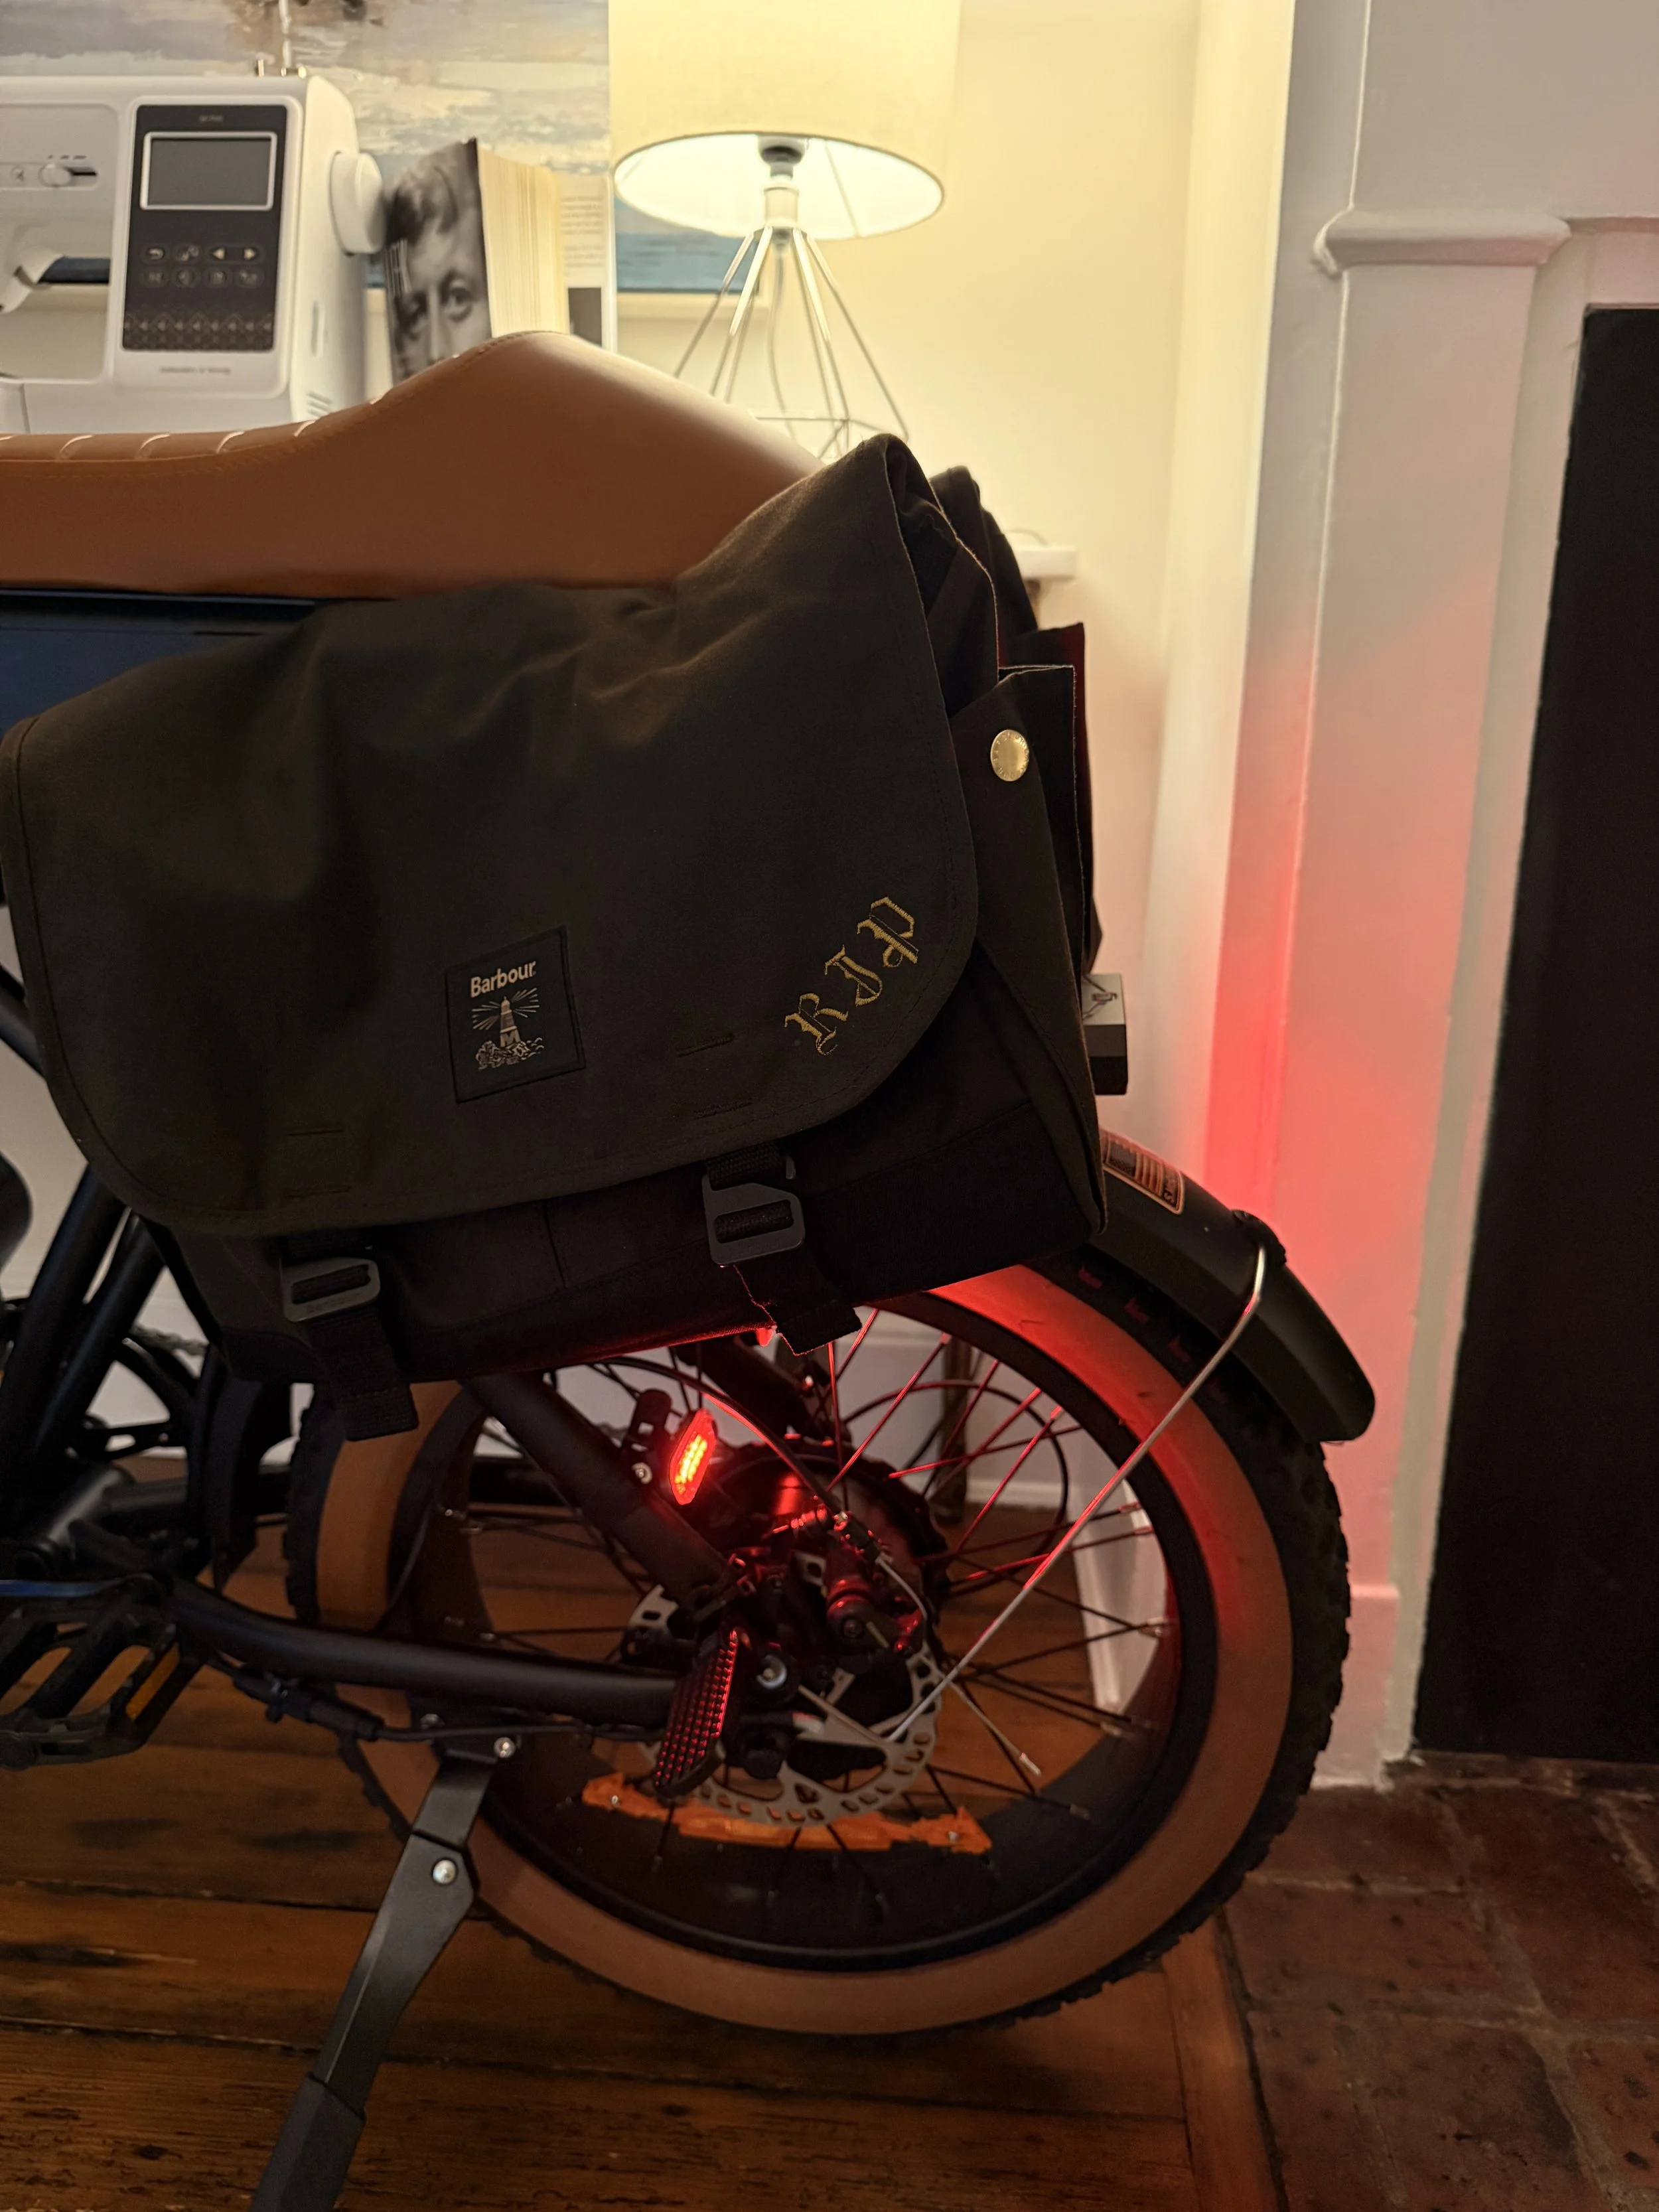
One of the most distinctive parts of the finished bike is the pair of waxed-cotton Barbour messenger satchels mounted on either side.
I wanted genuinely useful storage because I mainly use the bike to zip around Georgetown, commute to work, pick up groceries, and occasionally deliver embroidery orders. At the same time, I didn’t want conventional synthetic panniers hanging off the bike.
The visual inspiration came partly from classic Barbour advertising and the long history of waxed cotton as practical outdoor clothing and equipment. The satchels gave me the combination I wanted: traditional materials, weather resistance, and something that looked much more at home with the brown seat and tires.
Waxed Satchels: View the Barbour Waxed Satchels →
Mounting the Bags
The mounting system turned out to be surprisingly simple.
I removed the seat, cut the top carrying handles on the two satchels right in half, joined the straps across the frame, and secured them together. The seat was then reinstalled on top of the joined straps, effectively trapping them in position and allowing the bags to sit permanently on either side of the bike.
I also removed the original shoulder straps completely. I don’t intend to carry these as messenger bags anymore; they are now dedicated water-resistant storage for the bike.
The amount they hold is impressive. I can fit my large MacBook Pro in one and still have plenty of room left for groceries, work supplies, or embroidery deliveries.
Adding Locks to the Bags:
I also plan to add small locks to the satchels. For that, I ordered leather-and-brass purse strap mounting hooks, which should create a much cleaner attachment point for a lock than adding modern-looking hardware.
Leather & Brass Bag Hardware: View the sew-on bag hardware here
Security
For the bike itself, I use two Sportneer five-digit combination chain locks.
I went with the longer, heavier version because the bike is substantial and I wanted enough chain length to have some flexibility when locking it to different racks and posts around the city.
One advantage of using a combination lock is that there is no key to lose, which is particularly useful when I’m already carrying work items, groceries, or embroidery orders.
The chains also fit inside the central phone/storage bag when I’m riding. I always tie through the body, front wheel, and post. And if I’m not around for a while I use the other chain to lock the rear tire to the body.
Sportneer Combination Chain Lock: View the bike lock chains here
Mirrors & Visibility
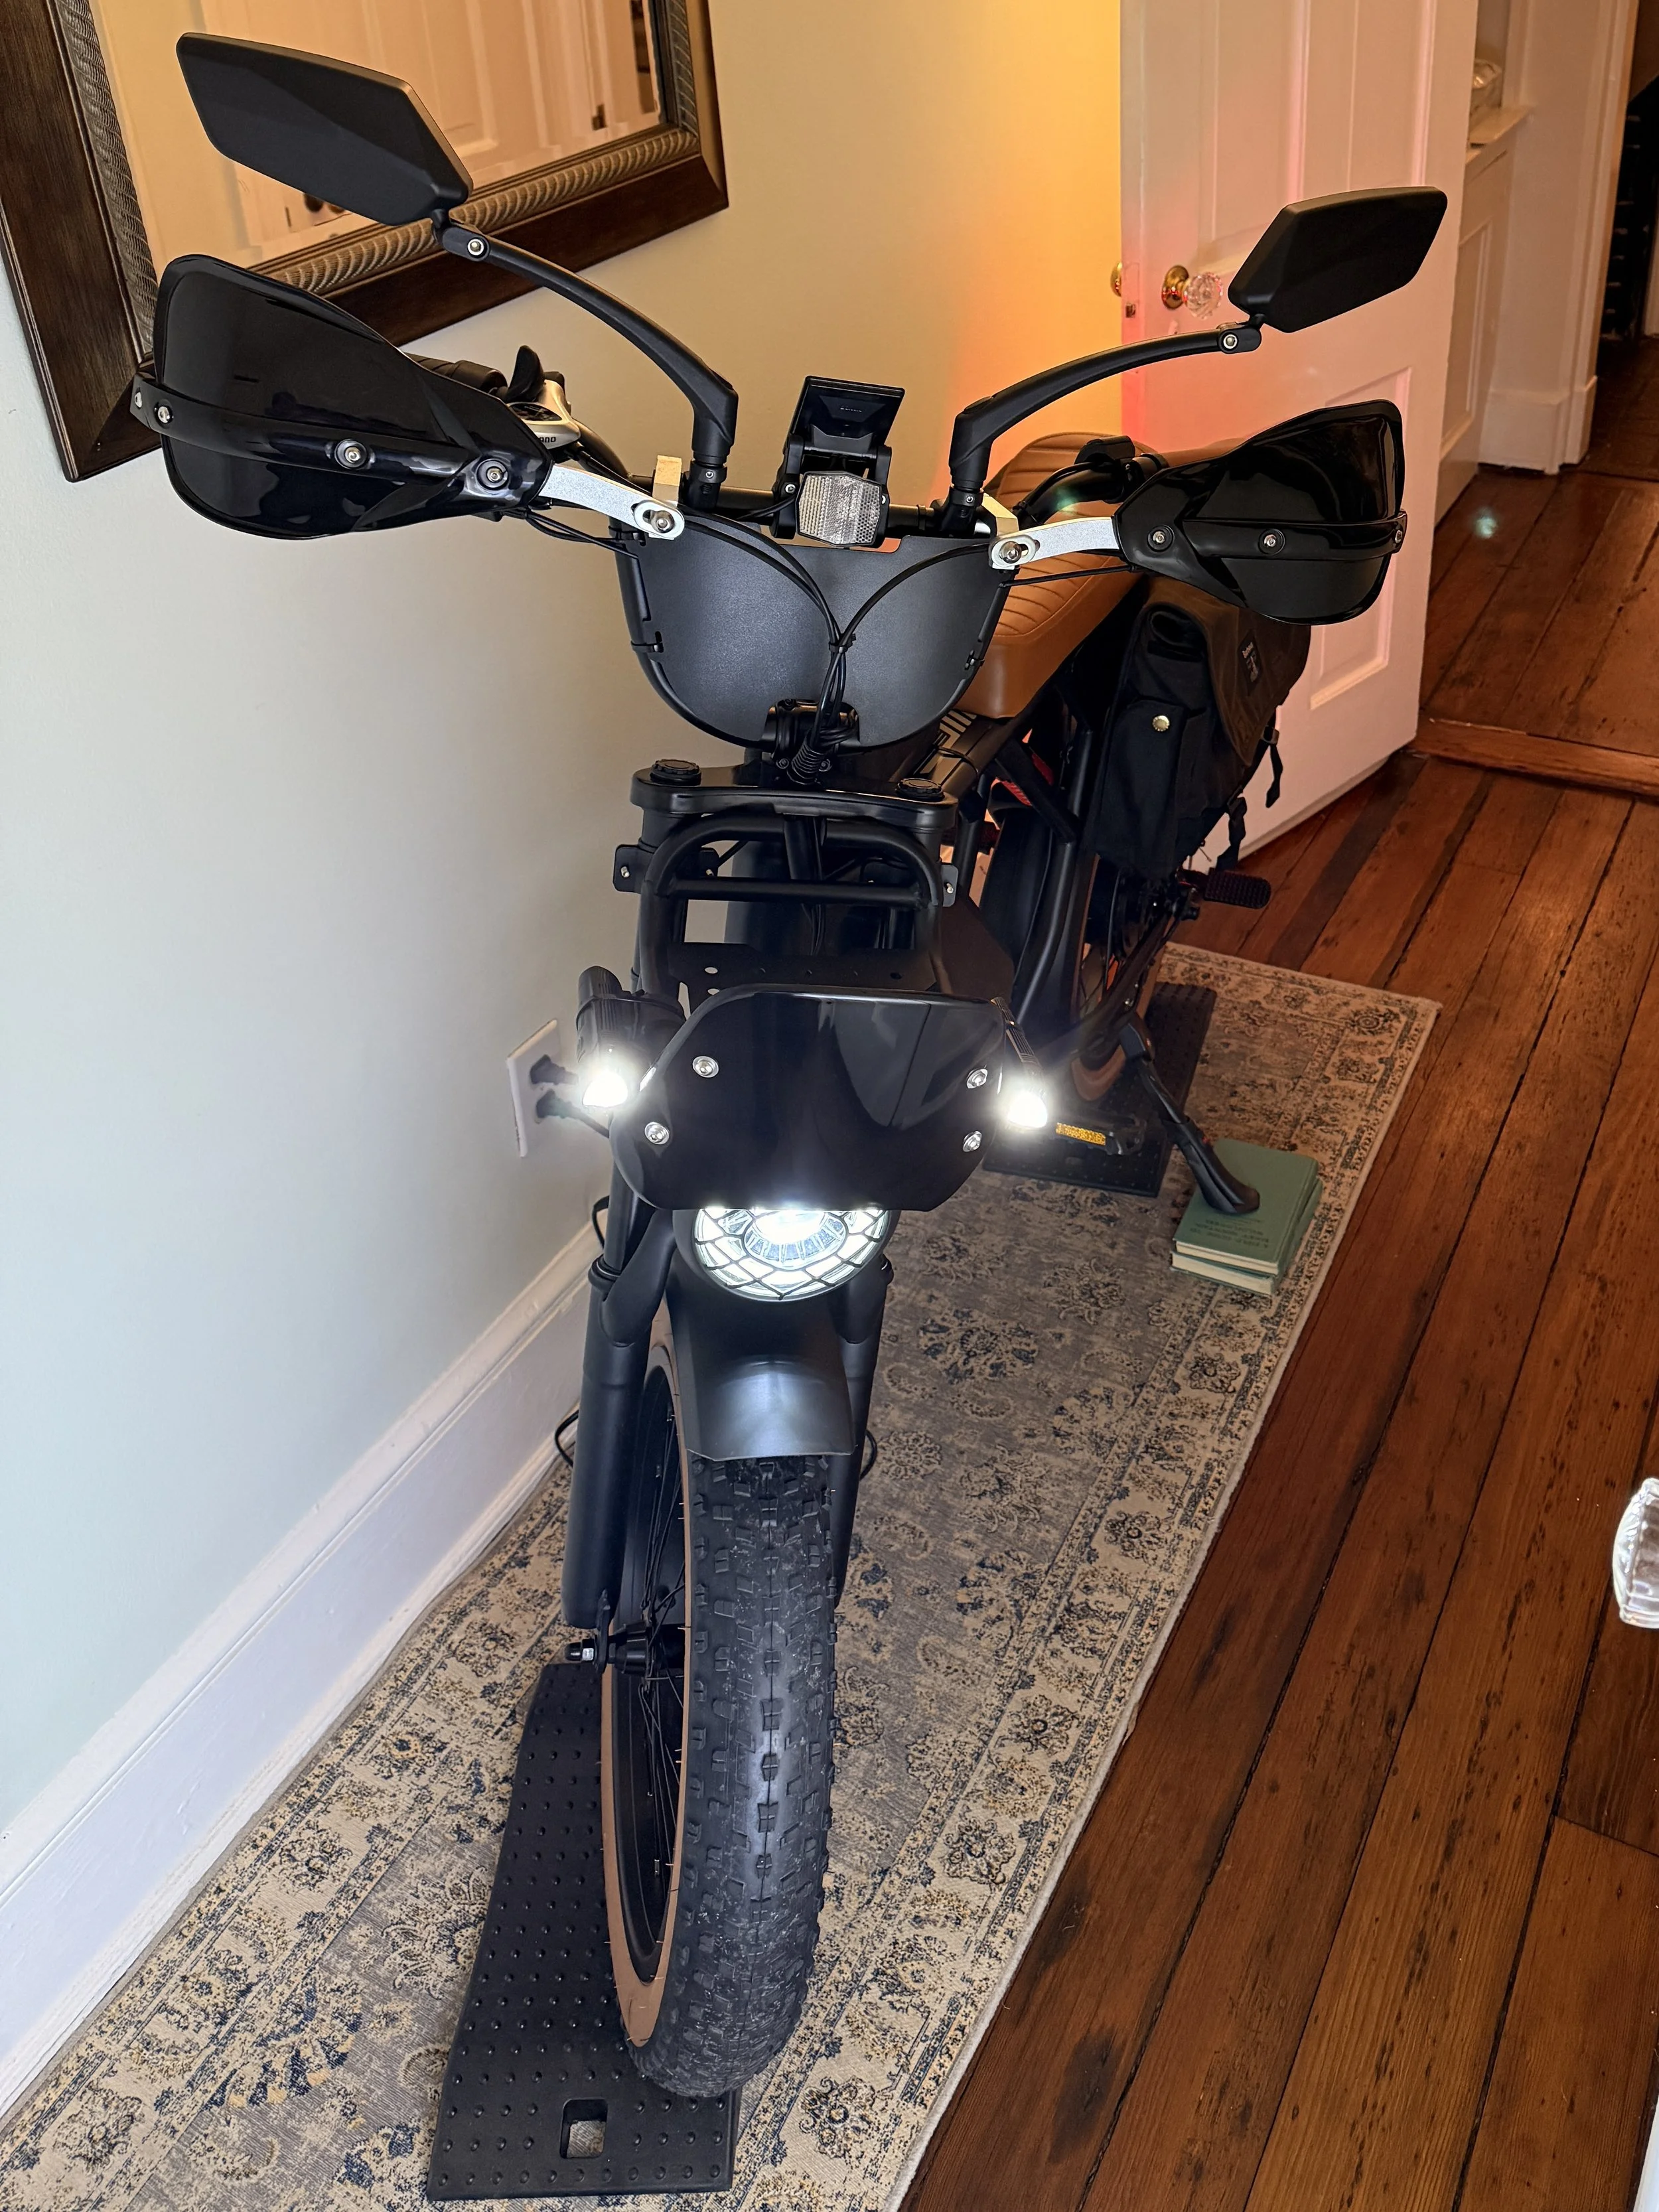
One of the more practical upgrades was adding a pair of long-arm rear-view mirrors.
The bike is larger and faster than a conventional bicycle, so being able to see traffic behind me without constantly turning around makes riding through busier streets much more comfortable.
The mirrors are adjustable and extend far enough outward that I can actually see behind my shoulders rather than mostly seeing my own arms.
They also happen to suit the slightly motorcycle-inspired direction the bike has taken.
Handlebar Mirrors: View the mirrors here
Lighting & Electronics
I’ve probably gone a little overboard with lighting, but visibility was one area where I didn’t mind having some redundancy.
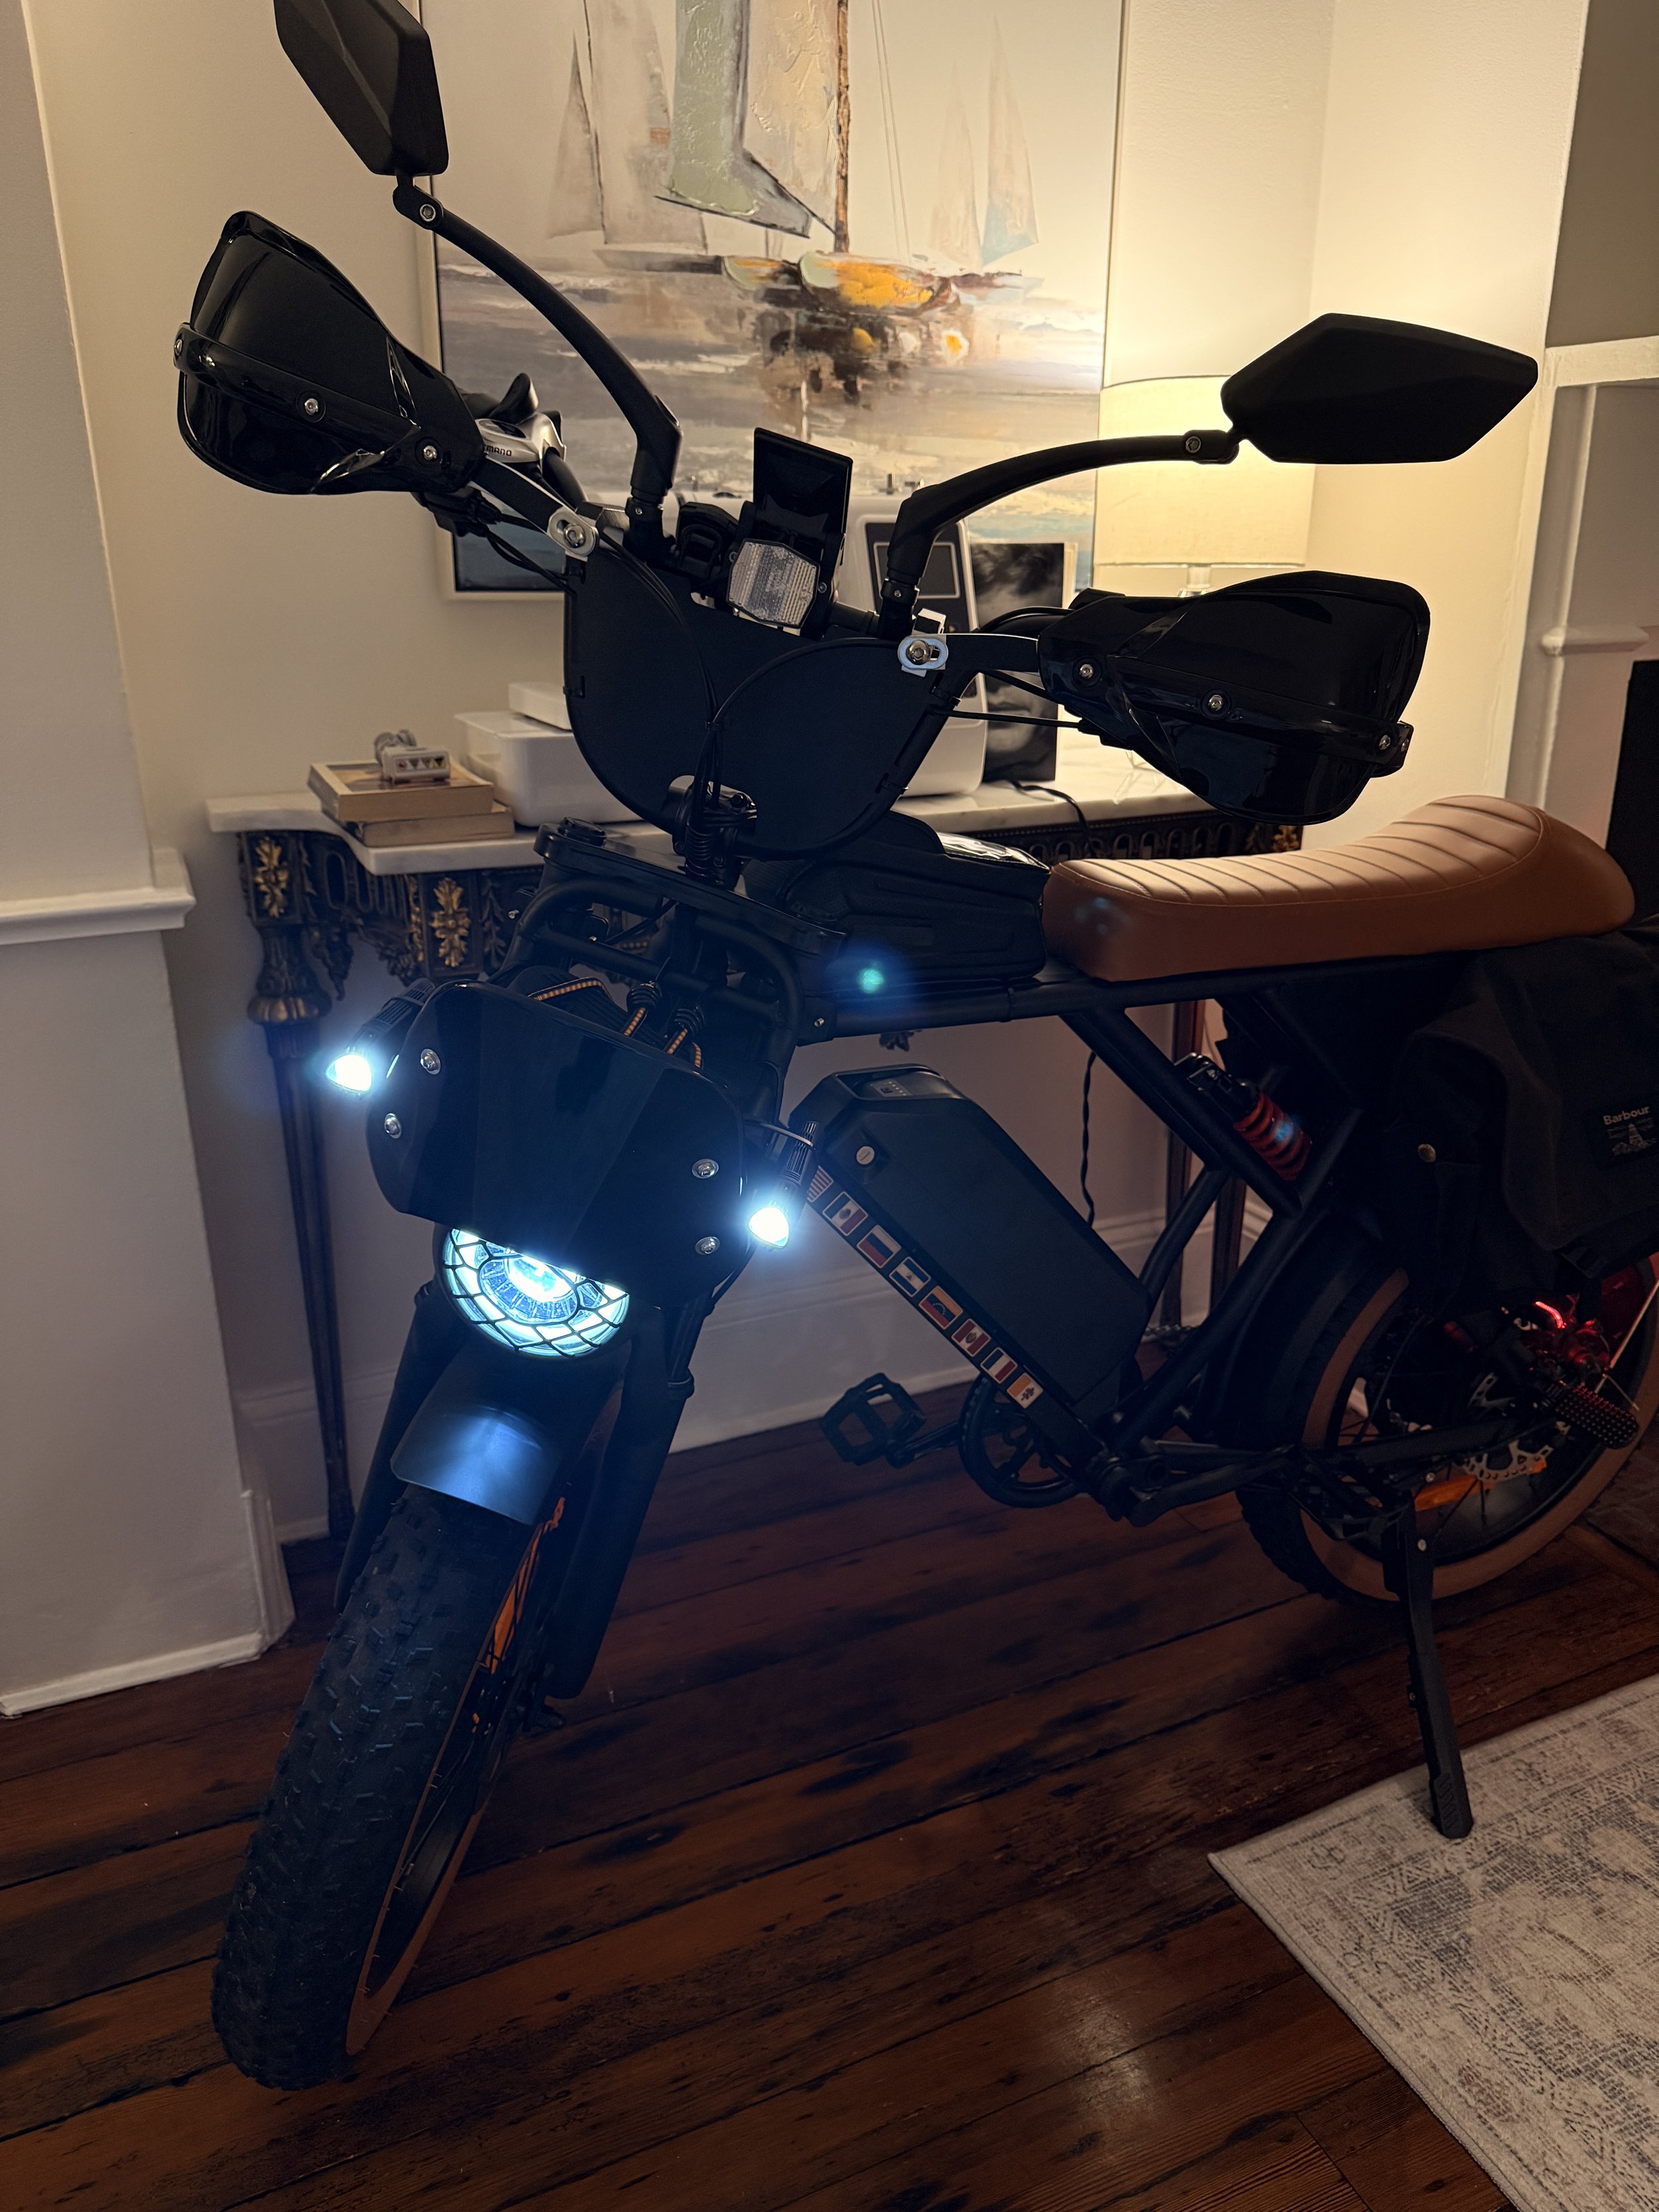
The bike now has two additional white front-facing lights and multiple red lights at the rear, in addition to its original lighting.
Additional Front & Rear Lights
For the additional lighting, I used the Ascher Ultra Bright USB Rechargeable Bike Light Set.
They are compact, rechargeable, easy to mount, and have several lighting modes. I added two white lights facing forward and two red lights at the rear.
Ascher Rechargeable Bike Lights: View on Amazon →
Turn Signals & Rear Projection Light
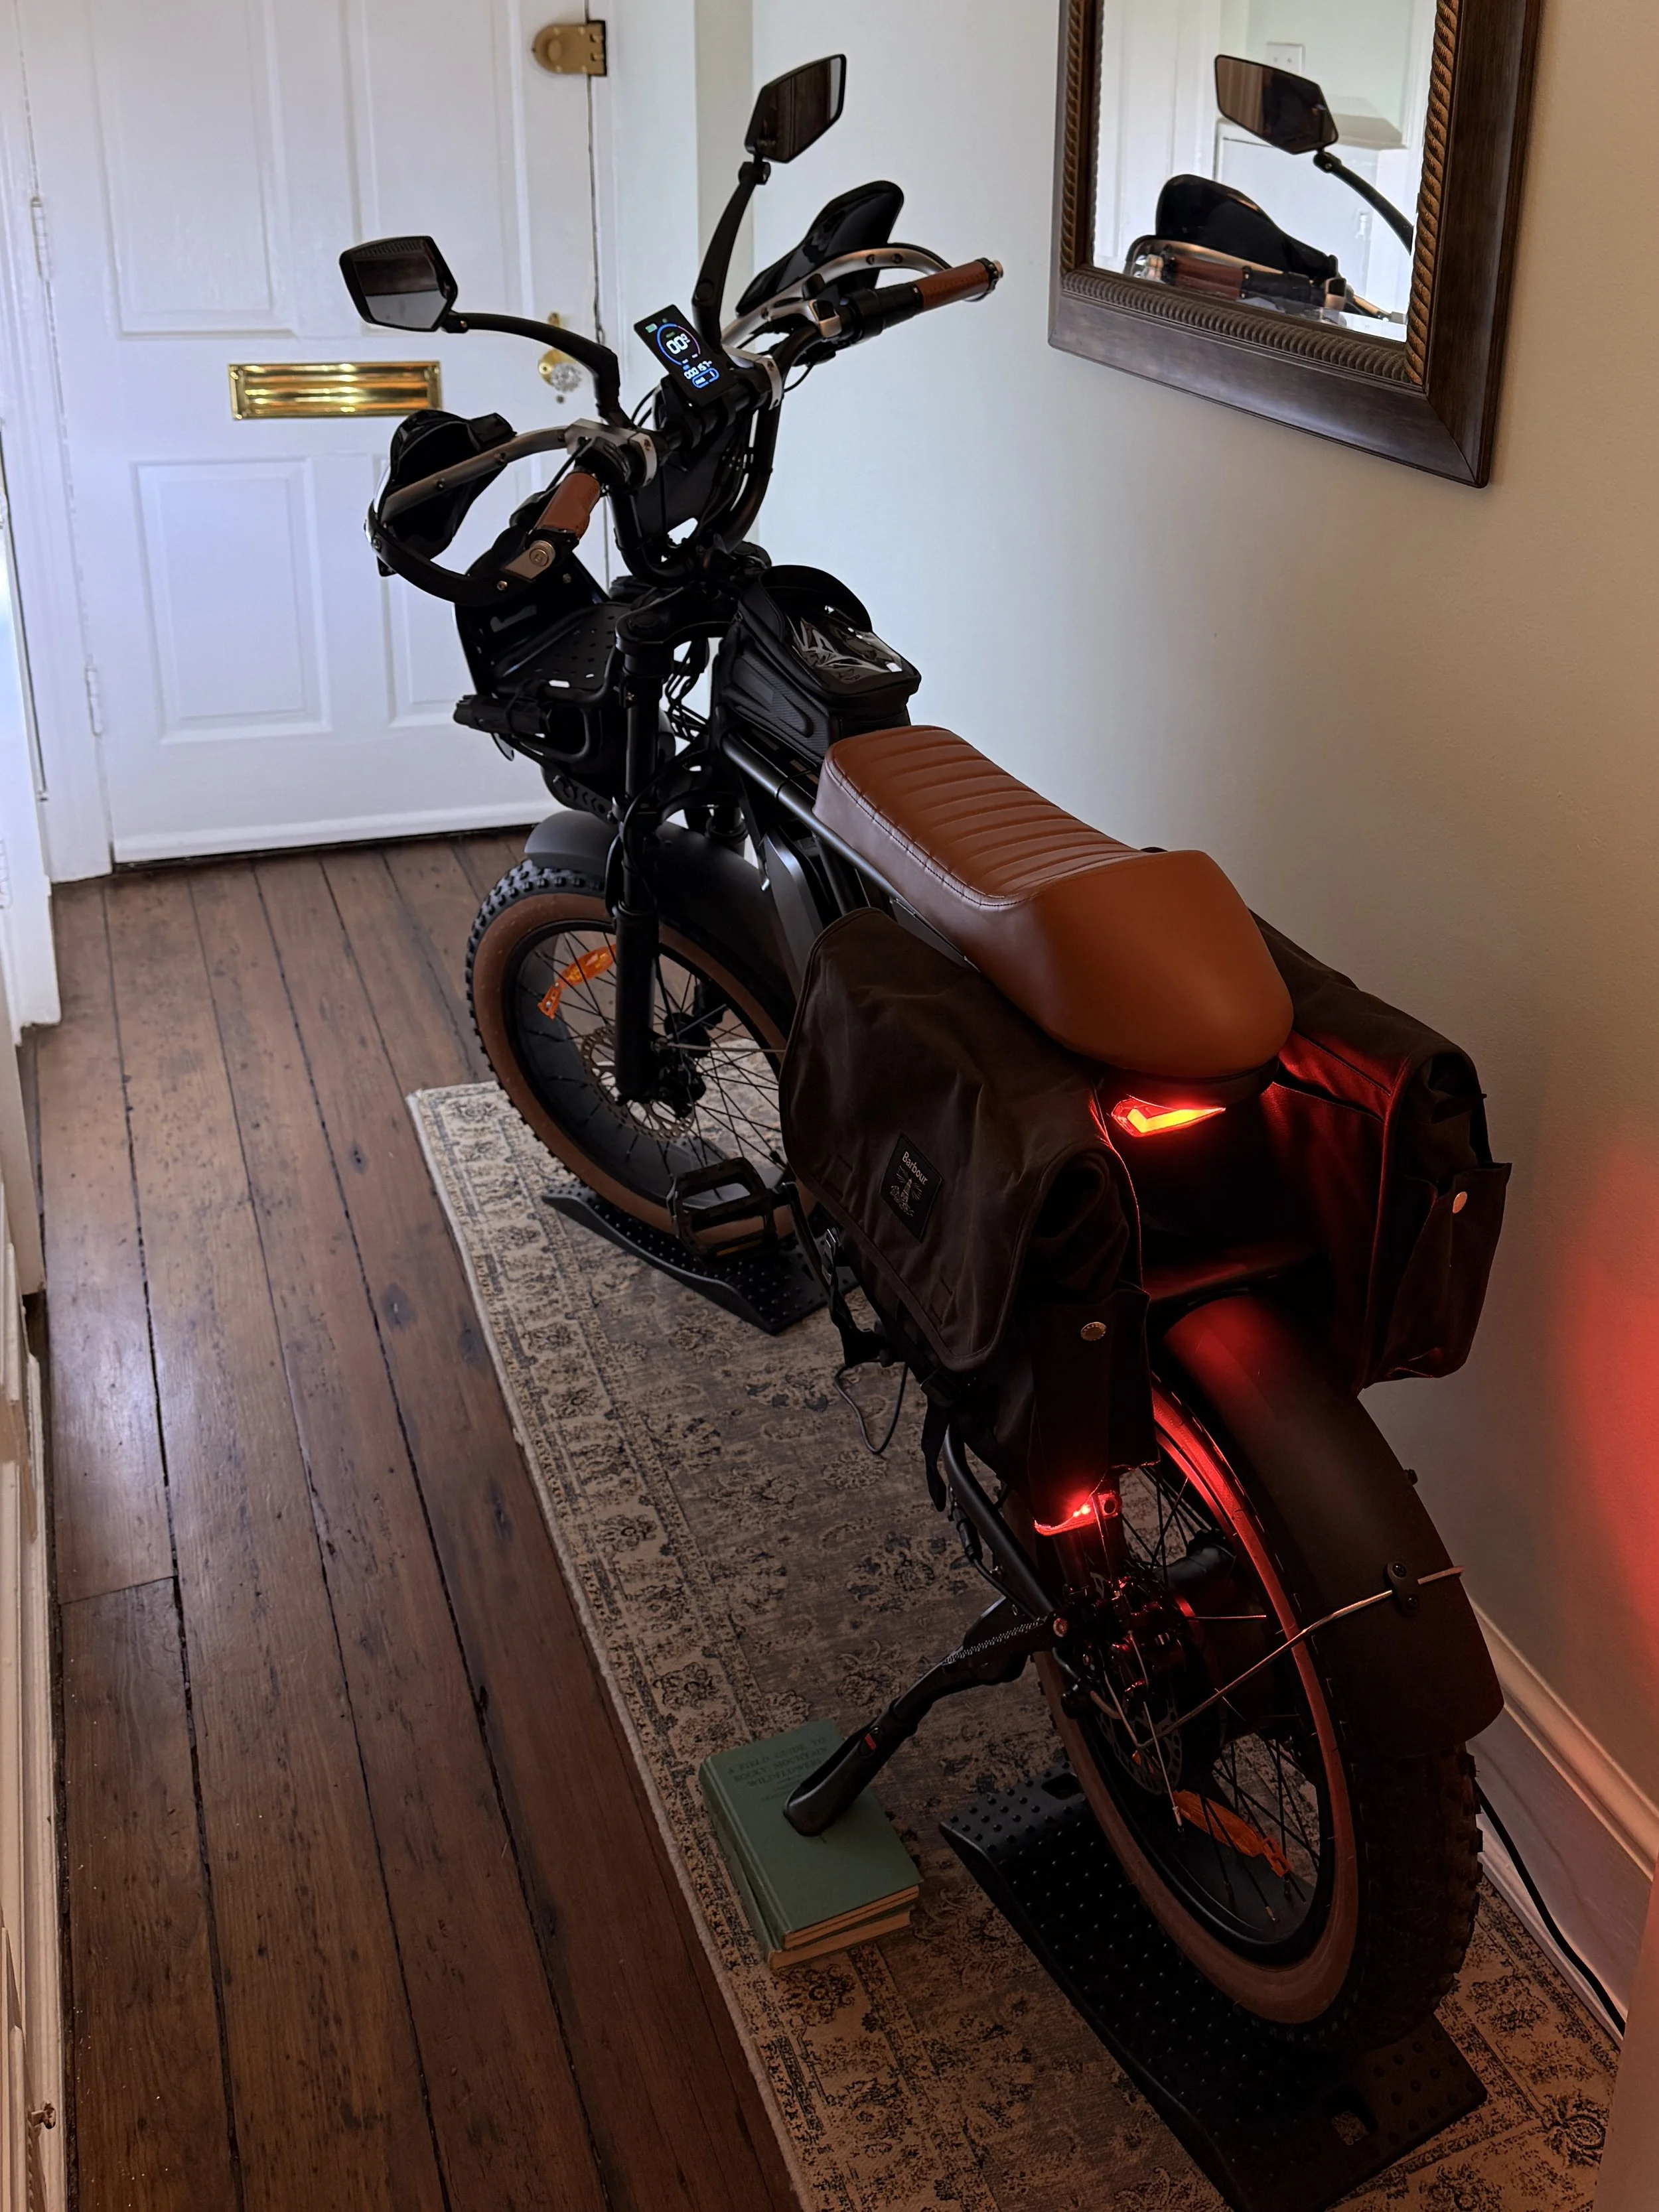
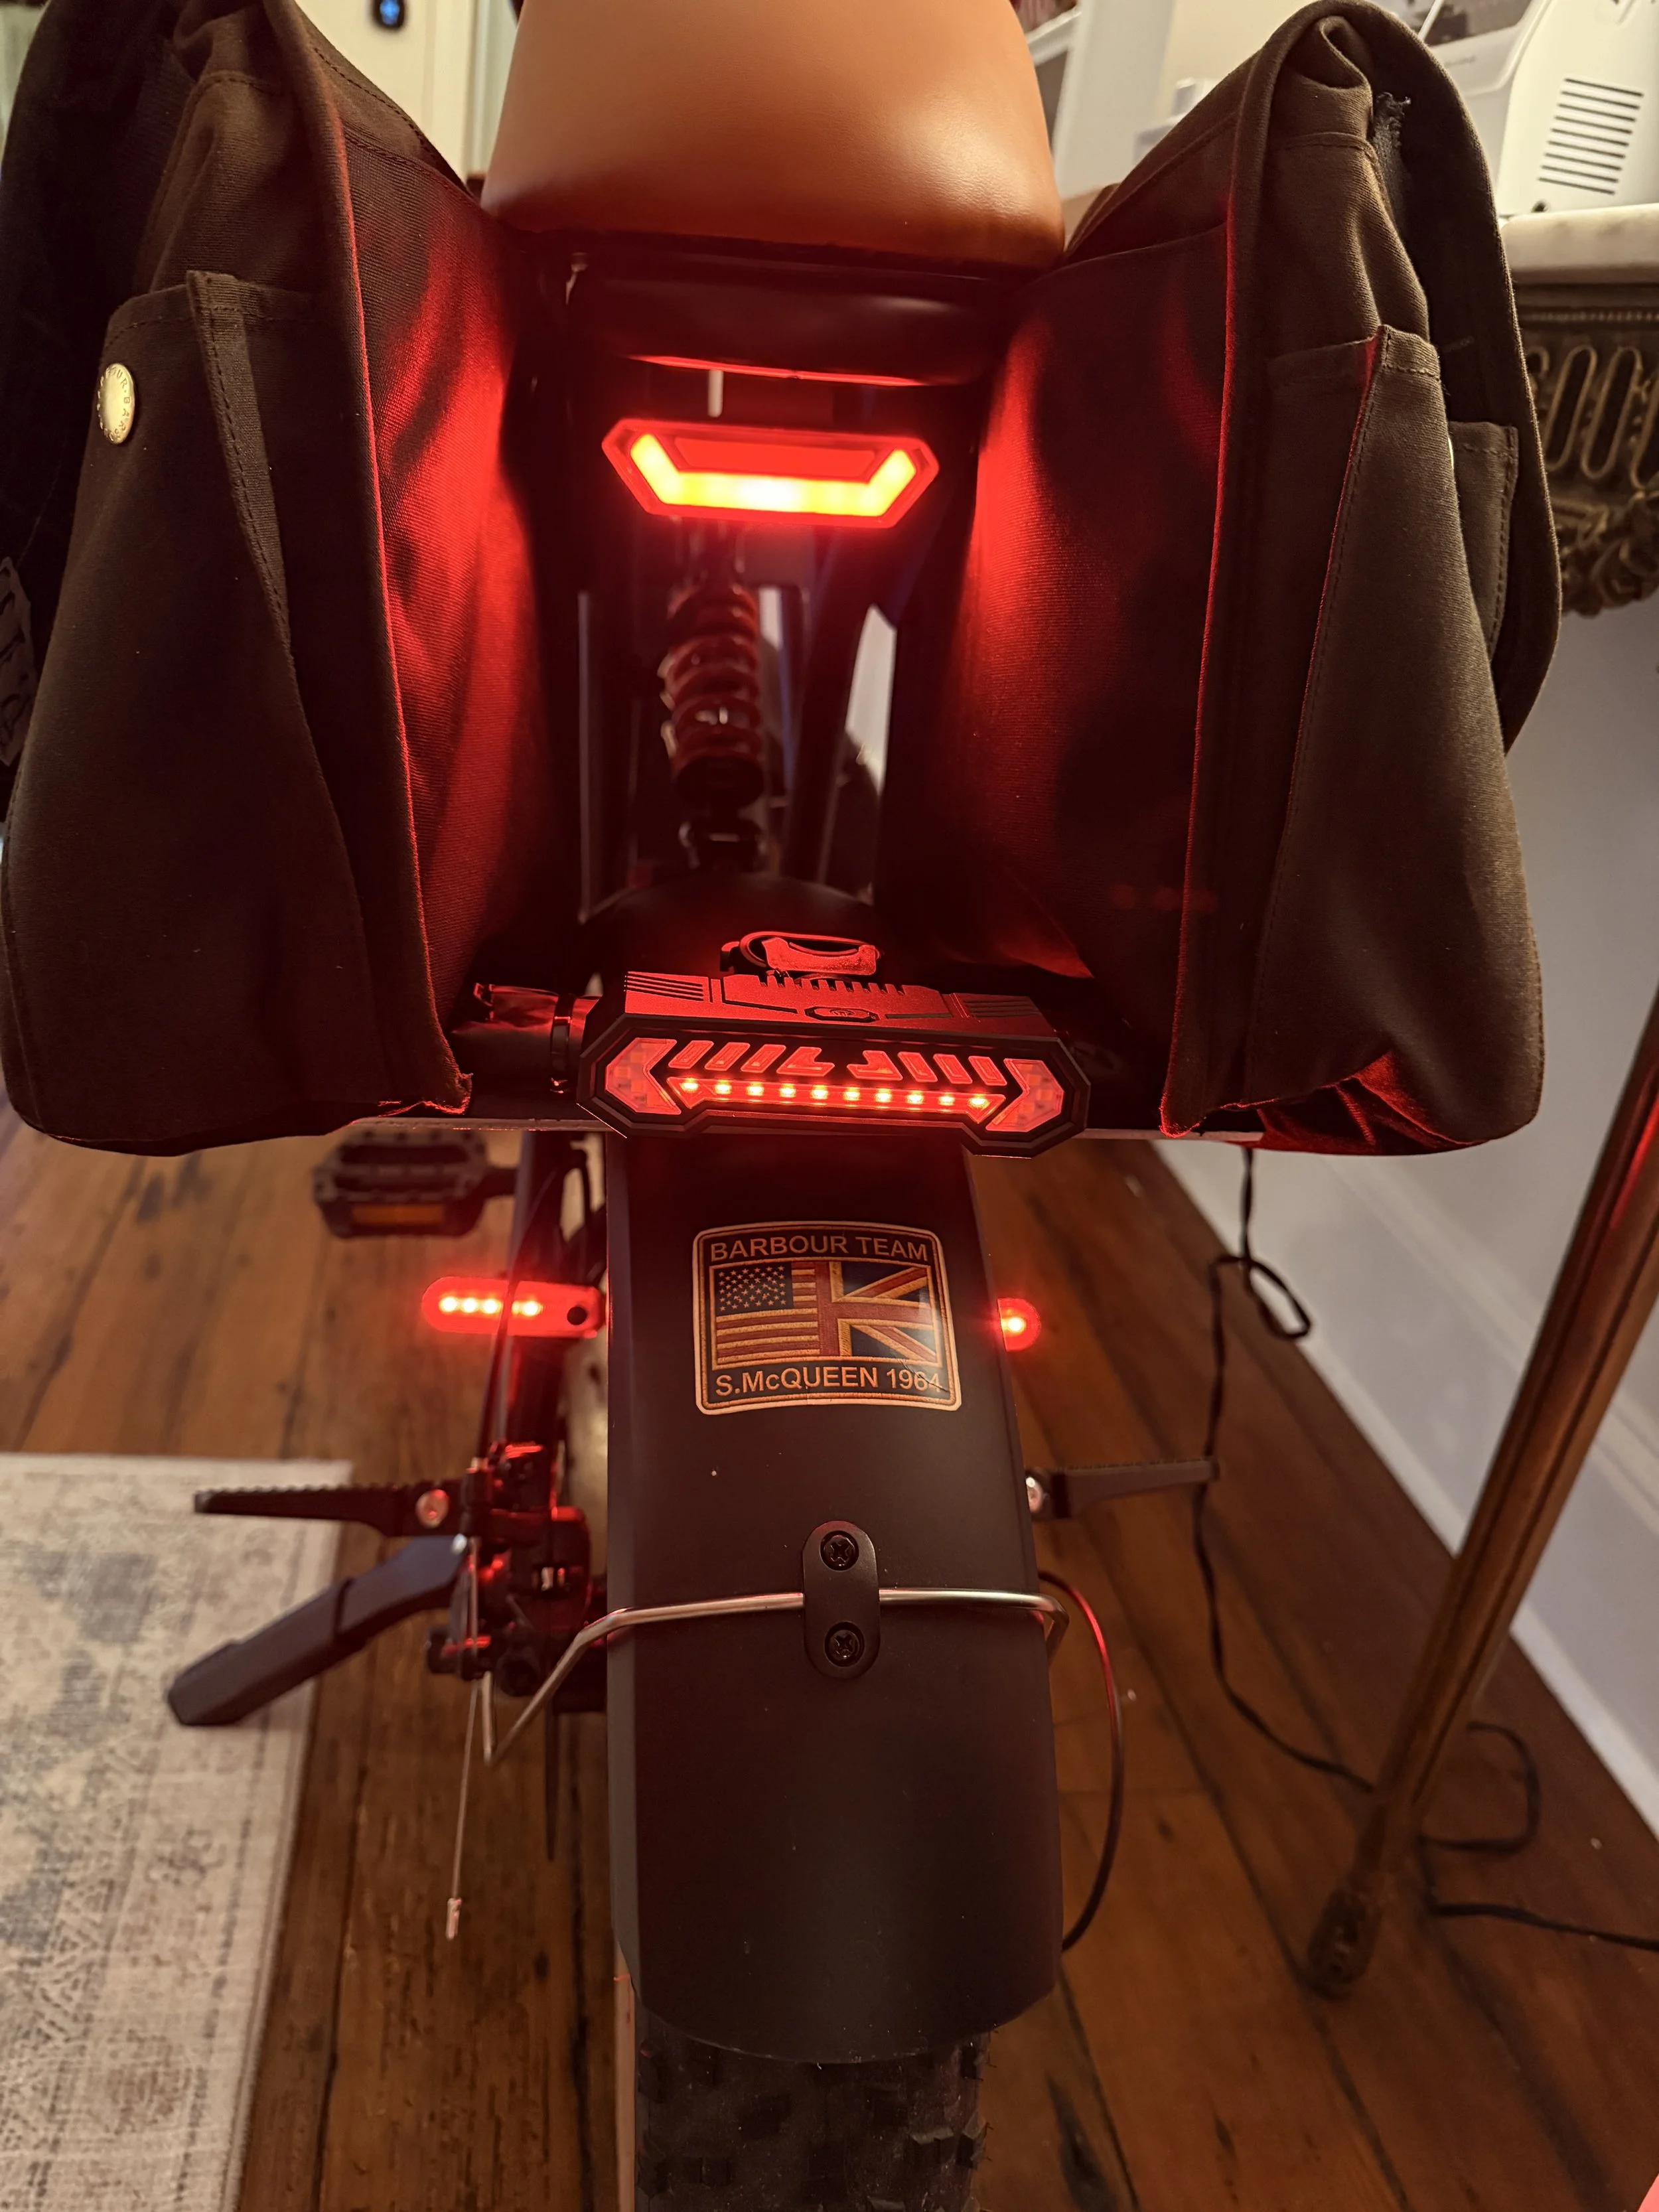
I also added a more elaborate smart rear light with remotely controlled turn signals.
In addition to the indicators, it projects illuminated lane markings onto the road beneath and behind the bike, which is a feature I particularly like at night.
The unit also includes a very loud audible warning function. I personally found the sound excessive for how I use the bike, so I modified my own unit to silence the speaker.
That was a personal modification to my own light—not an installation recommendation—and altering an electrical product may affect its intended safety functions or warranty.
Smart Rear Turn-Signal Light: View on Amazon →
With this much lighting, I haven’t felt a need to add separate reflectors yet.
Phone & Small-Item Storage
I haven’t needed dedicated phone charging so far, but I did want somewhere secure and visible to keep my phone while riding.
I installed an oversized ROCKBROS top-tube phone bag with a clear upper panel. The compartment underneath is much more useful than I expected and is where I usually keep my bike chain and smaller accessories.
Having that storage in the center of the bike means I don’t need to open one of the larger side satchels every time I need something small.
The bag originally had prominent branding on it, which I covered using the same matte-black vinyl I used elsewhere on the bike.
ROCKBROS Phone Bag: View on Amazon →
Matte Black Vinyl: View on Amazon →
Café-Racer Front Deflector
One of the less conventional additions is a small café-racer-style windshield/flyscreen mounted above the original headlight.
This accessory is technically designed for motorcycles rather than this particular e-bike, so it was definitely not a perfect bolt-on installation.
Amazon actually flags this item as frequently returned, and I can understand why. The mounting hardware required some adjustment before it sat where I wanted it.
Fortunately, I’m a big believer in making things work. I bent the metal mounting hardware slightly and used zip ties where useful to get everything positioned securely.
If you want an accessory that installs perfectly without modification, I would probably look for something designed specifically for your particular bike. If you don’t mind adapting hardware, however, I’m very happy with how this one looks.
It made a surprisingly large visual difference and gave the front of the bike much more of the vintage café-racer character I was after.
Café-Racer Front Flyscreen: View on Amazon →
Handguards
To continue that motorcycle-inspired front-end appearance, I also added a pair of black JFG Racing handguards.
They were originally intended for motorcycles and dirt bikes, but aesthetically they made sense with the flyscreen and larger front light.
Like several parts of this project, they are less about buying an accessory specifically marketed for my exact e-bike and more about finding components I like and figuring out how to make them work together.
They also provide a little additional protection around the hands and controls.
JFG Racing Handguards: View the handguards here
Passenger Footrests
I added a pair of small folding aluminum rear foot pegs. I was able to screw the bottom on using a larger washer than provided and put it under the steel rods holding the rear splashguard. Then I used two zip ties on each side through the top hole, securing the foot pegs to the bike body. You could probably be better off looking for a more compatible footrest, but I liked the look of these, and I made it work.
They fold upward when they aren’t being used, which means they don’t noticeably increase the bike’s width or interfere with the overall look. But I also like to keep them unfolded for more volume.
They are one of those inexpensive little additions that make the bike feel more finished.
Folding Rear Footrests: View the footrests here
Helmet
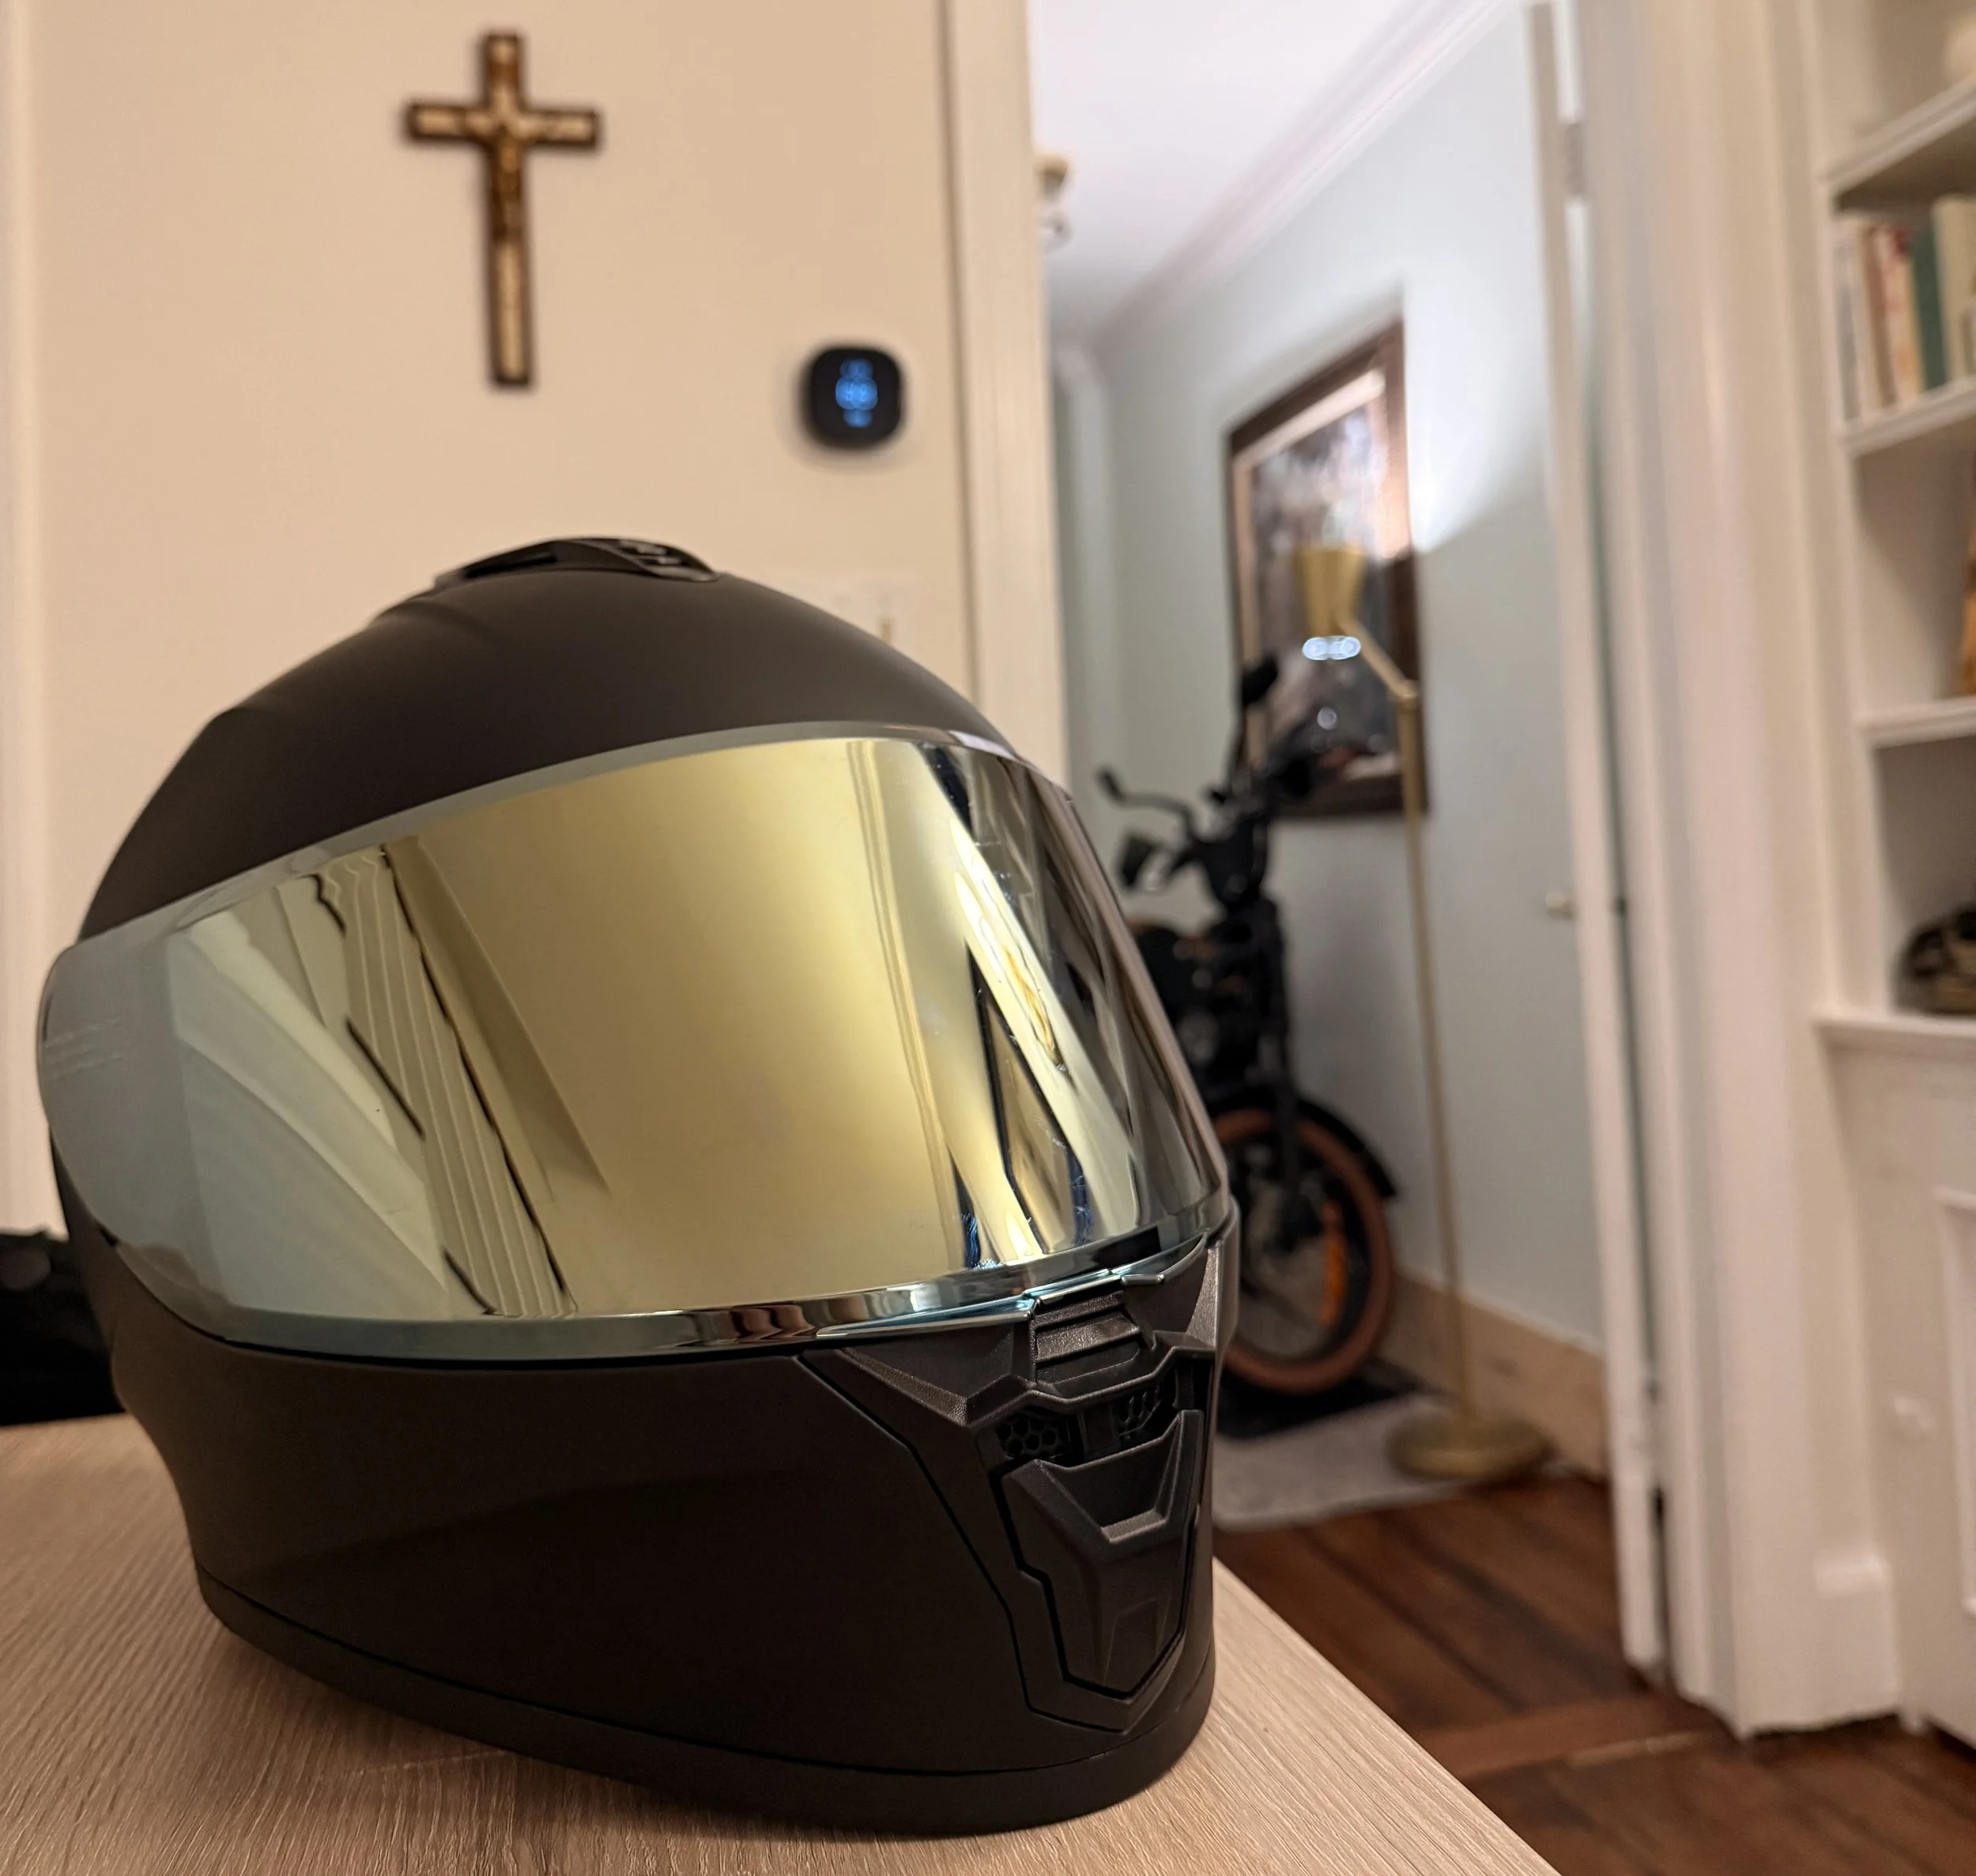
With a bike this substantial, I wanted something more protective than the lightweight bicycle helmets I was accustomed to seeing.
I chose a full-face DOT-approved motorcycle-style helmet in matte black.
Aside from the additional coverage, I liked that the helmet visually suited the bike. The version I chose has a gold-tinted visor, which adds a little personality without making the rest of the helmet overly elaborate.
As with any helmet, fit matters more than appearance, so anyone buying one should measure carefully and choose the appropriate size. I feel like mine ran a little small, but the cheek pads are removable, so I may get a larger size at another time.
Full-Face Helmet: View the helmet here
Portable Tire Pump
One accessory I really wanted to keep with the bike was a compact electric tire pump.
The fat tires are one of the bike’s best visual features, but they also mean I don’t want to be stranded somewhere trying to inflate one manually.
I chose the ETENWOLF S0 Mini Electric Bike Pump, which has a built-in pressure gauge and is compact enough to store with the rest of my gear.
For an e-bike I actually use for commuting and errands, this is the kind of accessory I’d rather have and never need than need and not have.
ETENWOLF Mini Electric Pump: View the pump here
Kickstand Upgrade
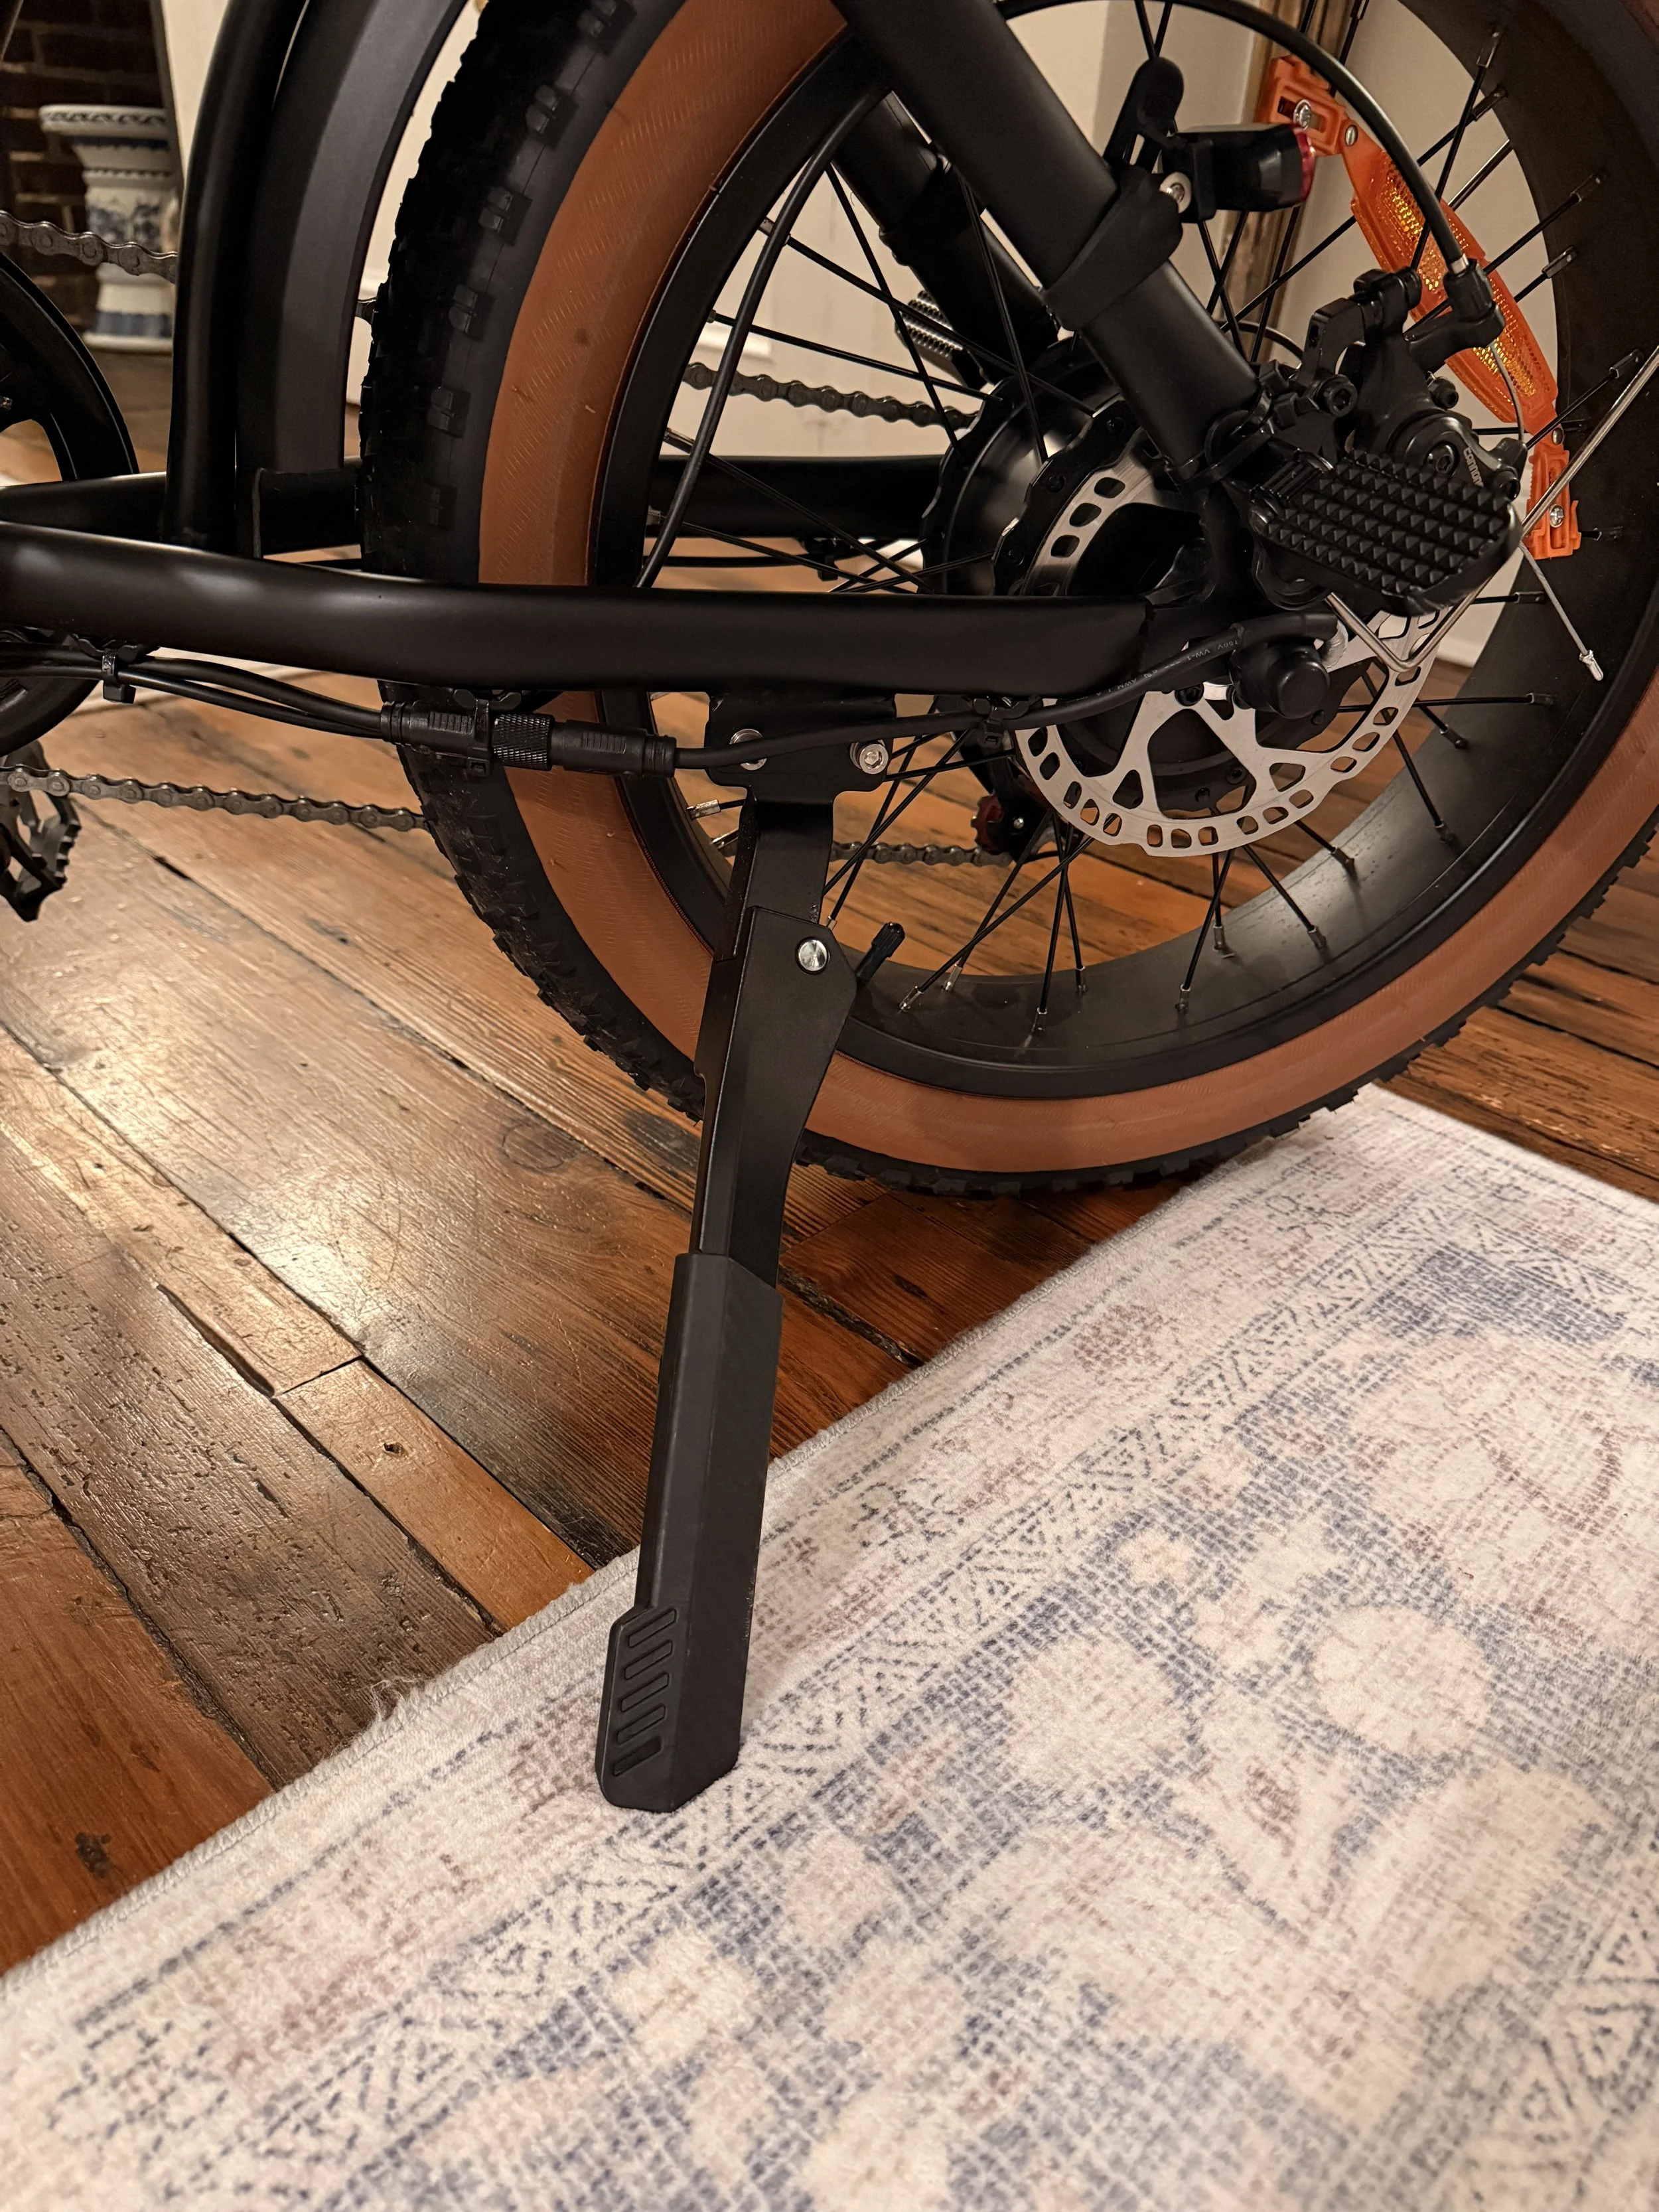
The bike’s weight made me pay more attention to the kickstand than I initially expected.
I eventually added a heavier-duty HENMI adjustable e-bike kickstand, designed to support considerably more weight than a typical lightweight bicycle stand.
A sturdier stand is especially helpful once you start adding bags, locks, accessories, and groceries to the bike.
Heavy-Duty E-Bike Kickstand: View the kickstand here
Parking & Storage
Because the bike spends time parked indoors as well as outside, I experimented with a couple of very simple ways to keep it stable and protect the tires (and my carpet) while it sits.
Rubber Tire Saver Ramps
I added a pair of rubber tire-saver ramps for longer periods of indoor storage.
They create a slightly cushioned surface beneath the tires and also help give the bike a defined position when parked.
Rubber Tire Saver Ramps: View the tire savers here
The Extremely High-Tech Accessory
One surprisingly useful addition is simply a large heavy-duty rubber doorstop.
Wherever I go, I don’t want to awkwardly hold a door open with my behind and push the bike through the door, hitting the pedals on stuff. So I calmly prop doors open with this rubber doorstop, which stays attached to my bike until I need it.
Heavy-Duty Rubber Doorstop: View the doorstop here
Custom Details
Once most of the practical parts were in place, I started concentrating on making the bike feel more like mine.
The biggest change was removing the bike’s original visual noise.
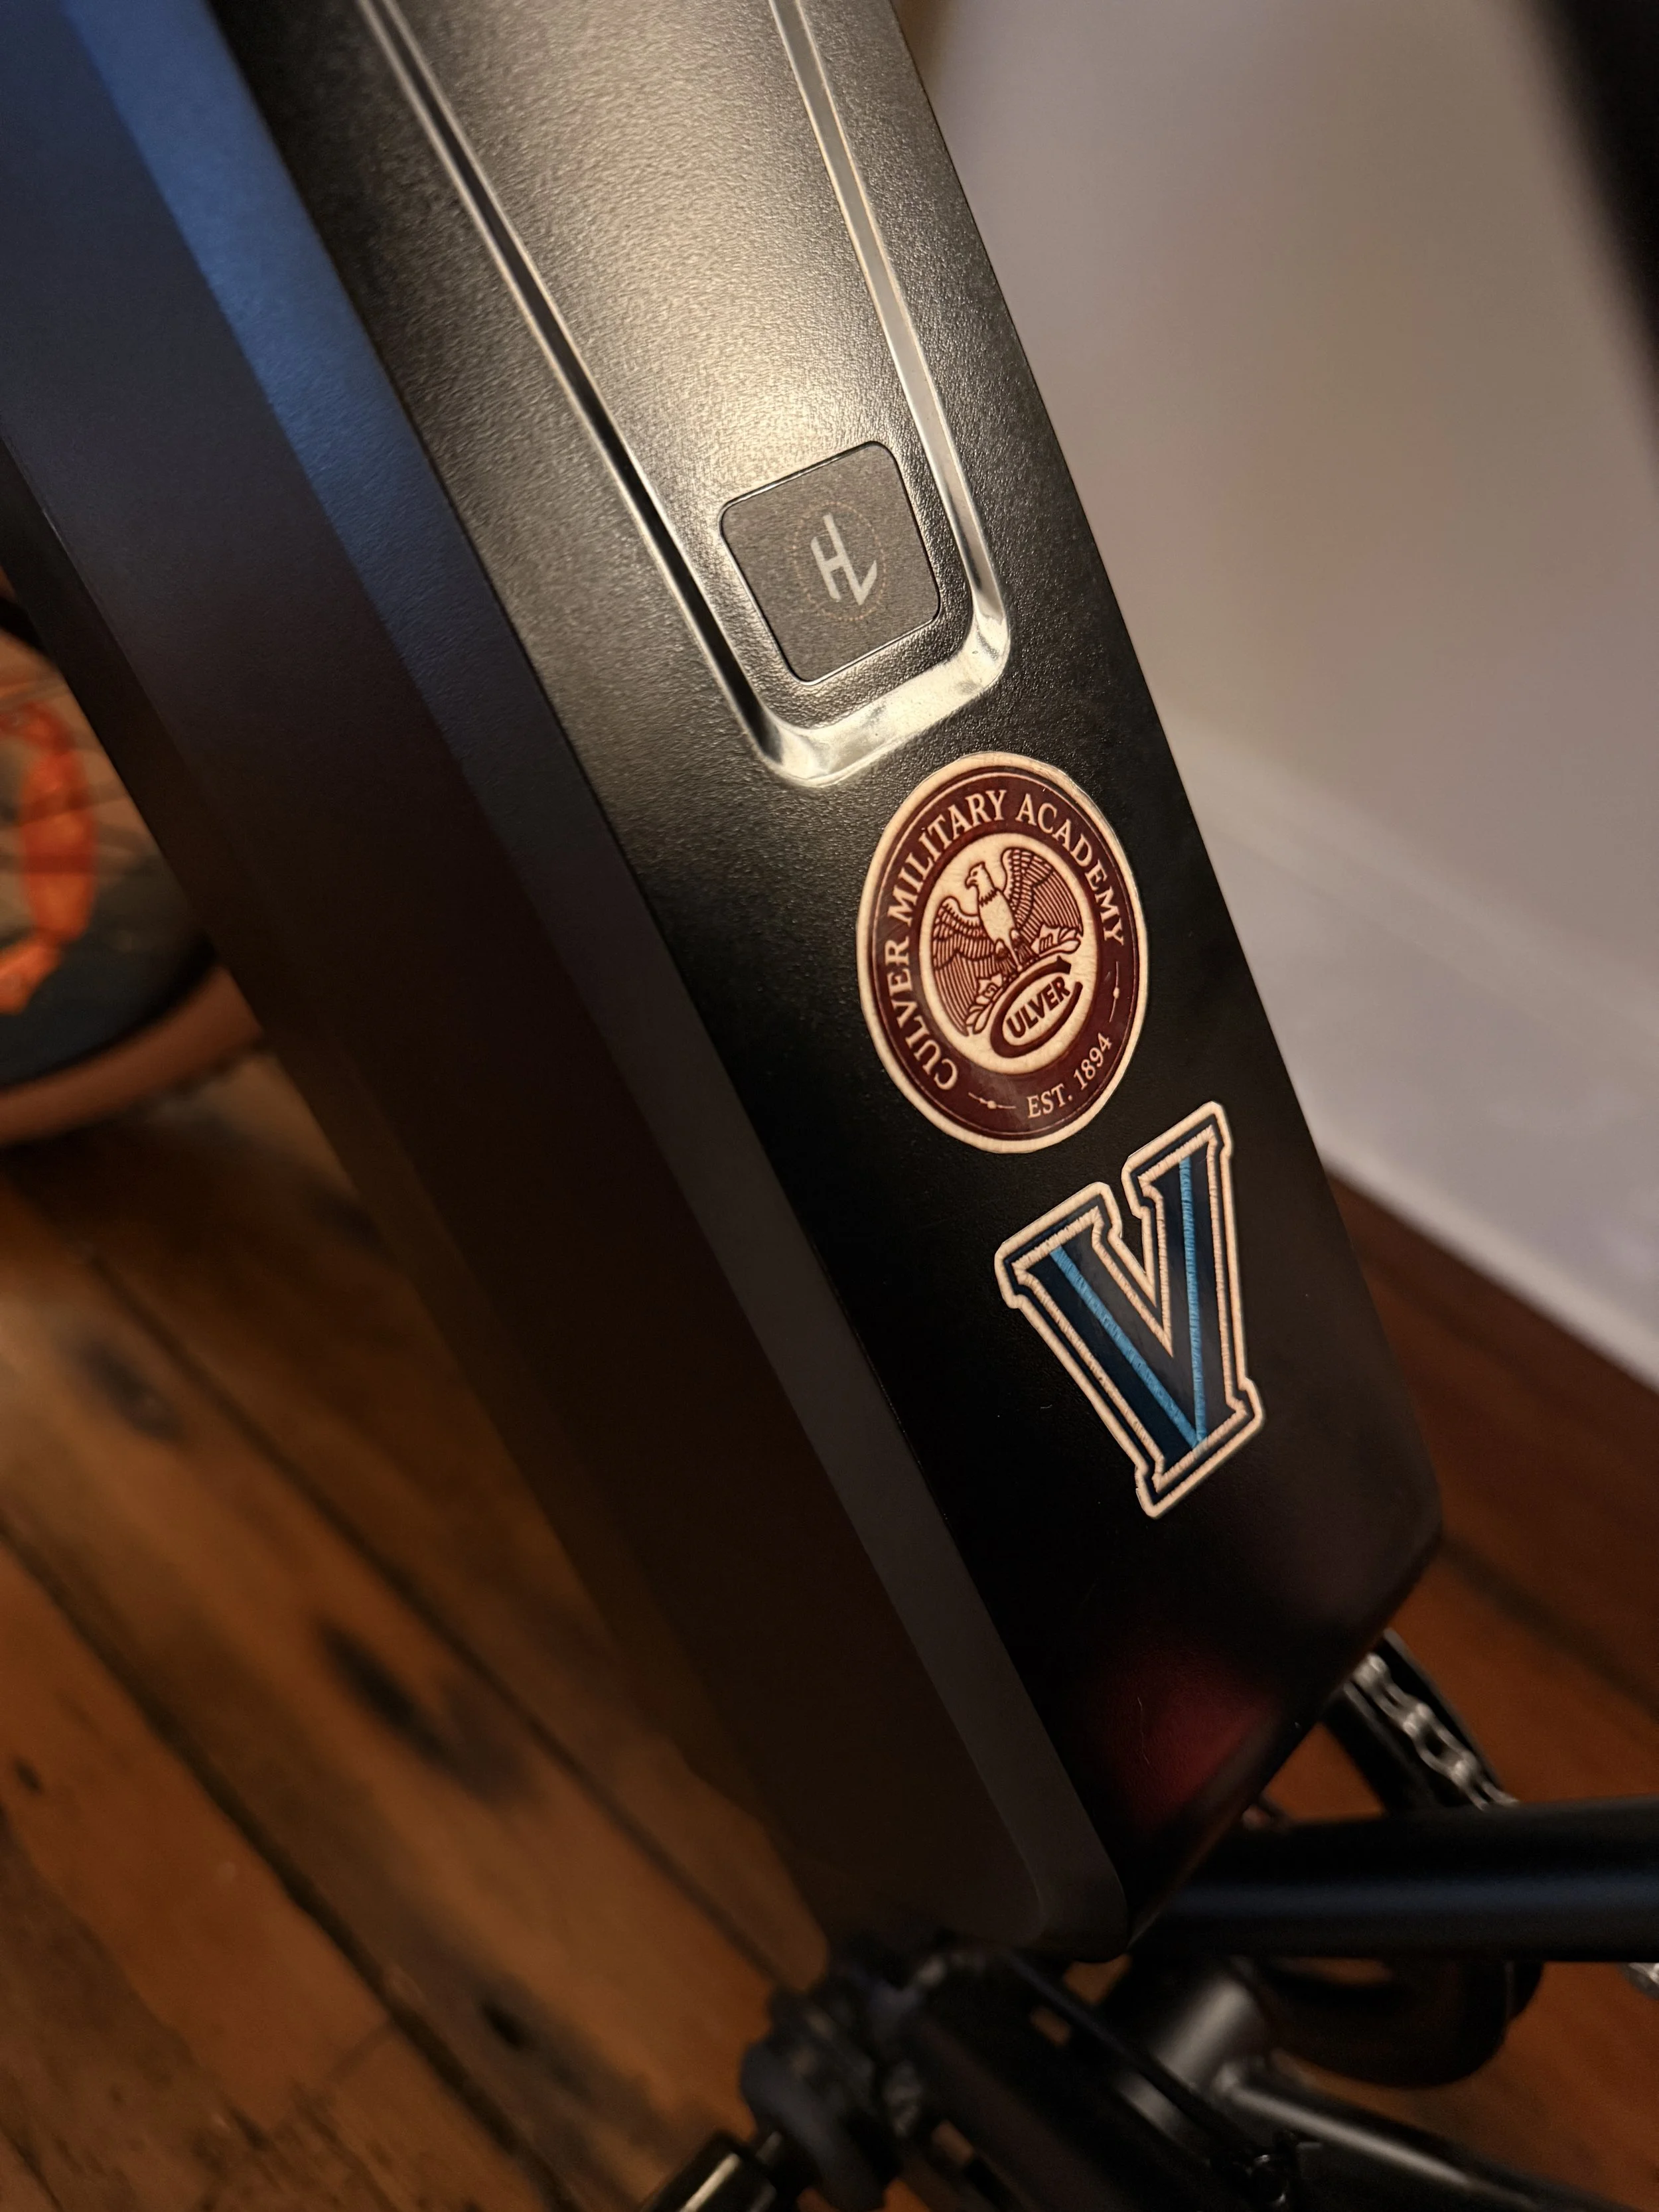
Most removable manufacturer stickers came off completely. Anything that couldn’t be removed cleanly was covered with matte-black vinyl, including branding on some of the accessories.
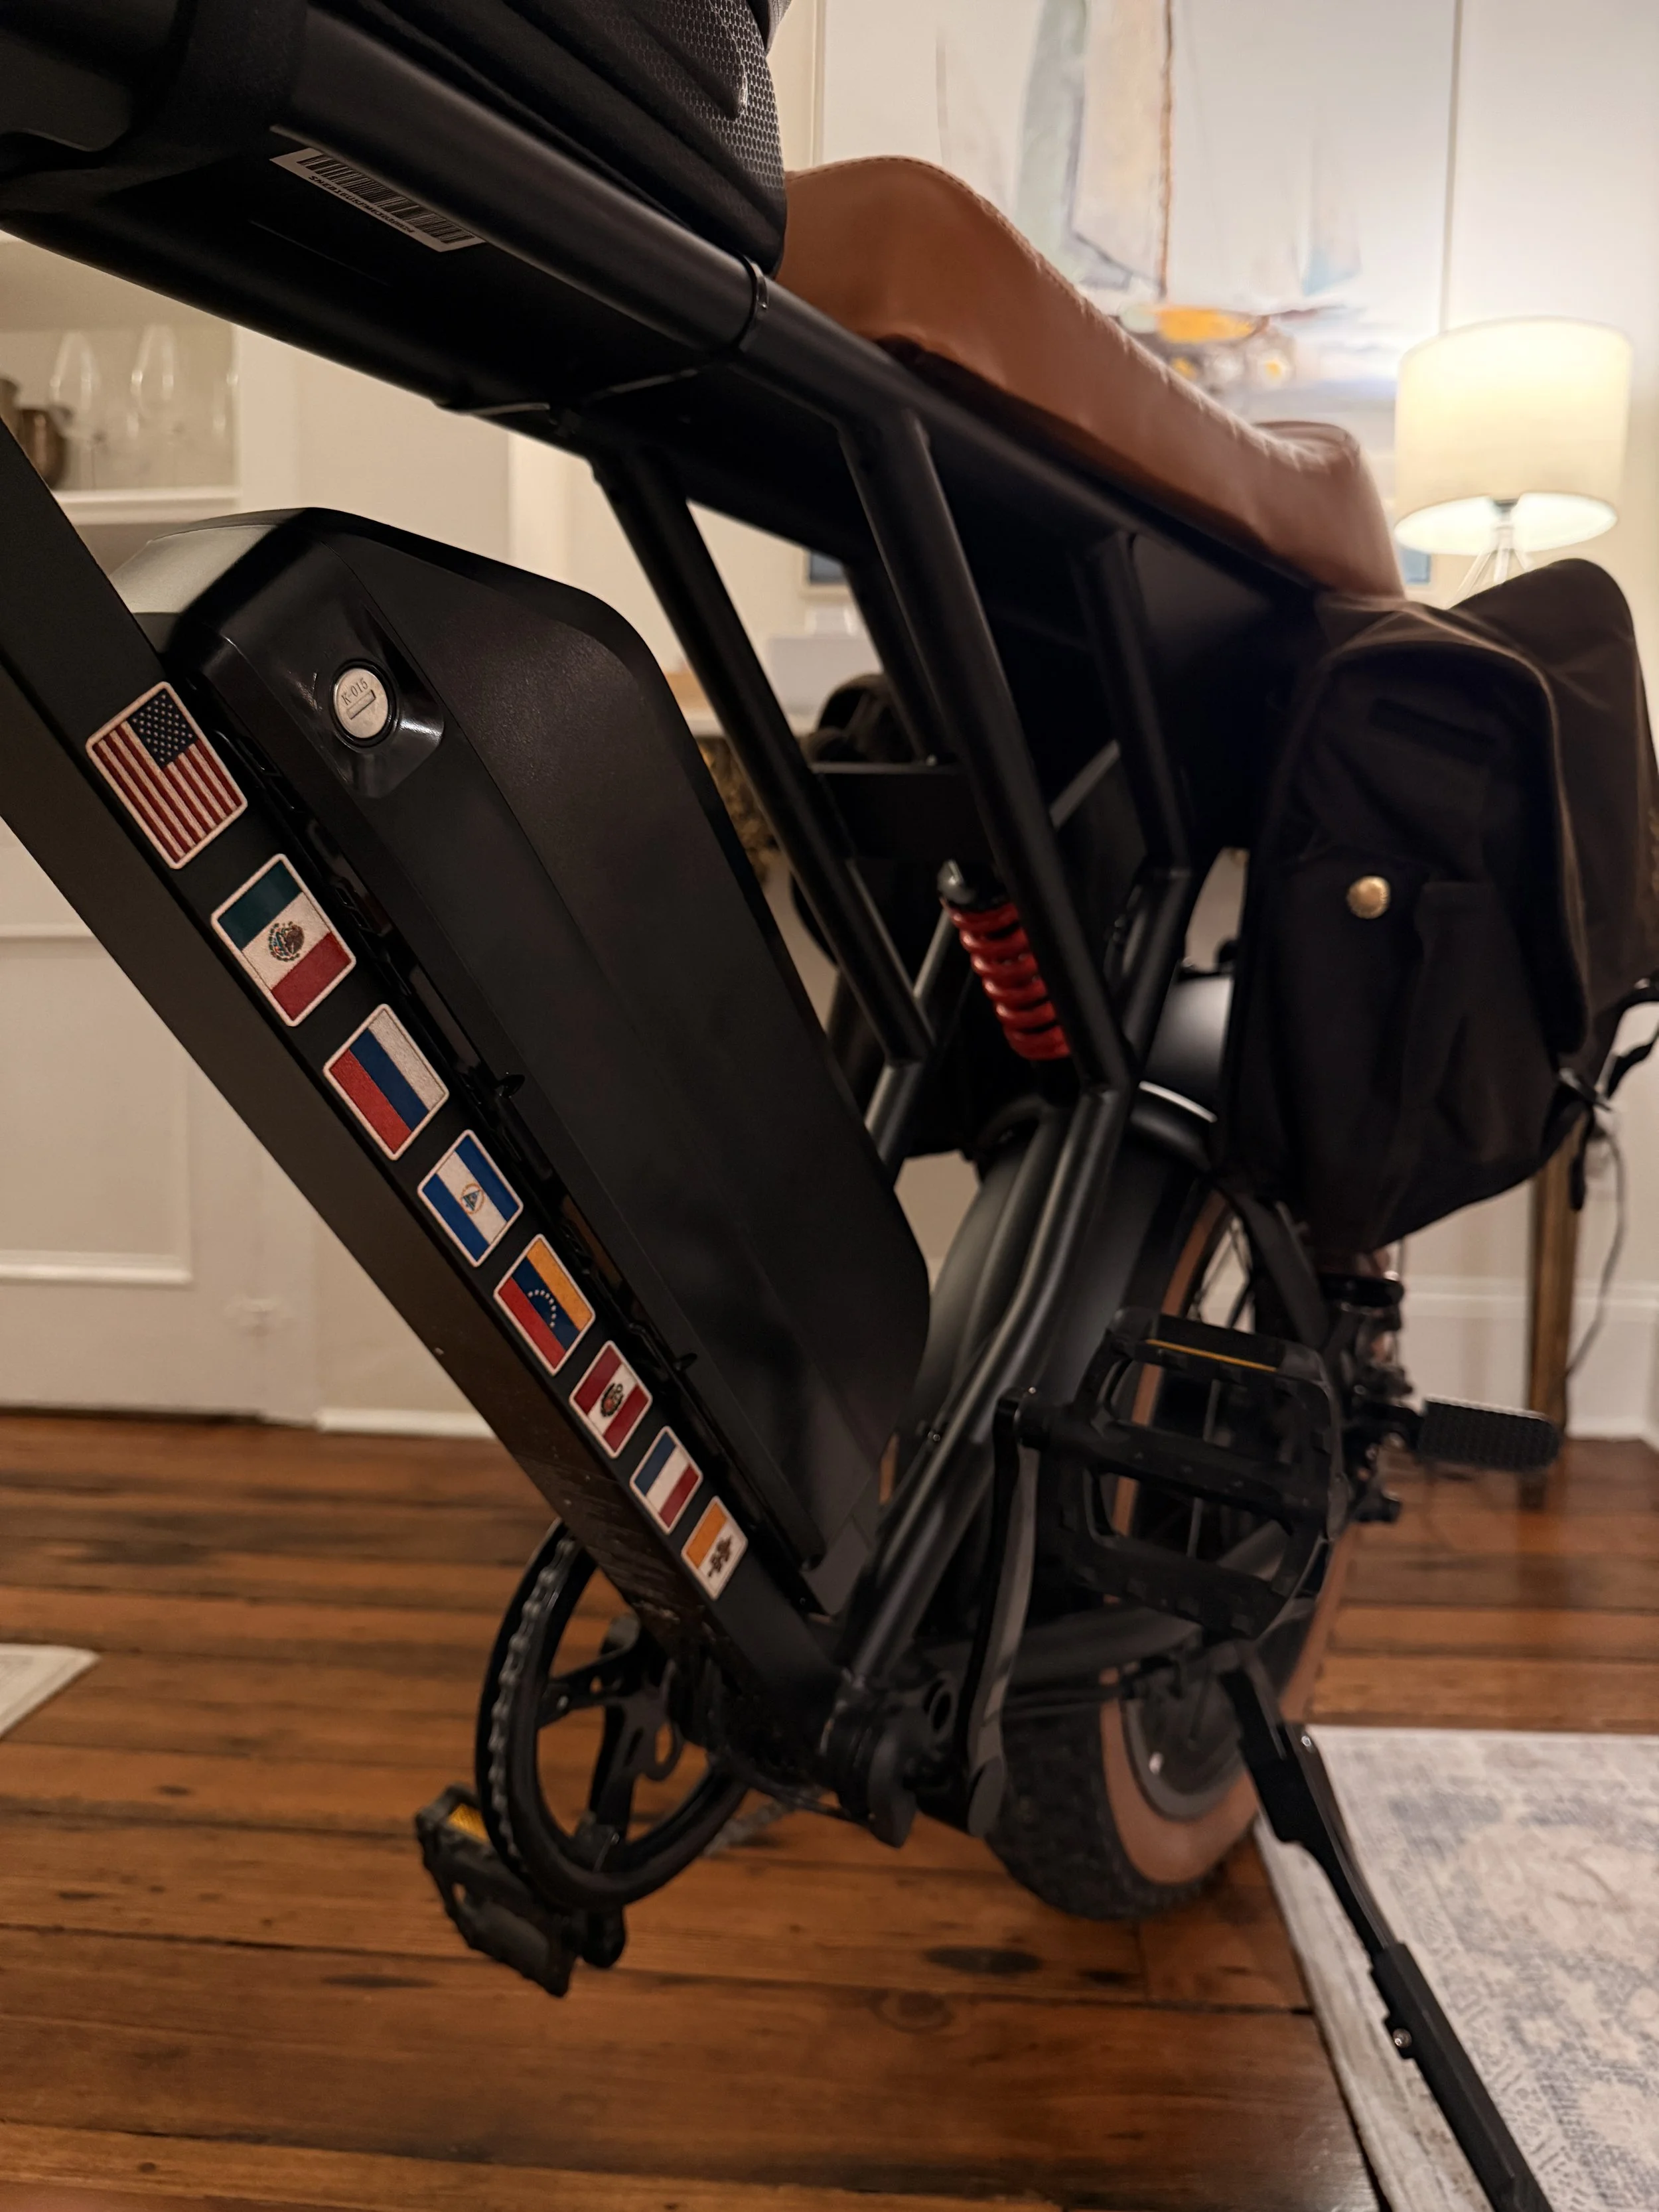
From there, I began creating my own graphics for the bike, including RicardoJPosada.com branding and details inspired by my upbringing in different countries.
What I Learned Building It
One of the main things I learned from this project is that I don’t particularly care whether an accessory is officially designed for my exact model of bike.
Some of the most successful additions were meant for motorcycles, handbags, or even doors.
A little measuring, bending, trimming, vinyl, hardware, and the occasional zip tie can solve a surprising number of compatibility problems.
That said, I wouldn’t recommend modifying safety-critical components just for the sake of appearance. For things like brakes, batteries, structural parts, and helmets, compatibility and safety matter more than improvisation.
For cosmetic parts and storage, however, I’m much more willing to experiment.
What I’d Do Differently
The biggest lesson has been to pay attention to mounting hardware and dimensions before ordering universal accessories.
“Universal” does not necessarily mean “fits immediately.”
The café-racer flyscreen is a perfect example. I’m very happy with the finished result, but I understand why some customers return it. If I had expected a five-minute bolt-on installation, I probably would have been disappointed.
I’ve also learned that hiding or removing branding early in the project makes a surprisingly big difference. Once the conflicting logos and racing graphics disappeared, all of the different accessories started looking like they belonged together.
The Finished Build
The goal was never to turn the bike into something completely different.
I wanted to take an affordable (somewhat), practical Amazon e-bike and make it better suited to my everyday life while giving it a more Georgetown-classic/cafe-racer appearance.
The waxed-cotton satchels give me enough storage to commute with my laptop, carry groceries, and deliver embroidery work. The additional lighting and mirrors make city riding more comfortable. The locks, pump, stronger kickstand, and storage accessories make it more practical. And the flyscreen, handguards, blacked-out branding, brown details, and custom graphics make it feel like my bike rather than one pulled directly from a product listing.
It is still evolving, and I’ll continue updating this page as I change things.
Shop My E-Bike Build
For anyone who just wants the parts, here is the complete list:
INVANTI E-Bike — Amazon link
Matte Black Vinyl — Amazon link
Leather & Brass Bag Mounting Hooks — Amazon link
Sportneer Combination Chain Lock — Amazon link
Rear-View Mirrors — Amazon link
Ascher Rechargeable Bike Lights — Amazon link
Smart Rear Turn-Signal Light — Amazon link
ROCKBROS Phone Bag — Amazon link
Café-Racer Front Flyscreen — Amazon link
JFG Racing Handguards — Amazon link
Folding Rear Footrests — Amazon link
Full-Face Helmet — Amazon link
ETENWOLF Mini Electric Pump — Amazon link
Heavy-Duty E-Bike Kickstand — Amazon link
Rubber Tire Saver Ramps — Amazon link
Heavy-Duty Rubber Doorstop — Amazon link
Last updated: October 2026